Netflix is home to thousands of shows and movies, making it the largest streaming service on the planet. It’s no wonder it’s a go-to option for many users, even when talking about watching anime. However, many users don’t know how to add subtitles on Netflix, which can lead to plenty of problems.
For one, if you don’t have subtitles that you can understand, you can’t enjoy the show or movie properly. Second, Netflix usually doesn’t offer plenty of subtitle options, leaving you with two, or three “main” languages, with less popular languages being tossed aside.
This problem, however, can be rectified by using the trick that we’ll show you. You can either use a VPN to change your virtual location or employ a browser extension called Substital to make it work. Either way, more details on how to get subtitles on Netflix are below, so don’t go away just yet.
Netflix Subtitles Problem Explained
First of all, we need to address the issue of subtitles on Netflix. You see, this platform, while stationing thousands of movies and shows, has one big issue – geo-restrictions. We talked about that in our top Netflix VPNs article.
Basically, the platform offers different libraries of movies and shows, depending on your location. In one country, you can watch the movie you want, but when you move abroad, that movie is unavailable. Well, this same analogy can be applied to subtitles as well.
We noticed that, when changing our online location, we consequently get either more or fewer subtitle options depending on which location we’re using. And that’s the main trick we want to present today – using a VPN to change your Netflix region.
Not only will you get access to more subtitles options but you’ll ALSO unblock more movies and shows as a result.
How to Get Subtitles on Netflix With a VPN
For those uninformed, we first need to get over the definition of a VPN. This service encrypts your connection and routes your traffic through a remote VPN server located somewhere else. As such, it assigns you an IP from that server, which changes your online location.
This means it’ll look like you’re somewhere else, which Netflix will also register. When visiting the site, you’ll get a different library, with different subtitles. The problem lies in the VPN selection, which is where many people stumble.
Finding a great service is imperative, as many of them are easily detected and blocked by this streaming service. Luckily, we tested hundreds of them and found that NordVPN is the most reliable provider in this regard, so there’s your solution.
For this guide, we’ll assume you can’t find the subtitle you want in your native library. Let’s see how to get subtitles on Netflix by changing your location with a VPN.
1. Subscribe to a VPN
The first step, of course, is to get a VPN. We are against free VPN services for Netflix because they never work.
NordVPN, on the other hand, isn’t free but there’s an exclusive 70% discount with 3 free months for the 2-year plan that you can get below.
Don’t forget a 30-day money-back guarantee, which allows you to get a full refund in the first 30 days. To subscribe, click the button above, select the plan, enter your email, and confirm the payment. If needed, verify your account through your email and you’re all set.
2. Download and Install the VPN
After you’ve completed everything from Step 1, download and install NordVPN. This provider works on every device/system, including iOS, Android, Windows, macOS, Linux, Smart TVs, Fire TV Stick, and plenty of others.
Download and install it on any device – we’ll use Windows. On this platform, you’ll get a setup file, which you need to install as any other app.
3. Open the VPN App and Sign In
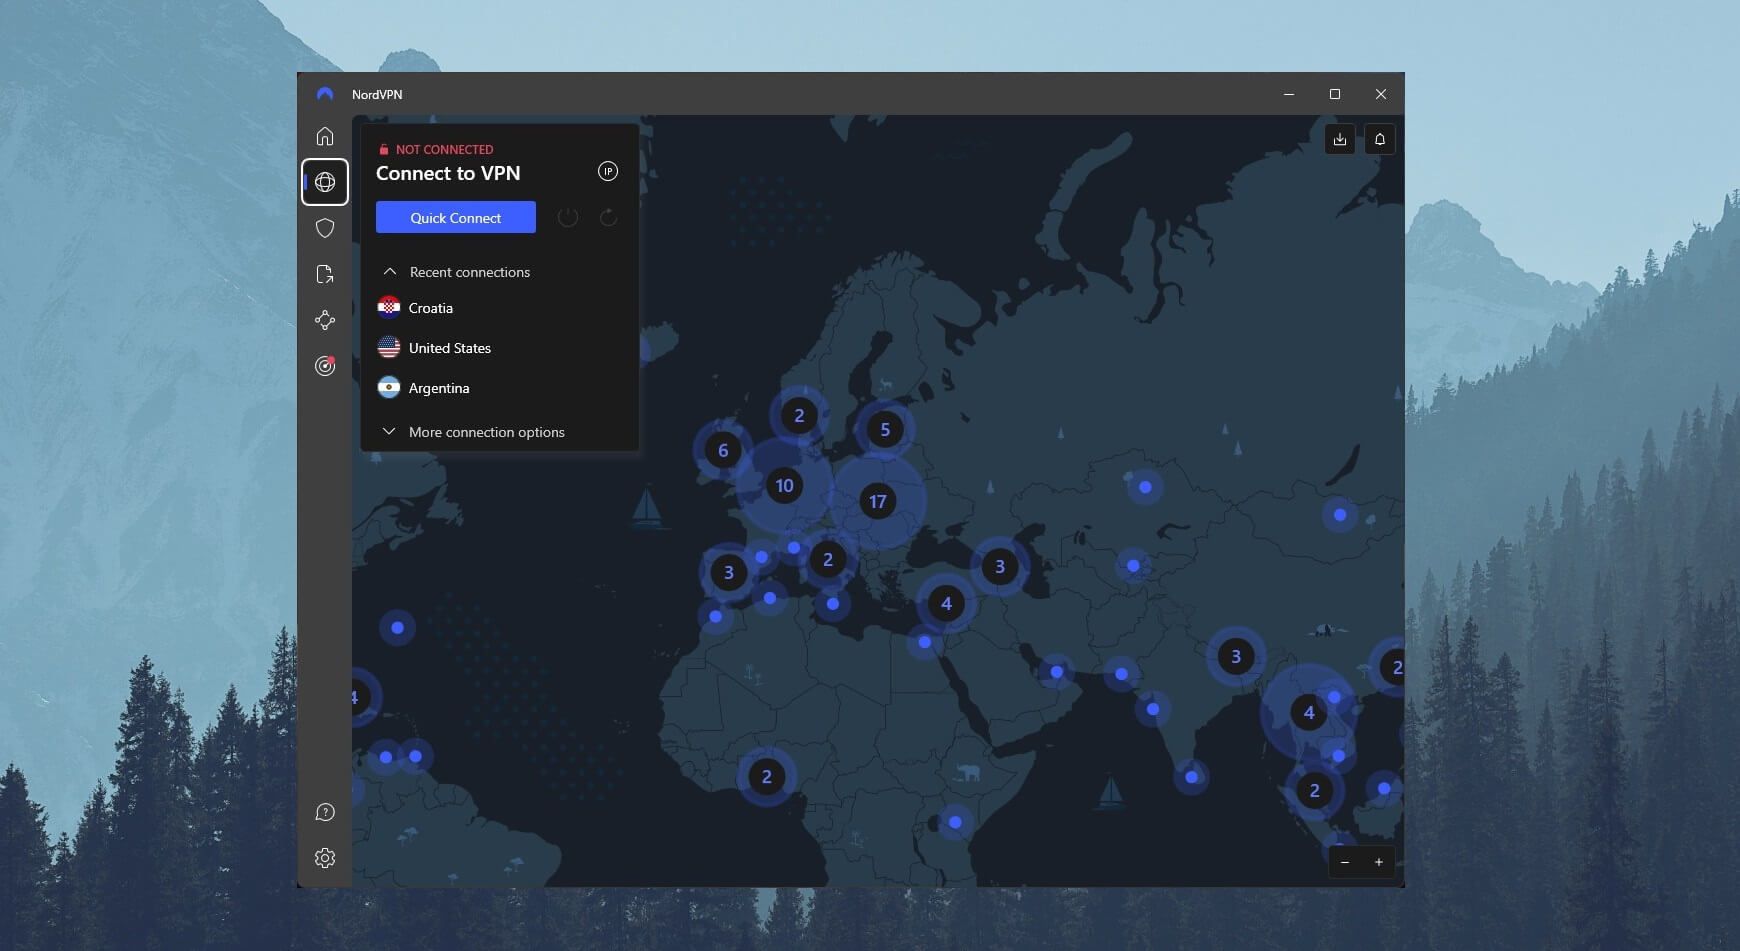
Now, open NordVPN and sign in with the email and password you made in Step 1. The dashboard should look like this after the successful sign-in.
4. Connect to a Server
Okay, so now, it’s time for the main trick on how to add subtitles on Netflix. Connecting to a server is important but the location you’ll choose depends on which subtitles you need. We recommend checking the website called uNoGS.
This site shows you where particular movies and shows are available on Netflix. Let’s use Breaking Bad as an example. This show is indeed available everywhere but with different subtitles, as you see below.
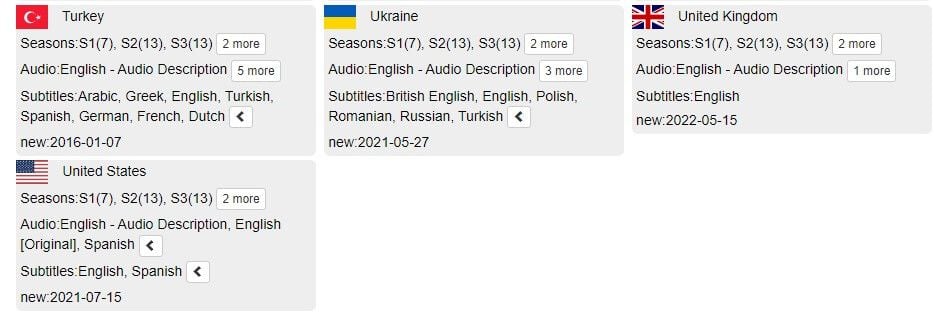
In the UK, it has only English subs, while Ukraine lacks Spanish subs. Turkey and the US have these subs, while the first country offers even French, Dutch, Greek, Turkish, and German subs. Nevertheless, let’s say you need Spanish subs because you don’t understand English well.
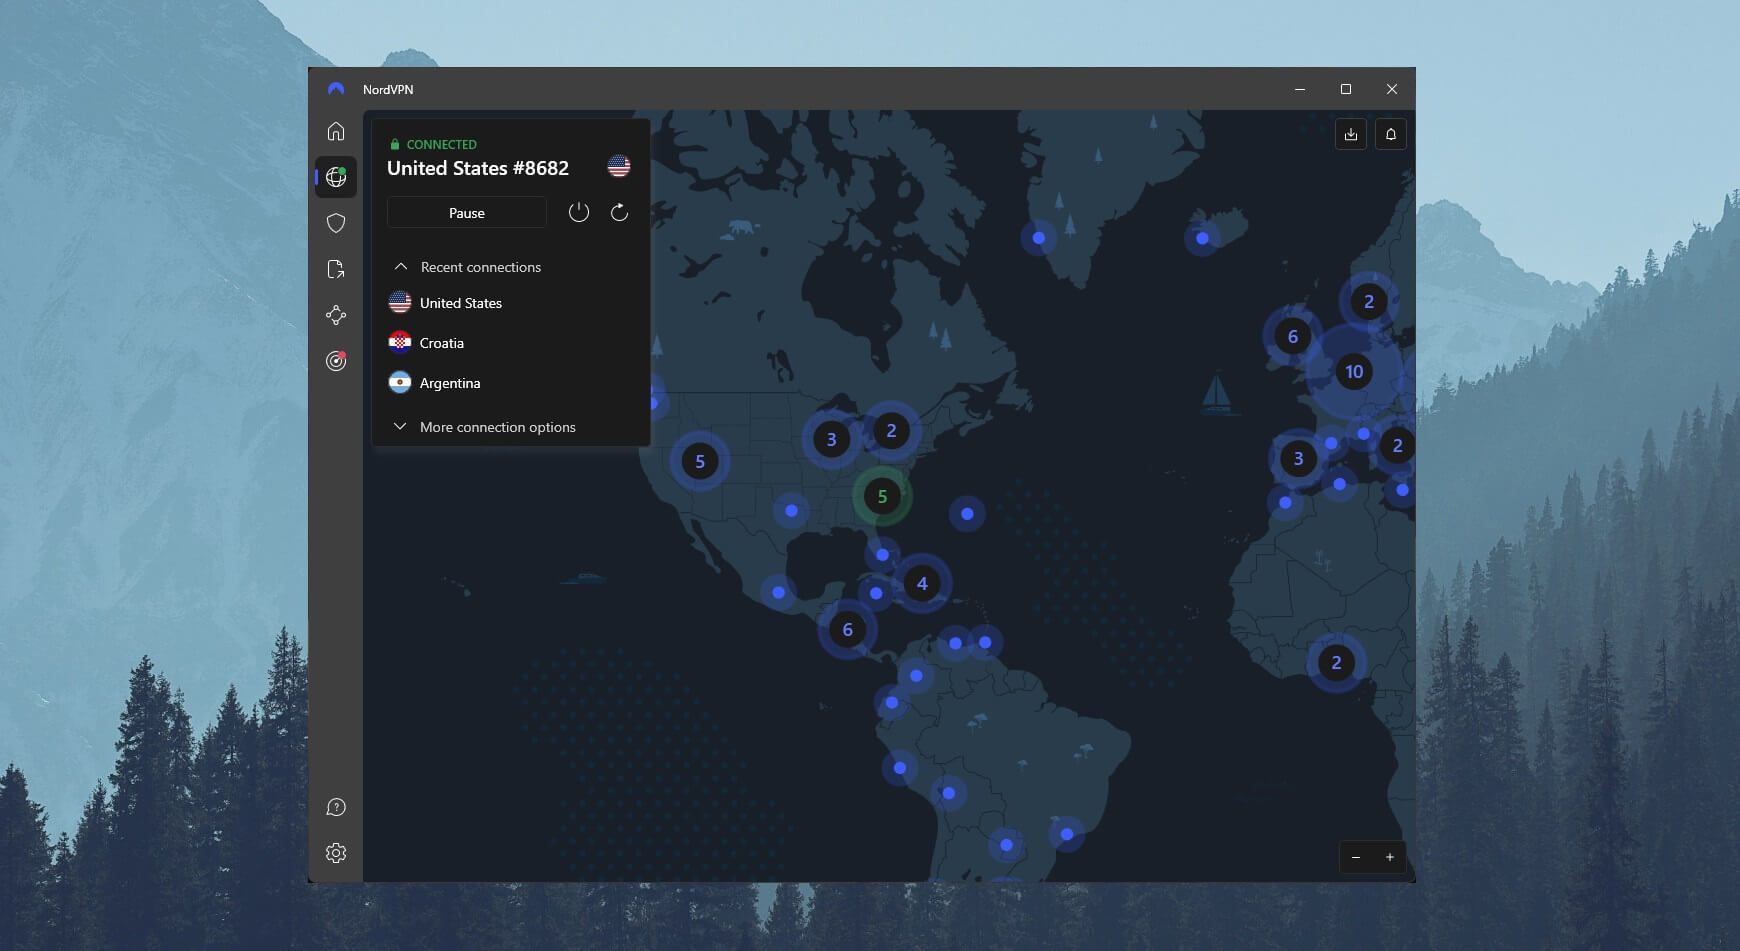
In this case, you can connect to the US server by opening the server list and finding the US servers. Click once on it and you’re set.
5. Add Subtitles on Netflix and Enjoy Streaming
With that set in place, let’s see how to add subtitles on Netflix in Spanish – or any other language you want. First, you need to visit Netflix and search for the show or movie you want.
Open that show/movie and click on the Subtitles icon below – it looks like a message bubble. The image below shows you that there are Spanish subtitles for Breaking Bad, as we promised.
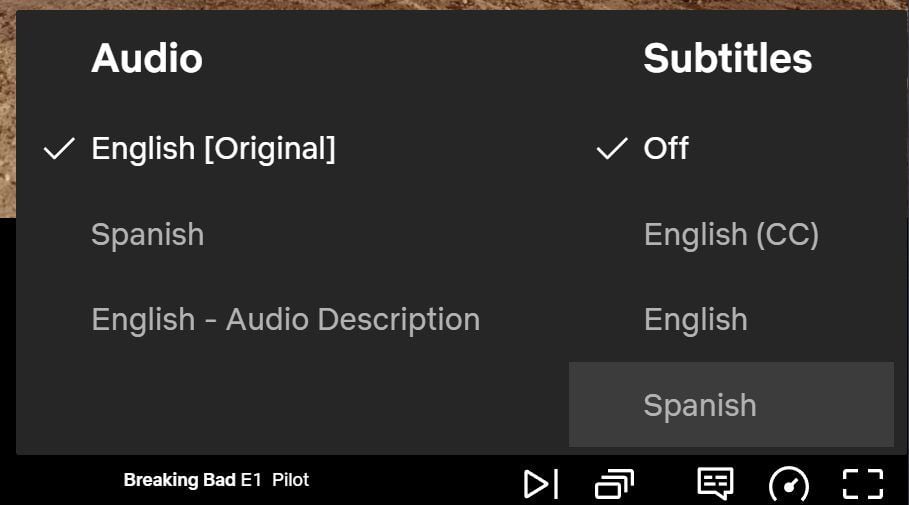
In fact, there’s even Spanish audio, which makes things much better if you’re from this country. If you are, don’t forget to check our favorite Spanish VPNs. To show you that we’re really watching Breaking Bad with NordVPN and Spanish subs, let us give you a full screenshot:
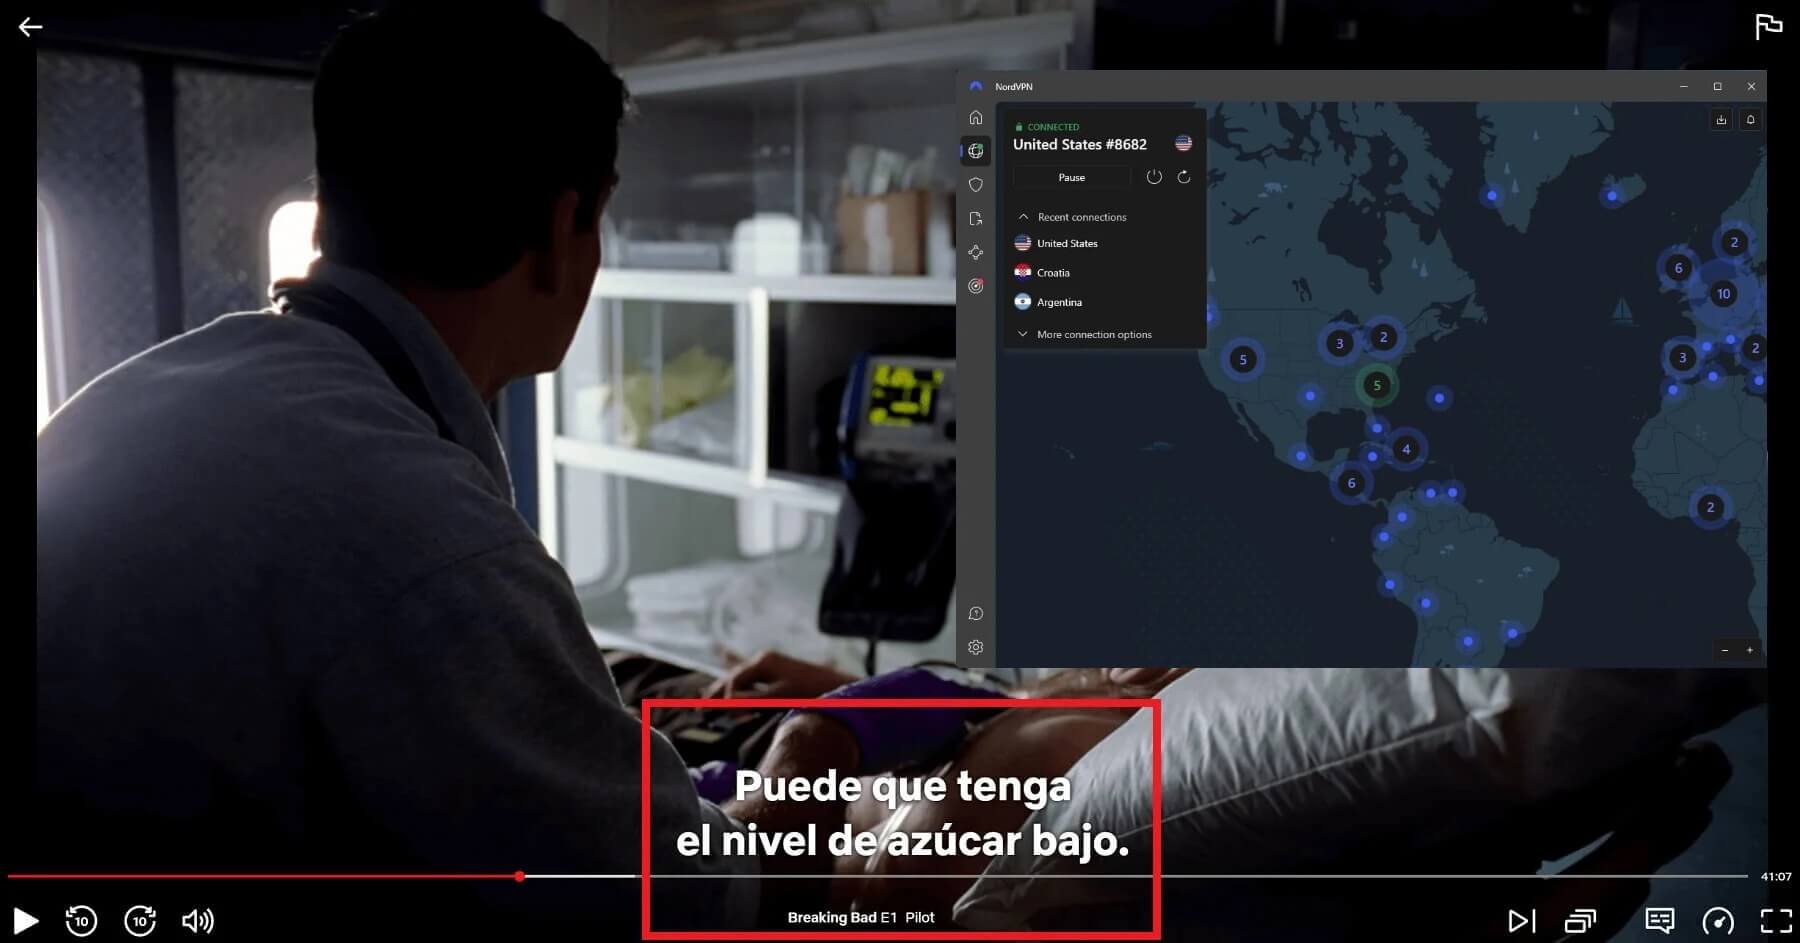
Although we don’t know what this means, we’re quite sure these are the Spanish subtitles we wanted. Needless to say, the same trick applies to any other language you want, and with NordVPN and uNoGS, you’ll know how to add subtitles to Netflix in your desired language swiftly.
How to Change the Subtitles’ Appearance on Netflix?
This streaming platform offers plenty of accessibility options, one of which is the ability to change your subtitles’ appearance. If you want to increase the font or even change the color of subtitles, follow these steps:
- Open Netflix and sign in to your account.
- Place the mouse cursor on your account image in the top-right corner of the screen.
- Select “Account.”
- Under “Profile & Parental Controls“, select the account you want to edit by clicking on it.
- Scroll down and find “Subtitle Appearance.” Click on Change.
- You can now change the font, the color, the size, and even the shadow if you want. Once you’re done with the customization, click on Save and go back to Netflix.
- If you change your mind and you don’t like what you’ve done, you can always apply additional changes or go back to the same menu and click “Reset to Default.”
How to Get Subtitles on Netflix With Substital
Regardless of whether you’re watching US Netflix or any other catalog, adding proper subtitles can sometimes be a pain in the butt. On top of that, the platform, many times, won’t offer subtitles in the language you understand, especially if you’re watching anime or less popular shows/movies.
How to get subtitles on Netflix in this case? Well, we recommend using a third-party solution or browser extension, if you will. It’s called Substital and is available for Chrome and Firefox, so the solution will work only on computers – macOS and Windows.
The great thing about Substital is that it offers subtitles in plenty of languages and allows you to immediately integrate them into whichever movie or show you’re currently watching. Not just on Netflix but on any other streaming service.
If you can’t find subtitles in a particular language on this platform, chances are that Substital will have them. Not only that but the extension allows you to add your own subtitles, as well! This means you can download them online, add subtitles to Netflix, and enjoy watching.
Needless to say, even in this case, we strongly recommend using NordVPN. It’ll let you access geo-restricted series and movies either way. And in conjunction with Substital, you can also watch them with the subtitles you want.
Using Substital: A Step-by-Step Guide
With everything explained, let’s see how to get subtitles on Netflix with Substital.
- Download Substital – it’s free. You can find it here for Chrome and here for Firefox.
- Connect to NordVPN’s server of your choice to unblock the movie or series you want.
- Go to Netflix and sign in if you haven’t.
- Find the movie or series you want to watch and start watching it.
- In the top-right corner of your browser window, click on the Extensions icon and select Substital.
- It’ll automatically detect the show or movie you’re watching, so click on it when it appears.
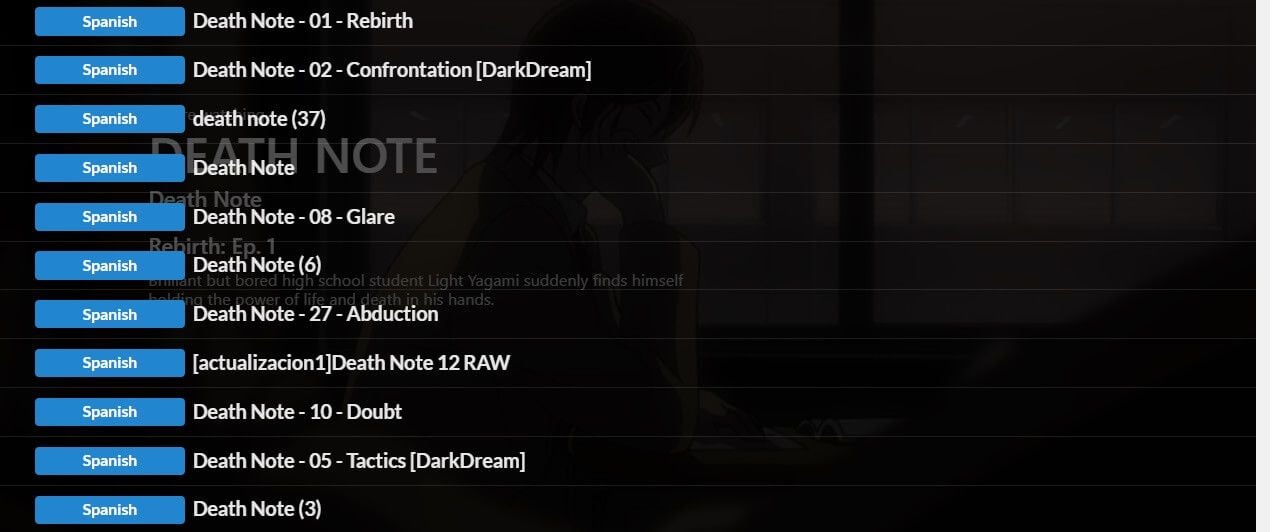
- Now, from the “All Languages” drop-down menu, select the language you want, and in the search bar, type in the name of the show.
- Press the magnifying glass icon next to the search bar to find the desired subtitles.
Once you’ve found the subtitle you want, click on it once and it’ll immediately be added to whatever show or movie you’re watching.
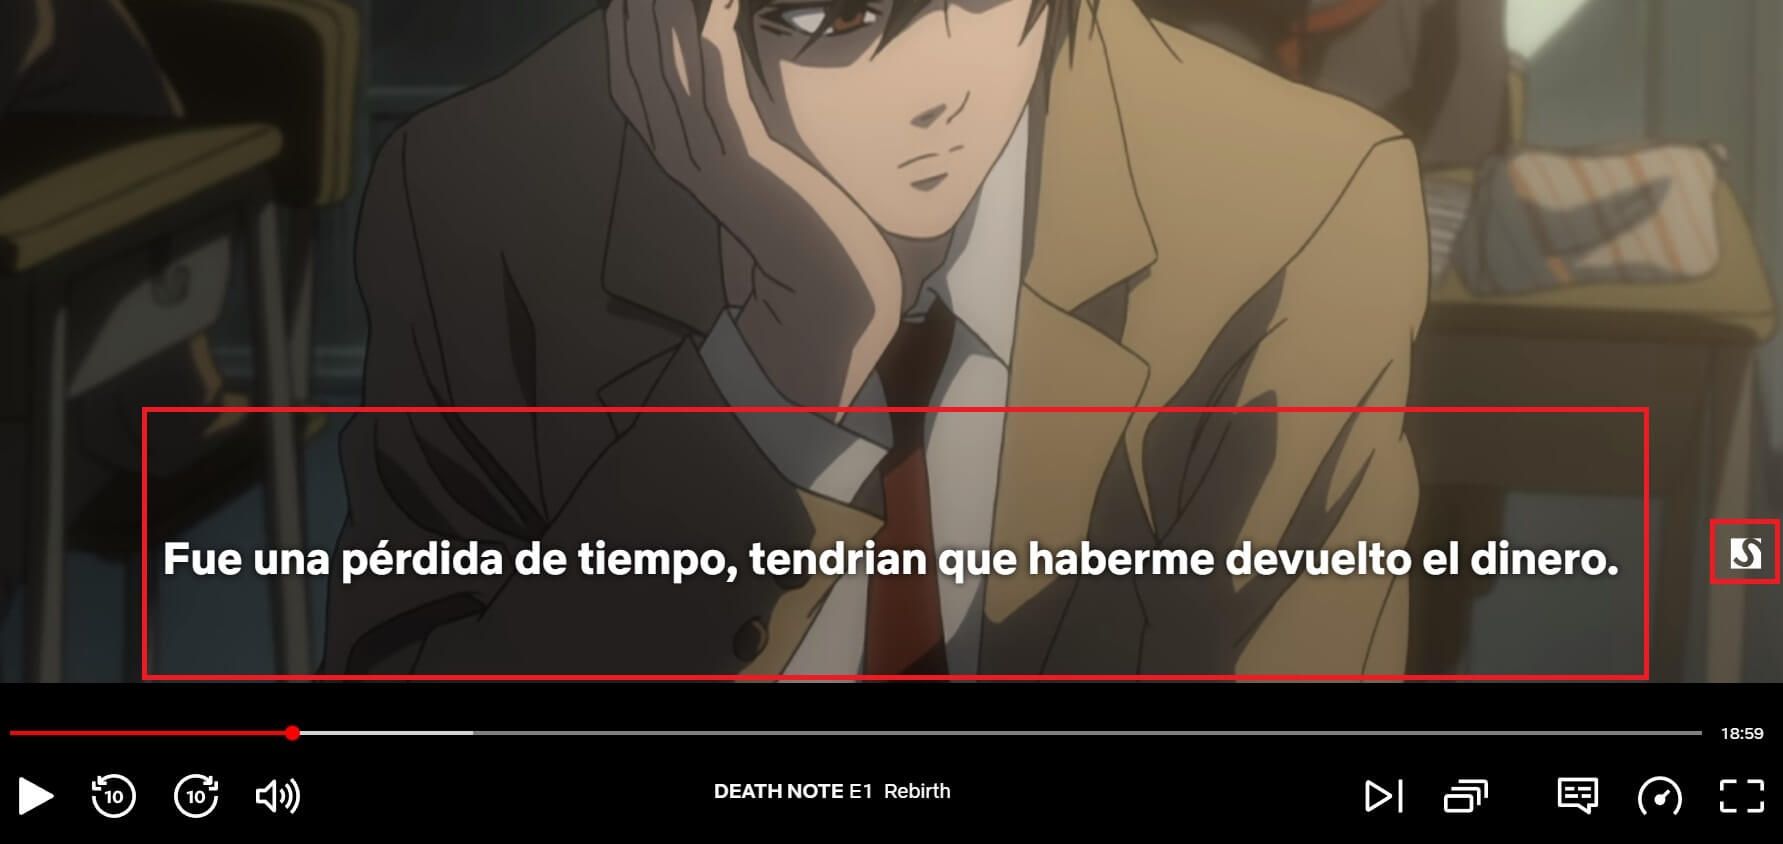
The screenshot above shows you that the subtitles work, and the Substital icon implies that we got our subtitles from this extension. By clicking on that icon, you can customize your subs in terms of changing the font, color, size, and even synchronization if the subtitle isn’t properly timed.
Keep in mind that Substital also lets you add your subtle files. Instead of searching for subs directly, click on the “Upload your own subtitles file”, then select the file from your computer to add it.
Will Free VPNs Allow Me to Get Subtitles on Netflix?
Let’s be straightforward – you don’t need a VPN to add subtitles to Netflix movies and shows. However, you’re limited to your native library only, where the selection of subs is obviously limited. That’s why we recommend using NordVPNto unblock more libraries, and by definition, access different subs.
Now, you can also use ExpressVPN or CyberGhost, as well. These two provide work extremely well, especially CyberGhost with its Netflix-optimized servers. ExpressVPN can unblock plenty of libraries too, and we found it to be very reliable for streaming, in general.
As for free VPNs, well… we’ll have to disappoint you. They don’t work with Netflix! Even free VPNs with great speeds for streaming will fail in this regard, as they’re always detected by this streaming platform. In some rare instances – very rare – you’ll find that some of them work.
For example, Windscribe used to work with Netflix FR but then, it offers up to 10 GB of traffic a month. All popular free services actually limit your bandwidth. TunnelBear gives you 2 GB, Hotspot Shield comes with 500 MB daily, PrivadoVPN has 10 GB a month, and so on.
Not to mention that many free services aren’t safe and secure, and they’re prone to selling your personal data to third parties. This applies to UrbanVPN, Hola VPN, Betternet, and Hotspot Shield. You always need to come to terms with the compromises that these providers come with.
And for adding subtitles on Netflix, that’s the last thing you want. It’s better to use a provider with unlimited bandwidth, fast speeds, and rock-solid security, such as NordVPN, ExpressVPN, or CyberGhost.
Summary
You now know how to get subtitles on Netflix. As you saw, it’s pretty easy, and thanks to our in-depth explanation, performing the steps above shouldn’t be a problem. Using a VPN, you can unblock plenty of different libraries and access series and movies you couldn’t watch before.
With that comes more subtitles in different languages that you can use. If you can’t find the language you want, using Substital in conjunction with a VPN is a smart move. This way, you can unblock geo-restricted content AND get the subtitles in the language you want.
It’s easy to get the most out of your Netflix experience, so why not take the chance and follow the steps we presented?
FAQs
To finish off this comprehensive tutorial, let us address a few important questions.
❌ How to get rid of subtitles on Netflix?
If you want, you can completely disable subs on this streaming platform. To do that, click on the Subtitles icon we mentioned at the start – the one that looks like a message bubble. Now, instead of selecting the language, click on “Off.”
This will remove all subs if you, for some reason, find them annoying or distracting.
🤔 How to get English subtitles on Netflix?
Well, the good news is that English subs are available for most series and movies. We say for most because that’s not always the case, plus, it depends on the region you’re in. Our team found that, for particular anime, you can’t find English subs – all you get are Japanese subtitles.
However, in this case, it’s easy to get an English translation simply by using the trick with Substital. This way, you can make every show/movie watchable if you don’t understand Japanese, French, Spanish, or any other given language.
⛔ Why I can’t get subtitles on Netflix?
A common issue on this platform is that people don’t have the option to choose the language of the subtitles. In fact, they can’t seem to be able to turn them at all! That’s, unfortunately, another annoying limit of this platform. It doesn’t offer subs for every movie and show.
Once again, this can be remedied by switching to another library in some cases. Or you can use Substital and it’ll surely find some subs in your language for the movie or series you’re trying to watch. Keep in mind that, if we’re talking about a relatively new movie or show, even Substital might not work.
But over time, it’s highly likely that both Netflix and Substital will have subtitles, so it’s a matter of patience.