With over 200 million users, Wix is one of the most successful website builders, and it’s easy to see why – an easy-to-use interface, an AI system that instantly creates a website, and affordable plans. But how to create a website with Wix?
It is not straightforward when you’re using a website builder for the first time. Worry not – In this guide, we will show you how to build a website with Wix, from creating the account to designing your first pages to adding apps and eventually publishing it.
This will be a long, detailed guide, so let’s not waste more time and get started. With this ultimate guide, you’ll become a master in no time and will perfectly know how to make a website with Wix.
How to Create a Website With Wix Step by Step
Whether you’re in the market for a new website or just want to learn more about how they work, this guide is perfect for you. Here, we’ll look at Wix – one of the most popular website builders on the internet today. We’ll show you how to create a website with Wix from start to finish, so you can get it online and start sharing your content with the world.
Step 1: Create a Wix Account
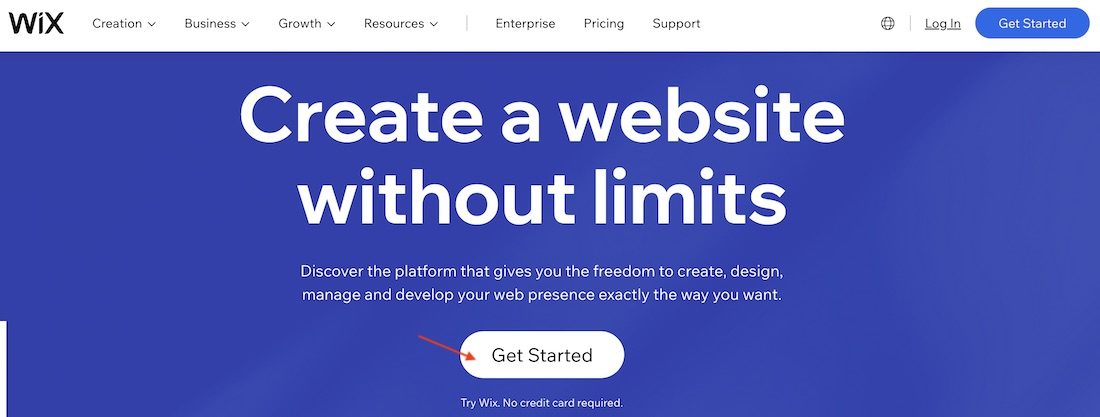
First things first, head over to Wix.com, click on “Get Started,” and sign up for an account.
You can create an account by either entering your email address and password or signing in with Google or Facebook, which is pretty convenient.
Once you’ve created your account, the system will ask you the type of website you want to create – it could be anything from a blog to a business website or an online store.
You will then select the features you need: a chat box, an online store, a subscription form, and much more. Then, add your business name and import images and text from another website if you previously had one.
You can skip all these parts if you want to, as you’ll be able to modify the settings later on.
Sign Up for a Wix Account Today
Step 2: Select Your Website’s Design
Now that you’ve created an account and submitted the initial information, it’s time to get creative and pick a theme and other graphic details.
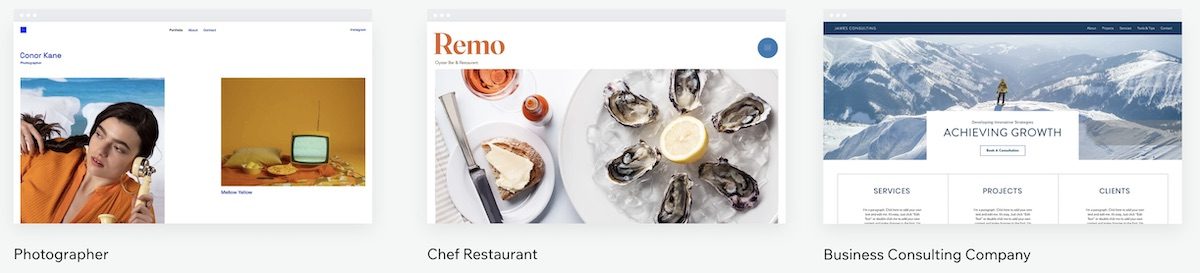
You can choose different themes that you can modify later, but we’ll use “Minimal” for this guide. After picking your favorite theme, Wix will offer a few templates for your Homepage, About Us, Product Page, and more.
If none of the pages appeals to you, you can select the “Blank” template and then customize it later.
After selecting a template, you can start customizing it to match your brand. You can add your own text, images, videos, and change the colors and fonts to suit your business.
Step 3: Choose Your Creation Option
Your website’s first draft is ready. You can now go ahead and customize it. Before we go into details, it’s worth noting that this website builder offers 2 creation options – Wix ADI and Wix Editor.
Wix ADI means Artificial Design Intelligence and uses AI to help you create your website easily and quickly. This is the perfect option for small businesses that will use the site purely to promote a few pages – a restaurant, an online business offering a few services, or a resume.
The second option, Wix Editor, offers much more control over your website, and you’ll get to drag and drop different elements to customize the pages fully. We recommend this option if you’ve previously created a website, you know the basics, or in case you’re not fully satisfied with the templates.
When you start working with Wix, you will be given the ADI version, which is the easiest and most convenient. If you’re ready to personalize your website and want to use Wix Editor, you can hover the mouse on “Site” in the upper right corner and select “Go to Editor.”
Wait – Before clicking, you should know that you can switch from ADI to Editor but not the other way around. So we recommend you play with ADI first and see what you make of it before switching.
How to Use Wix ADI?
When you first start to create a website with Wix, ADI is the system you’ll be assigned, and it gives you everything you need from fonts and background to SEO-related data, including:
- Buttons
- Content
- Headings
- Subheadings
- Subscription forms
- And much more
After selecting your favorite homepage during the setup, you’ll be taken to the ADI editor, and you can then move the items up and down as well as change it to another template. Of course, you can edit all the content to match your brand and industry.
Once the homepage looks like what you had in mind, you can click on “Add” in the upper left corner of the page and choose “Page” to add more content to your website.
As you understand, the Wix ADI creation option is the most convenient for newbies, and we’re confident you can make a website quickly.
How to Use Wix Editor?
While ADI is a great choice for beginners, Editor gives you more flexibility and freedom and, ultimately, more control over your website.
As mentioned previously, to switch from ADI to Editor, hover the mouse on “Site” and click on “Go to Editor.” Again, you can’t go back once you’ve made the switch.
Now that you’re in the new editor, click on any element, and you’ll see all the possible edits. For instance, on headings, you can edit the text, the font, the size, the color, and everything else.
Or, when clicking on a background, you’ll be able to change the scroll effect, the layout, the shape divider, and more. And if you’re not happy with the results, you can simply click on the “Undo” arrow on the top right-hand side.
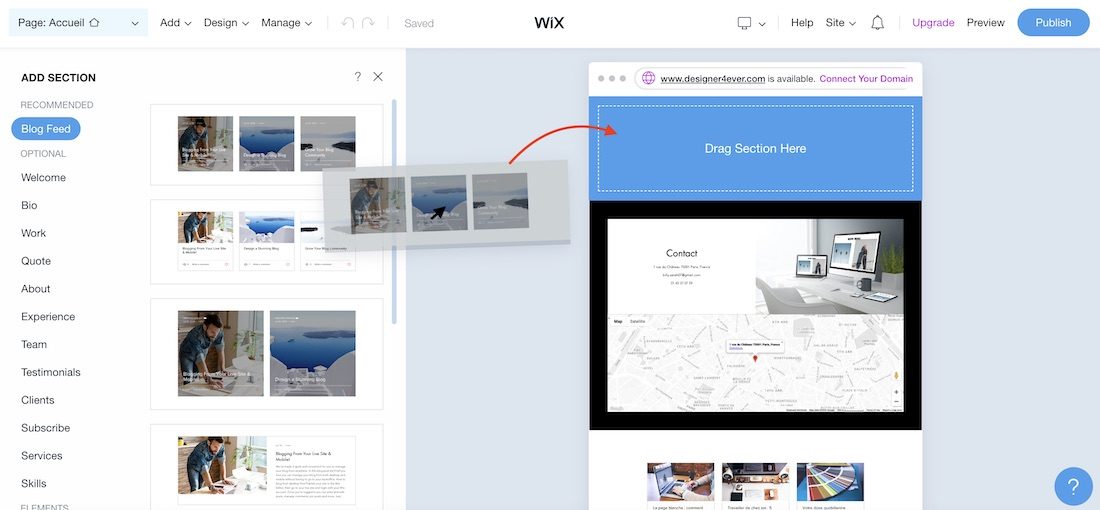
Next, the elements you currently have may not be enough, so you will want to add more of them. For this, click on the + on the top left-hand side. As you can see, you can add paragraphs and headings, forms, a gallery to display images, buttons, and much more. Simply click on the element you want to add, and it will appear in the middle of the page; you can then move them around and edit them.
After taking care of the homepage, you will want to add and manage your pages, which can also be done easily on Wix Editor. Click on “Page” on the upper right-hand side and then “Manage Pages.”
You can add pages, may it be a pricing page, a services page, or anything else you wish. Also, to manage the header menu on top of your website’s screen, you can drag the 6-square grid near Home or other pages up and down.
These were the essential steps you need to know to get started with Wix Editor, and we’re confident you know how to proceed further. Of course, we recommend exploring the different settings on the elements you need on your site to get the results you’re after.
Create a Website With Wix Today
Step 4: Creating a Blog
Creating a blog is one of the best ways to advertise your business online, increase brand awareness, and broaden your audience. And you’ll be happy to know that creating a blog with this website builder is easy and can be done in just a few simple steps.
First of all, head over to your dashboard, located under “Site.” From there, when operating with the ADI creator, you simply need to click on “Blog” on the left-hand side of the screen and then “Create your first blog post – Get Started.”
From here, you’ll access the Wix content creator, and you’ll be ready to start writing. If you’re a more advanced user and have started using the Editor, click on the + sign on the upper right corner of the screen, hover your mouse over “Blog,” and then “Add to Site.”
Once you’ve created the blog on your website, get to the dashboard, and click on “Create New Post” under “Blog.”
Step 5: Create and Manage Blog Posts
Now that you know how to create a blog with Wix, it’s time to produce content, and it’s a very easy thing to do.
In your dashboard, under “Blog,” you’ll find the “Create New Post” button, which will take you to the content creator.
First and foremost, add a title to your blog post. This is automatically set as an “H1.” Then, you can create content under that. The text is automatically set as “paragraphs,” and you can turn them into headings and subheadings by clicking on “Paragraph” at the top and choosing the heading you need.
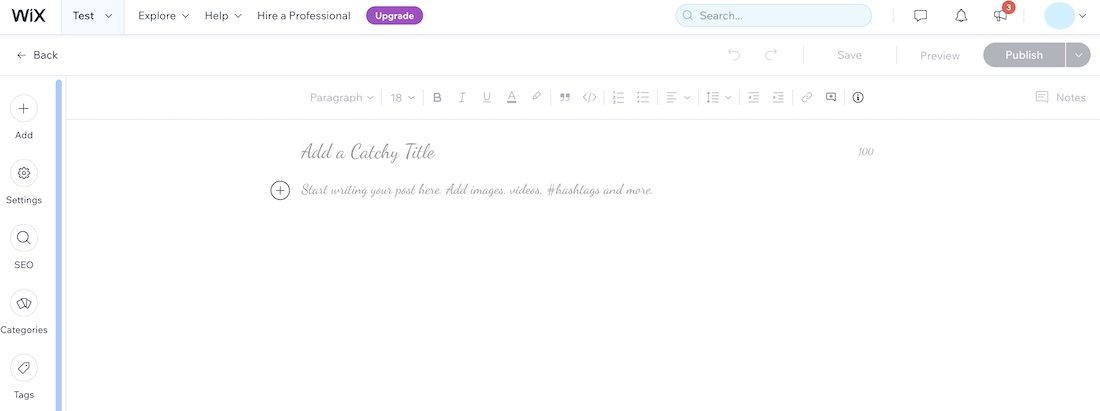
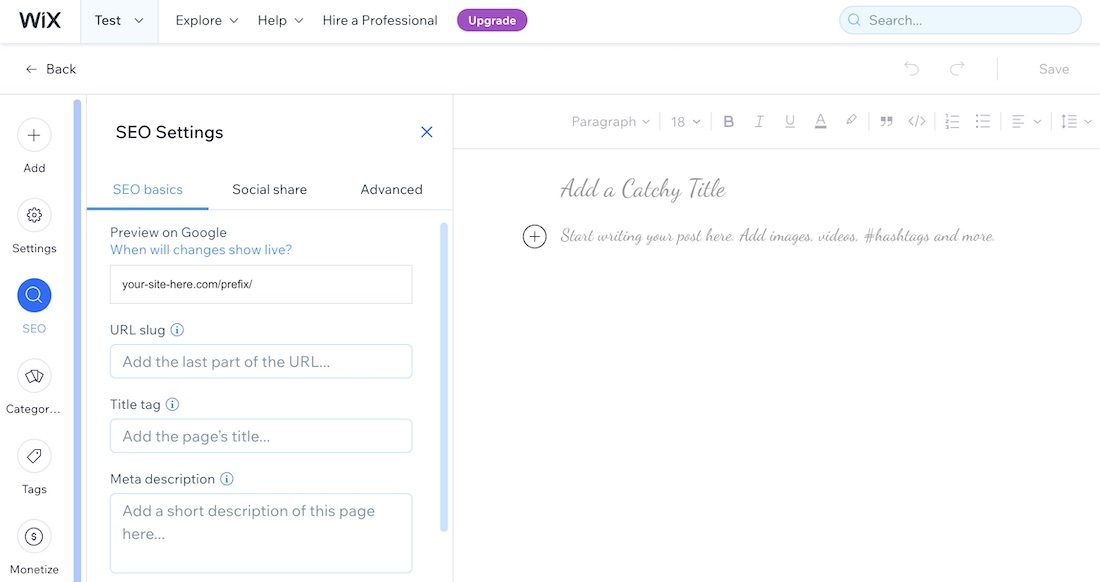
In addition, when clicking on the “+”, you’ll get to add media, files, GIFs, codes, polls, and a lot more. On the left-hand side column, you have all the SEO-related stuff and all the metadata you should insert. For instance, tags, categories, meta description, add translations, and more.
Once you’ve finished crafting the blog post and you’re happy with the results, you can click on the “Publish” button on the upper right-hand side of the screen. Alternatively, you also have the option to save it as a draft or schedule your post for a later time.
Finally, when the post is live, you will see it under “Blog/Posts” in the dashboard and the option to revert it to draft, move it to trash, or duplicate it. It’s worth noting that you will need to go into the post itself to modify the metadata and other SEO-related data.
Step 6: Install Apps
You’ll find over 250 apps, free and paid, on the Wix App Market. So let’s continue this guide on how to create a website with Wix by installing apps.
To browse all the apps and install them, click on the 4-square grid on the left-hand side of the screen when you’re in the Editor.
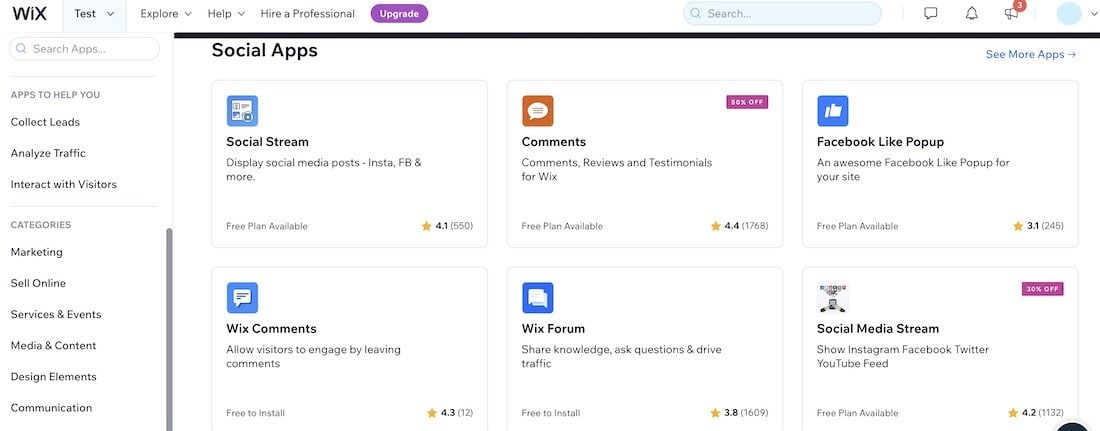
From here, you can search for apps, explore them by popularity or check the newest additions, and filter by category:
- Marketing
- Sell Online
- Services & Events
- Media & Content
- Design Elements
- Communication
To install an app on Wix, simply select the one you need on the App Market and click on “Add to Site.”
Step 7: Add Media
One element that you always need when making a website with Wix is the media. May it be images, audio, or videos, this is what makes your website come alive.
You can access the media gallery through Editor by clicking on the screen’s image logo on the left-hand side.
From here, you can upload media not only from your computer but also from social media, Google Drive, and Google Photos.
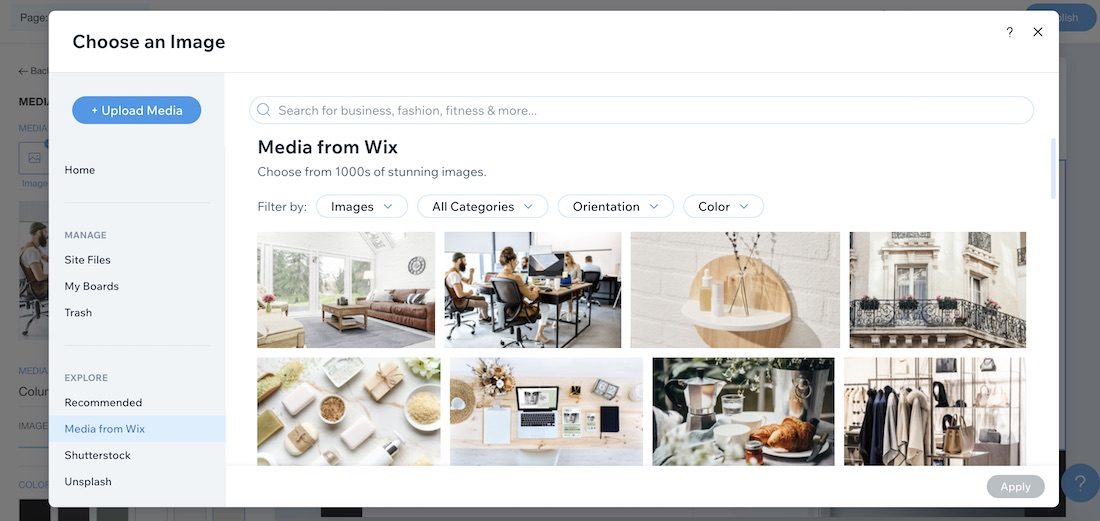
Apart from that, you can also add free stock photos from Wix and Shutterstock, as well as edit your photos and improve them for SEO rankings.
Once you’ve uploaded your media, you simply have to drag and drop it on the page you’re in.
Step 8: Preview the Website
We’ve been through everything you had to know about making a website with Wix, creating and posting a blog, and adding apps and media, and it’s now time to preview it before publishing.
And this is the easiest part of the process. Once you’ve added all the pages and your website looks like what you had in mind, you can click on the “Preview” button on the upper right-hand corner of the screen, next to “Publish.”
This will show you the final version of the site, as a user would see on the front end. So this is your chance to adjust anything before going live on search engines.
Publish Your Domain With Wix Now
Step 9: Publish Your Wix Website
Now that you’ve learn how to make a website with Wix, the time to finally publish it has arrived, and that couldn’t be any easier. In the website builder, may it be ADI or Editor, you will find the “Publish” button on the top right-hand corner.
When you click on it, your website will be live and ready to receive visitors.
That being said, it’s worth noting that all Wix URLs come as the following, under the free plan: https://username.wixsite.com/SITE-NAME
When setting up your account, you buy the domain from Wix and, once you get a paid subscription, you will be able to customize the domain and remove the “Wix ads” banner on your website as well as the format above, which does not look professional.
Plus, with a professional domain, you will be able to rank on search engines such as Google and Bing much more easily.
Create a Website With Wix – FAQ
We’ve answered everything you should know about how to build a website with Wix, so let’s go deeper into detail with important FAQs.
Is Wix Good for Beginners?
Yes, and Wix is THE most popular website builders on the market. And for a good reason – its intuitive interface and drag-and-drop editor make it a great choice for those who are looking to create a website without any prior experience.
Plus, the platform offers a wide range of features, templates, and designs to choose from, giving you the freedom to create a website that is uniquely yours.
Can You Rank Your Website on Google With Wix’s Free Plan?
Yes, it is definitely possible to rank your content on Google with Wix, even when using the free plan. Naturally, it goes without saying that your content must be unique, helpful to the readers, and compelling enough to get on Google’s first pages.
Create a Website With Wix Easily
Should You create a Wix Website With ADI or Wix Editor?
When using Wix, you can either use their ADI (Artificial Design Intelligence), which creates a website for you based on your business and preferences, or the Wix Editor, which gives you more control over the design of your site.
Both methods have their pros and cons, so it’s important to weigh them before deciding which is right for you.
ADI is great for people who don’t have any experience with web design. It’s simple and straightforward – just answer a few questions about what you want your website to be, and Wix will take care of the rest. The downside is that you don’t have as much control over the final product. That being said, this is the most convenient option for small businesses that aren’t willing to customize their site much.
The Editor gives you much more control over the look and feel of your website. You can choose from a variety of templates and then customize them to suit your needs. From the font to the background to the pages and even adding manual CSS code in a click, this is ideal if you have a specific vision for your website in mind.
However, despite the simple drag-and-drop feature, it does require some knowledge of web design. If you’re starting from scratch, it may take some time to learn how to use all the features of the Wix Editor.
Is It Difficult to Create a Website With Wix?
Creating a website with Wix is a breeze – Even if you don’t have any coding skills, you’ll be able to get your site up and running in only a few minutes, especially if you follow this guide on how to create a Wix website.
The drag-and-drop interface is extremely user-friendly, and there are plenty of templates and tools available to help you customize your site to perfection. Plus, the platform takes care of all the technical stuff for you, so you don’t need to worry about hosting, domain names, or any of that jazz.
How Long Does it Take to Make a Wix Website?
There’s no need to agonize over every little detail when you’re creating your website. Just get the basics down, and you can always come back and tweak things later.
In most cases, you can have your site up and running in only 10 minutes. Of course, if you want to really personalize your site and make it unique, that’s going to take a bit longer; generally, around 1 hour is enough to see the final result.
Can You Create an Online Store With Wix?
Absolutely, you can create an online store with Wix. In fact, this website builder offers users the ability to create highly customizable and responsive online stores.
However, before you start selling with Wix, you will have to purchase a Business Plan, which starts at only $25, so this is an affordable option for entrepreneurs. It’s also worth noting that this platform doesn’t charge any commission on your sales, but the payment gateways might.
Create your ecommerce shop with Wix
Is Wix SEO-friendly?
While Wix was initially regarded as not being SEO-friendly due to the lack of powerful apps compared to WordPress, it is nowadays a very powerful tool, and it is excellent for SEO.
On top of having a wide range of SEO tools available in the dashboard, such as the Sitemap and Site Verification features, Wix also offers an internal Site Speed option once you have enough traffic coming in.
Conclusion
All in all, Wix is an excellent website builder that offers users a wide range of features and tools to create beautiful, responsive websites. It’s easy to use, even for people who are not particularly tech-savvy, and it’s perfect for small businesses who want a professional website without having to spend a fortune.
Additionally, Wix is SEO-friendly and offers a variety of powerful SEO tools to help you rank your site high on Google.
To conclude this guide about how to make a website on Wix, we highly recommend you try it by following the steps above and seeing how easy it is. Have you already built yours? Let us know, and we’ll be more than happy to clarify any issues you may have had.