Squarespace is one of the easiest website builders to create a blog or an online store. It is a drag-and-drop editor making the design process as seamless as possible, even for a beginner. There are many templates or pre-made websites that you can use to build yours on the Squarespace platform. The website builder has many features ranging from blogging options to eCommerce functionalities. You can access a few of your favorite and useful third-party applications through the Squarespace Extensions.
Moreover, according to our Squarespace review, the SEO is pretty good. It can do more than the bare minimum, and you can rank well with your newly created Squarespace website. At the same time, it makes your website mobile-friendly, and you have control over how your site adapts to mobile and desktop screens through the editor.
Despite the ease of use of this tool, it is important to give you a step-by-step guide to create your website with Squarespace easily. This way, you will enjoy your design process better, and it will minimize fumbling around the editor.
1. Choose Your Preferred Website Template or Start from a Blank Canvas
Creating a site with Squarespace is one of the simplest things to do. It is not a coincidence that many consider it to be one of the best website builders.
To get started, you must open an account. You don’t have to pay fees or provide credit card details to open an account.
Create a website with Squarespace
Once logged in to your account, the system should automatically redirect you to the Account Dashboard. However, if you find yourself on the homepage instead, click on the icon with your initials on the top-right menu.
Choose a Template
To build your website on Squarespace, you need to choose a template first.
Go to Account Dashboard, click on the CREATE WEBSITE button.

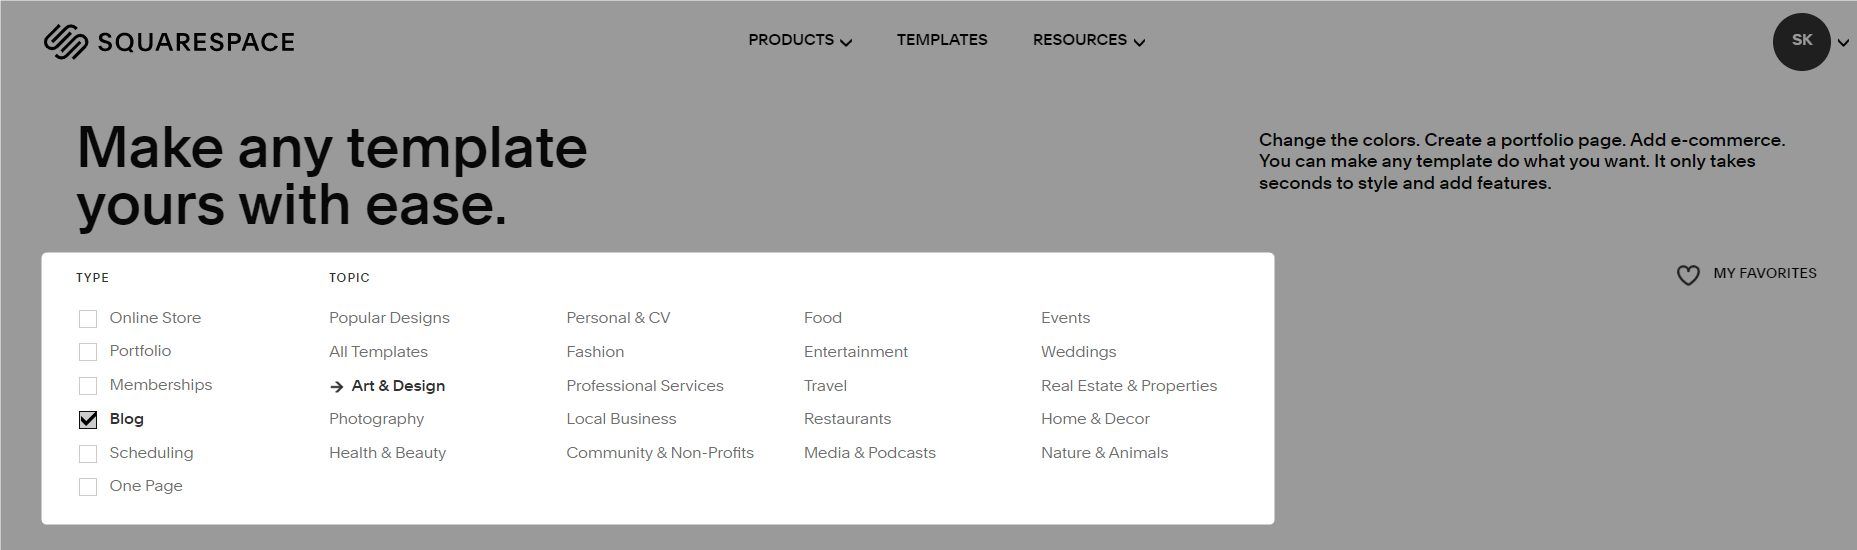
On the next page, think about the purpose of your business or its type. Use the filters under either TYPE or TOPIC or both to find the closest ones to it.
Once you have the list of filtered results, hover on a template and click on the PREVIEW TEMPLATENAME link.

On the preview page, you can use the three icons at the top left to see how the demo site and its web pages behave on desktop, tablet, and mobile devices. The display window in the middle of your screen is responsive, so you can scroll through the pages and click the links or buttons on the demo site.
Depending on your device, you may also use the VIEW DEMO SITE link to preview the site in full screen.
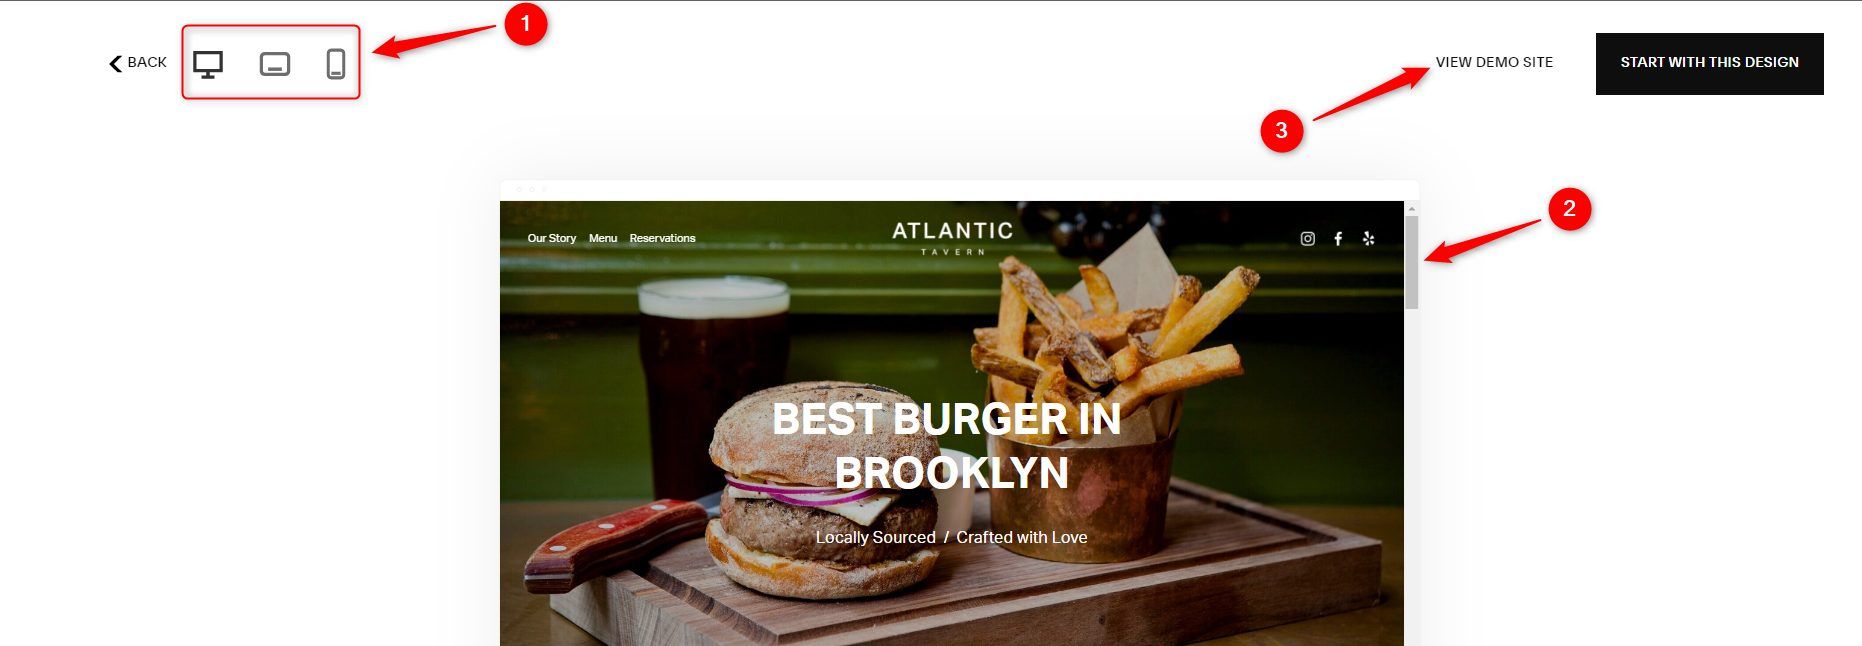
If you are okay with building your Squarespace site with the template, click the START WITH THIS DESIGN button to continue to the next step. Otherwise, click on the BACK link at the top left corner of the page to choose another template offered by Squarespace.

Note: Repeat the same steps for each template chosen until you find the one you want to use to create a website on Squarespace.
After choosing your desired template, let the system set up the site.
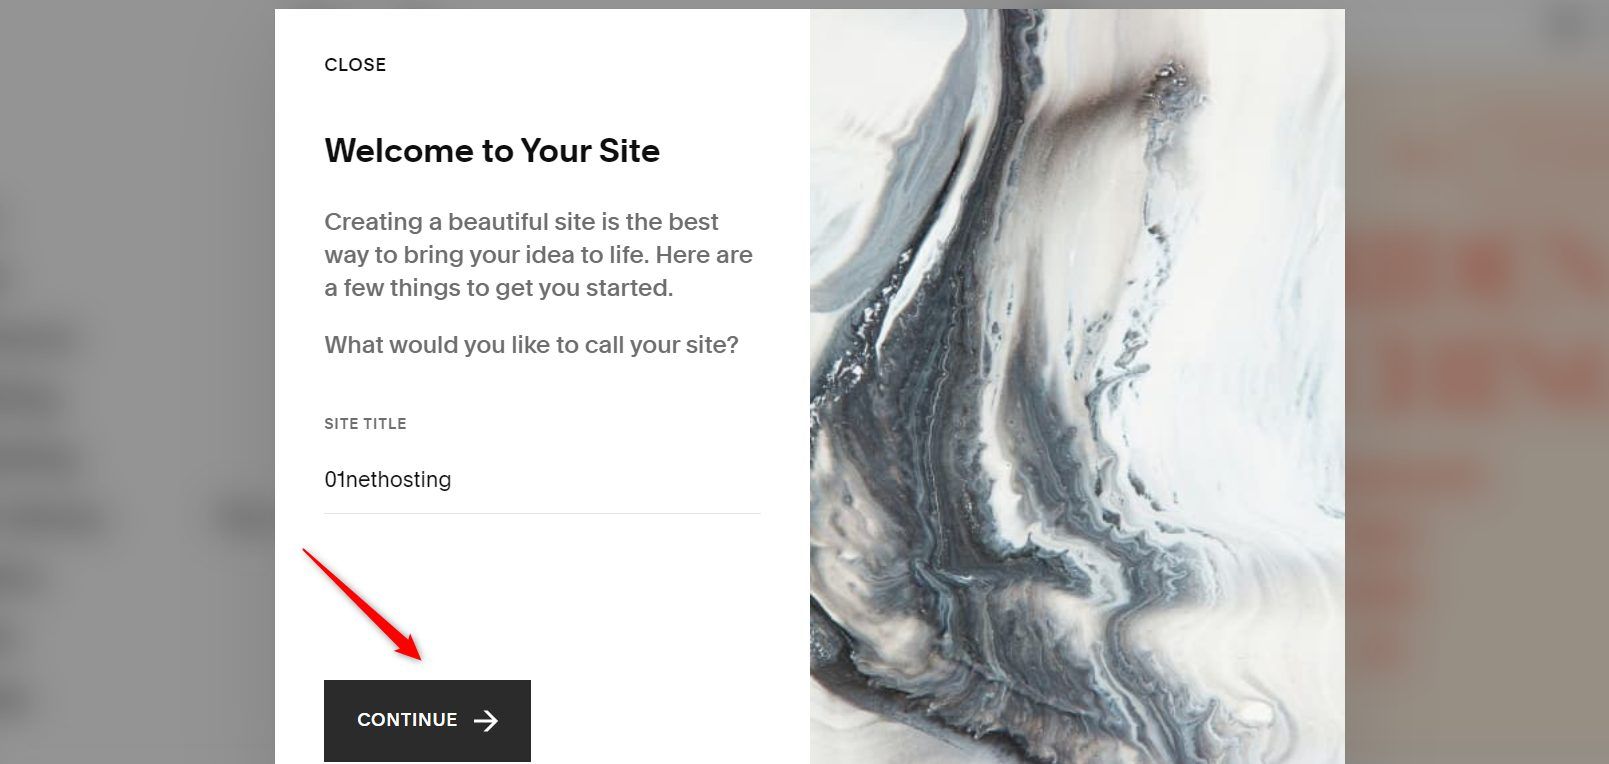
Type your business name or site title in the box provided. Click on the CONTINUE button afterward.
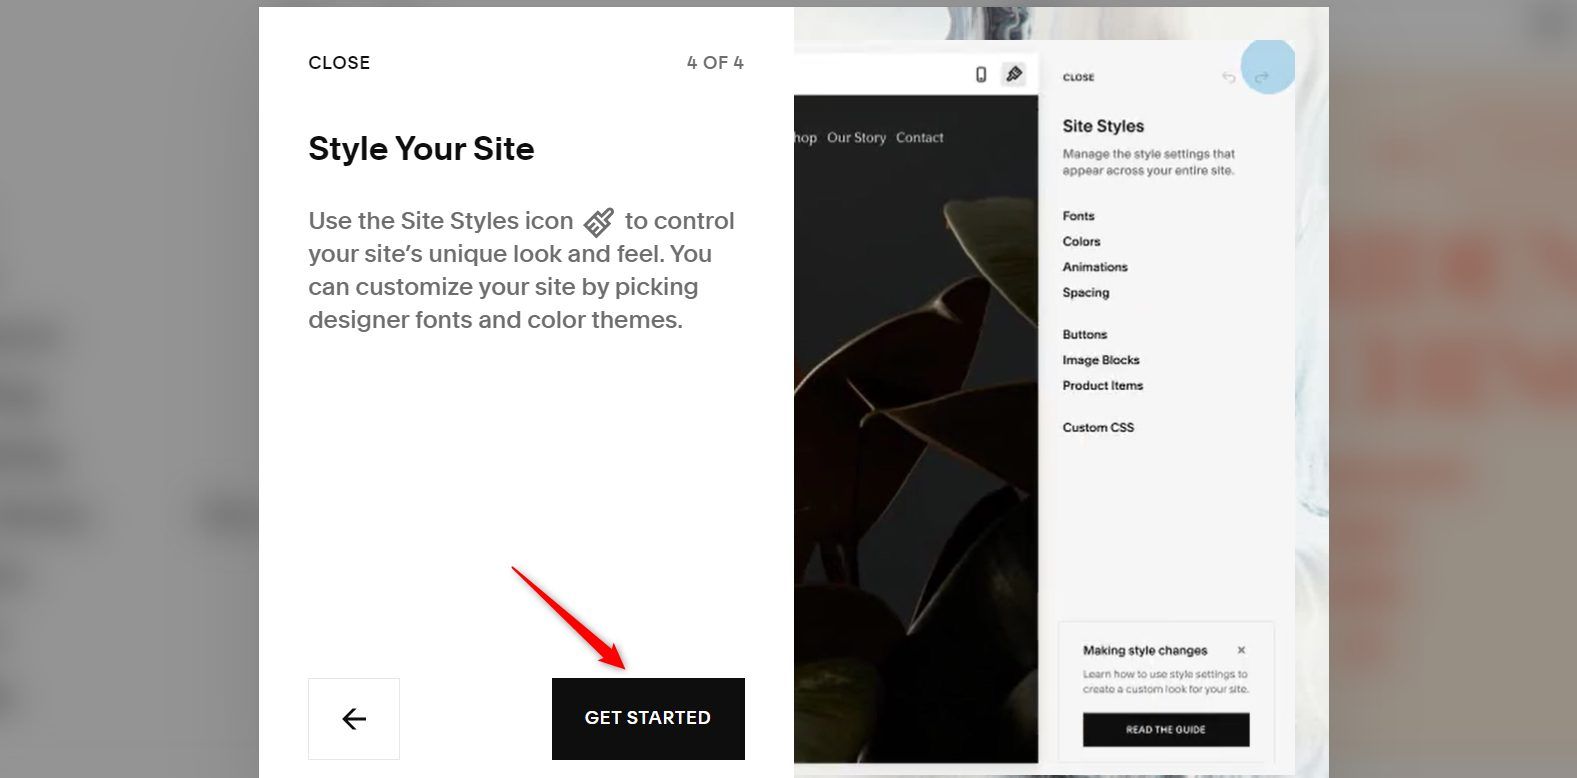
Click on the NEXT buttons for the next two screens. Then, click the GET STARTED button on the next screen afterward. This will take you to the editor page. You can now start designing your web pages.
Build Your Own Squarespace Site Template
If you are confident that you can start building your website on Squarespace from scratch, this method is for you.
Create a site with Squarespace now
From the Account Dashboard, click on the CREATE WEBSITE button.
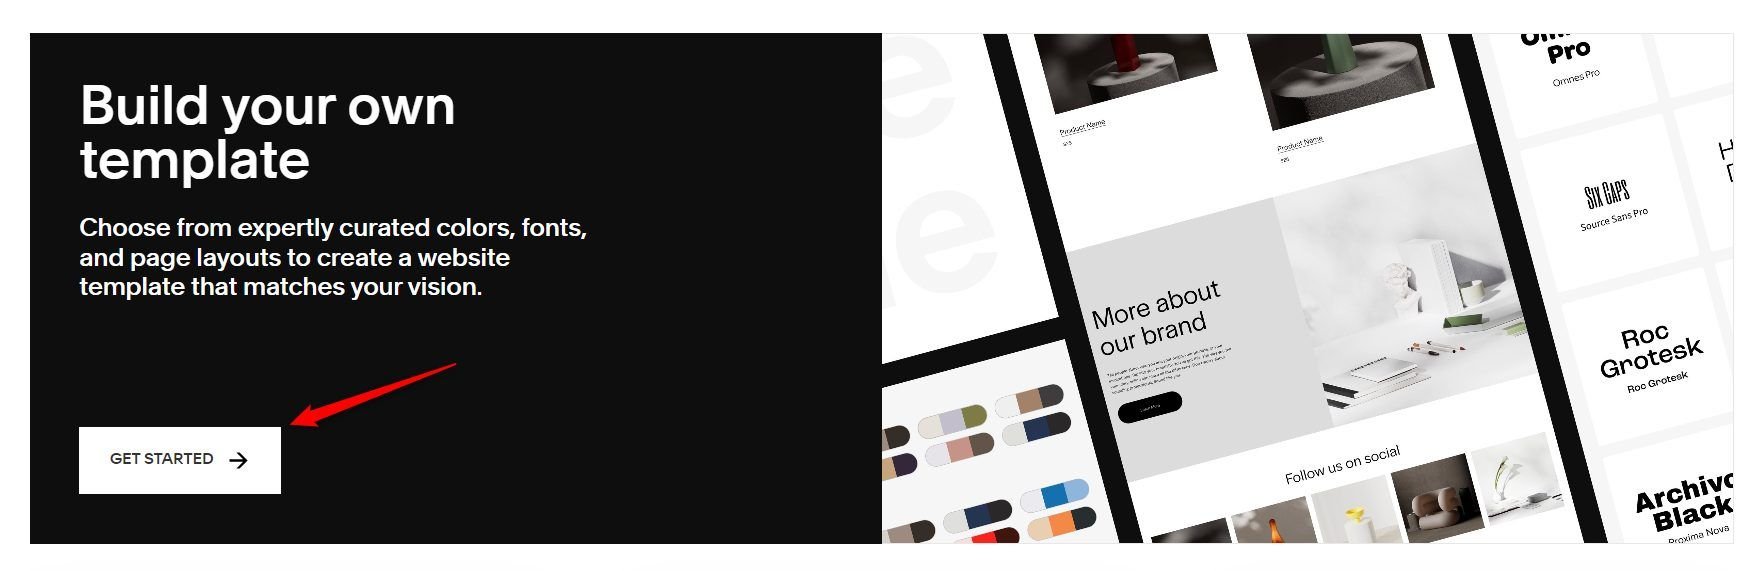
Then scroll down on the Template page until you see this section. Click on the GET STARTED button afterward.
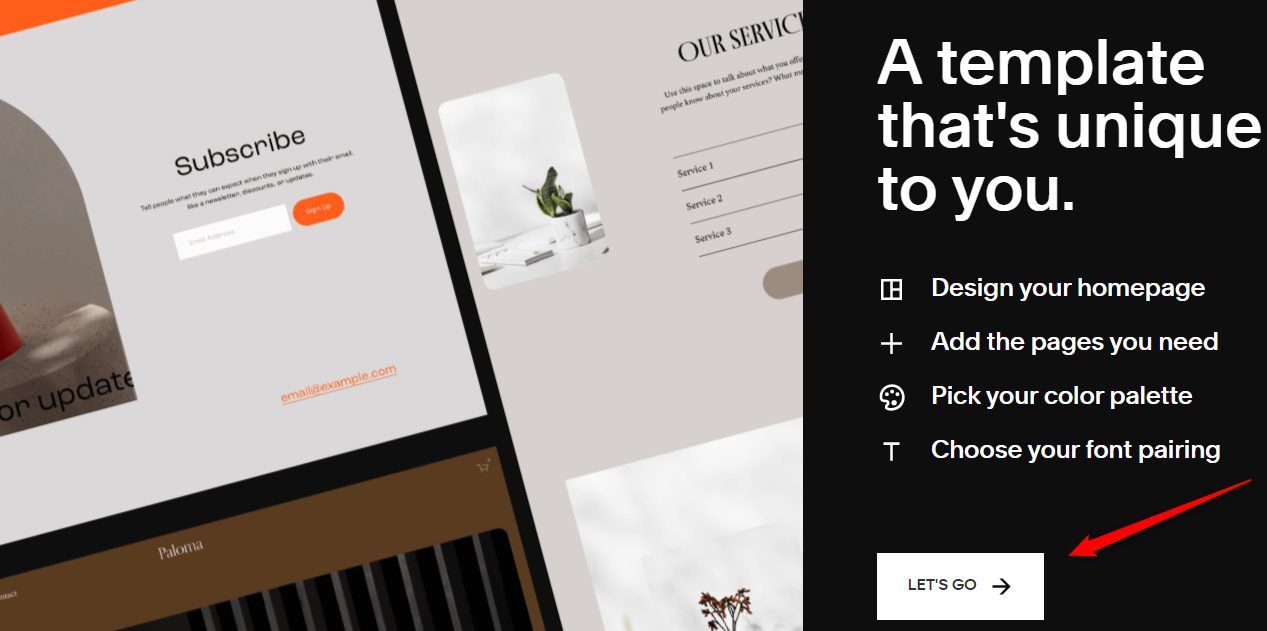
On the next page, click on the LET’S GO button.
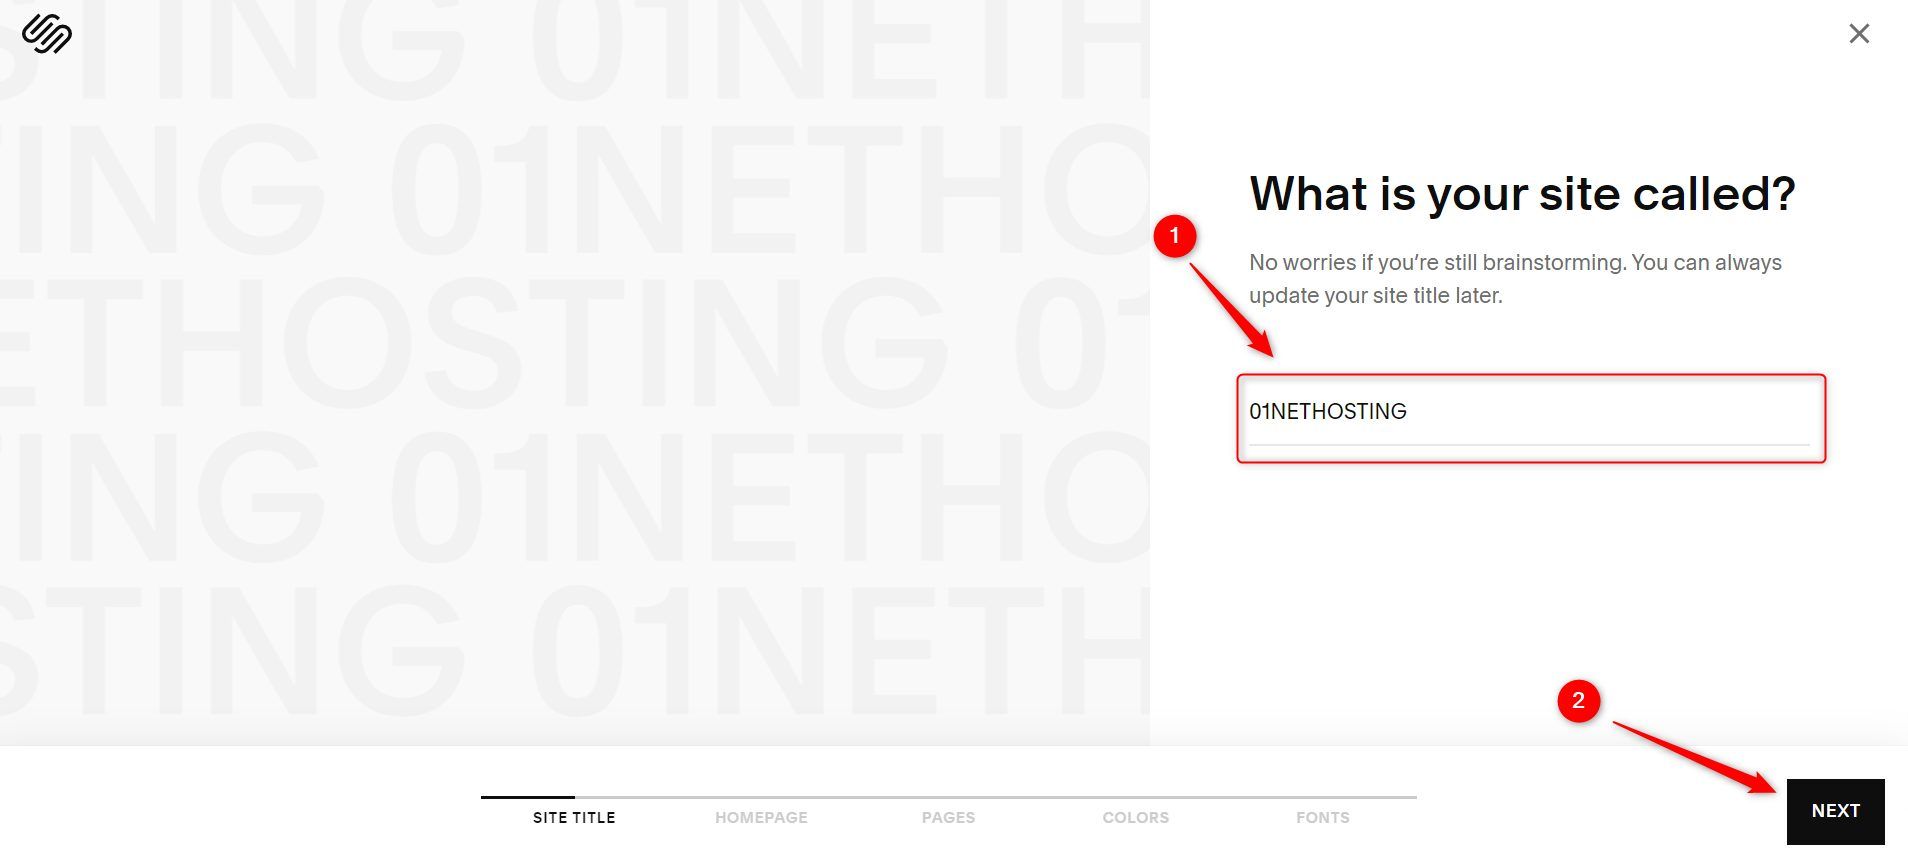
Type the title of the website you want to create with Squarespace in the space provided and click on the NEXT button.
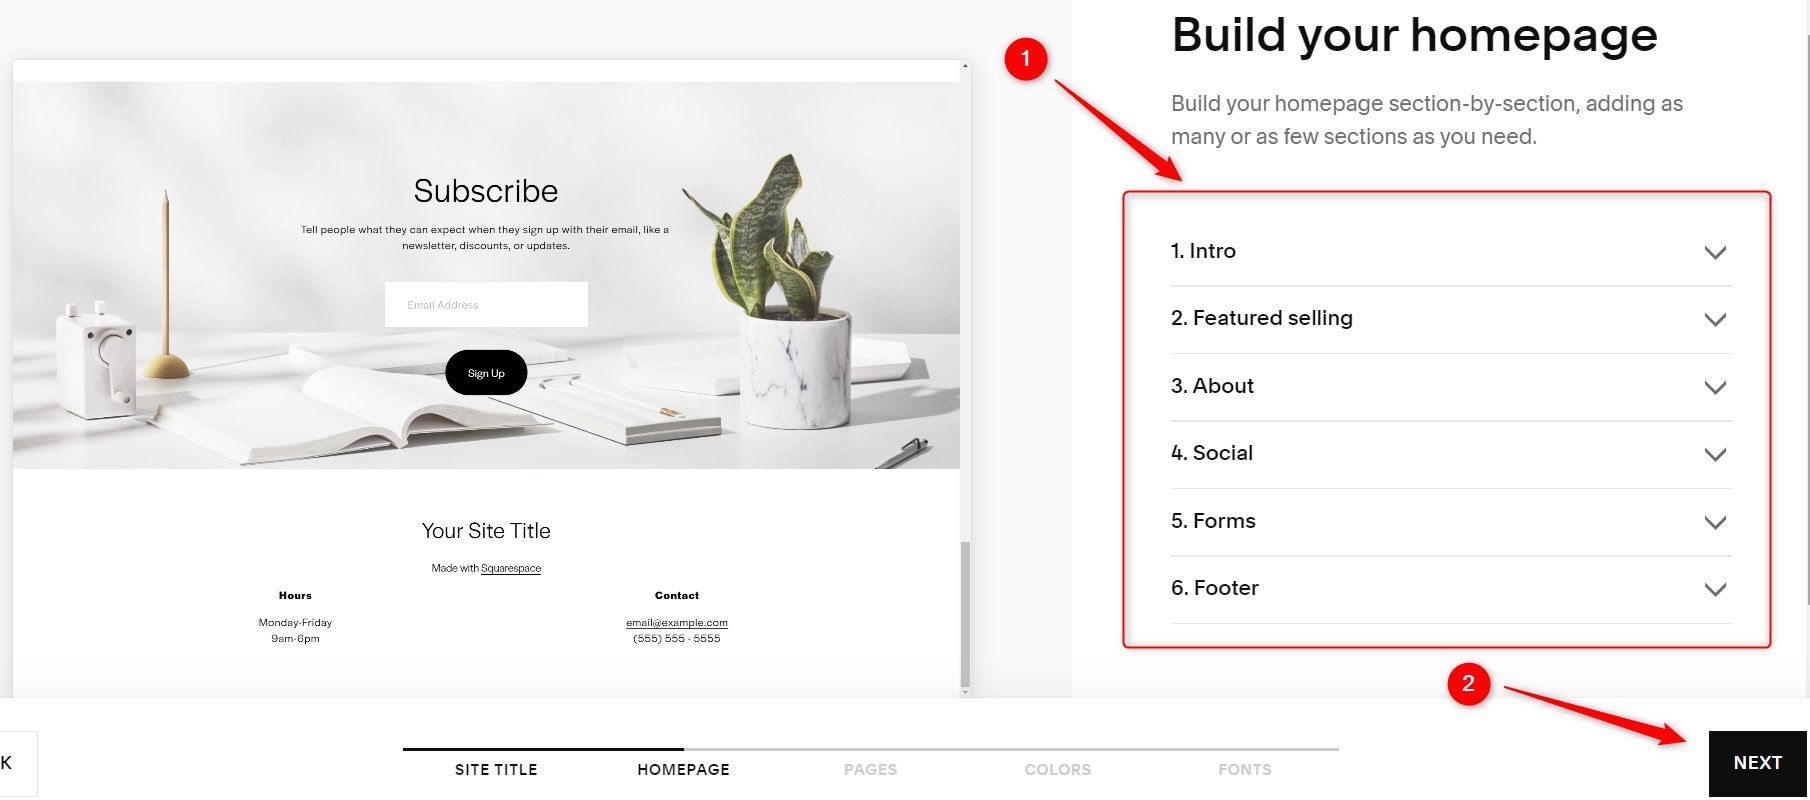
Then, choose your preferred design for each section of your homepage. It is not compulsory to choose from all the sections. However, choosing from the Footer templates is advisable unless you want to create one yourself.
Click on the NEXT button once you are done.
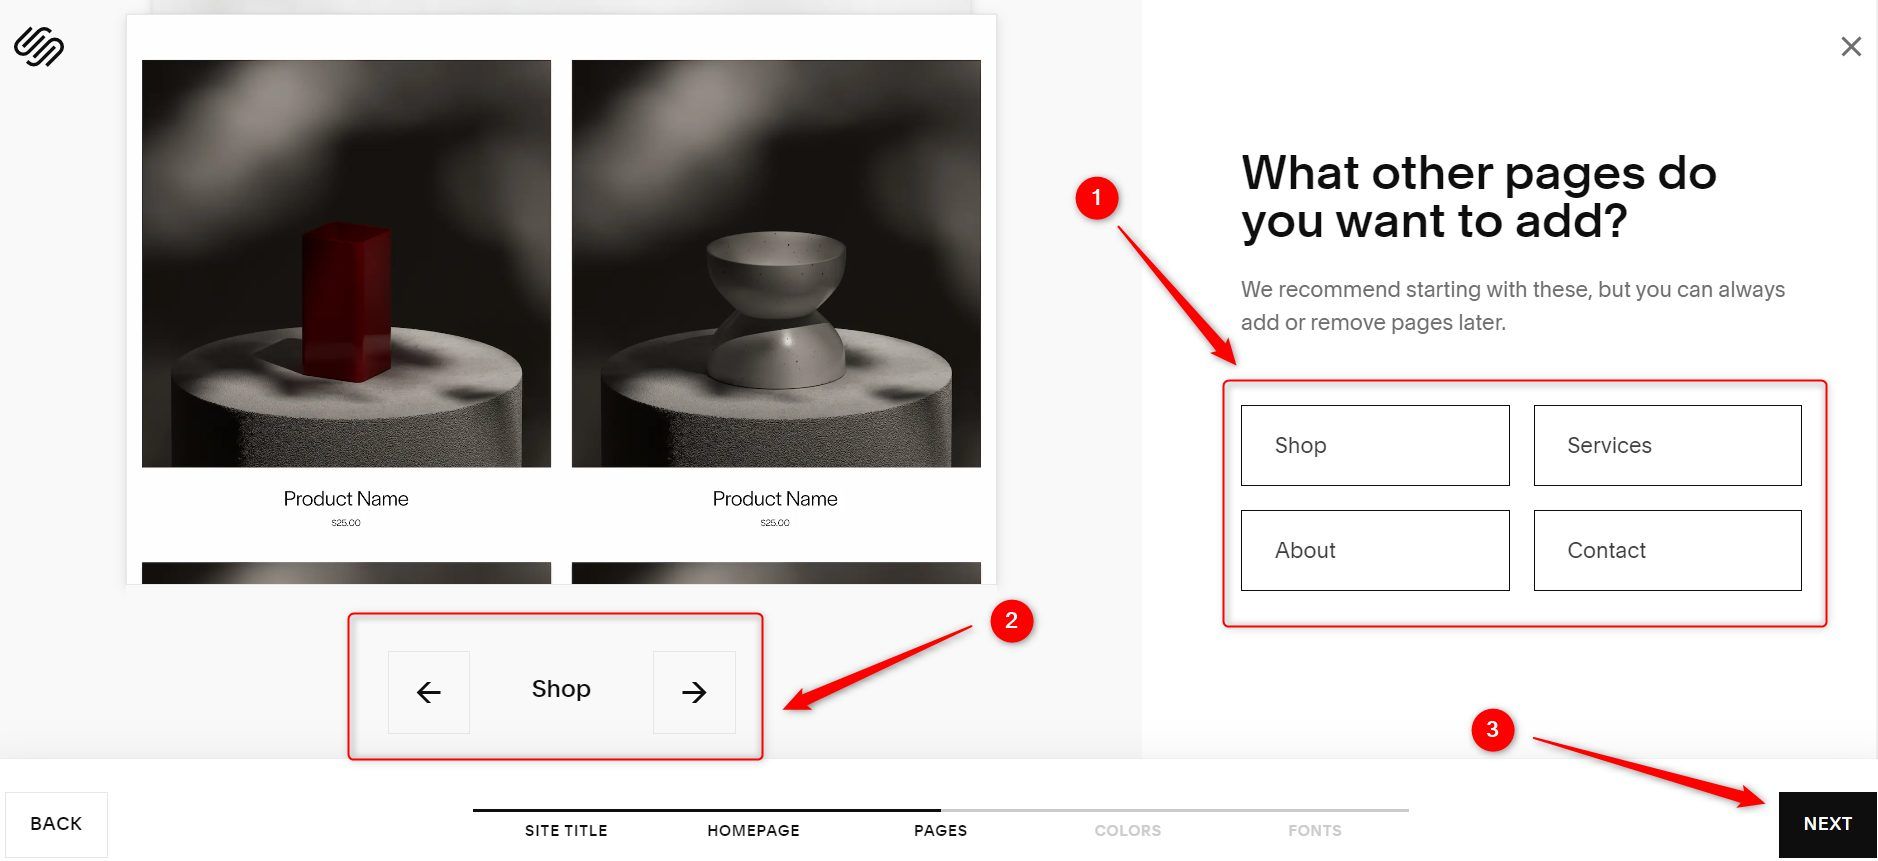
On the next page, add or remove the suggested pages for your website by clicking on them. You can use the arrow buttons to see what each page you have chosen looks like. Once done, click on the NEXT button.
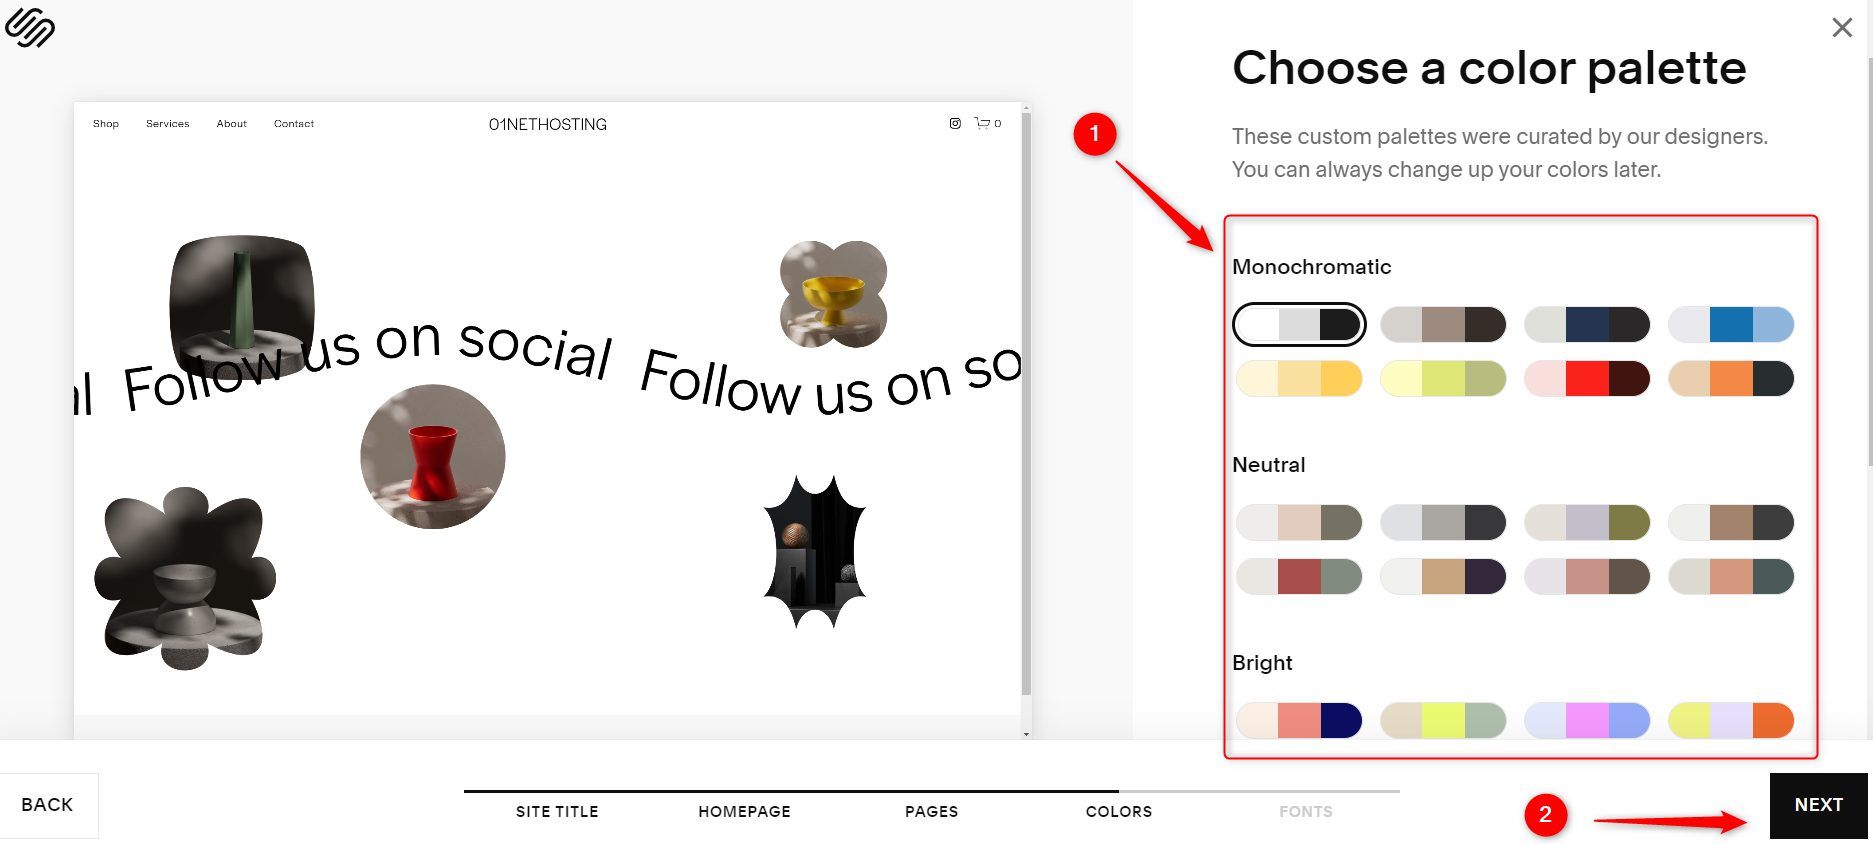
Choose your preferred color palette from the ones provided. Click on the NEXT button afterward.
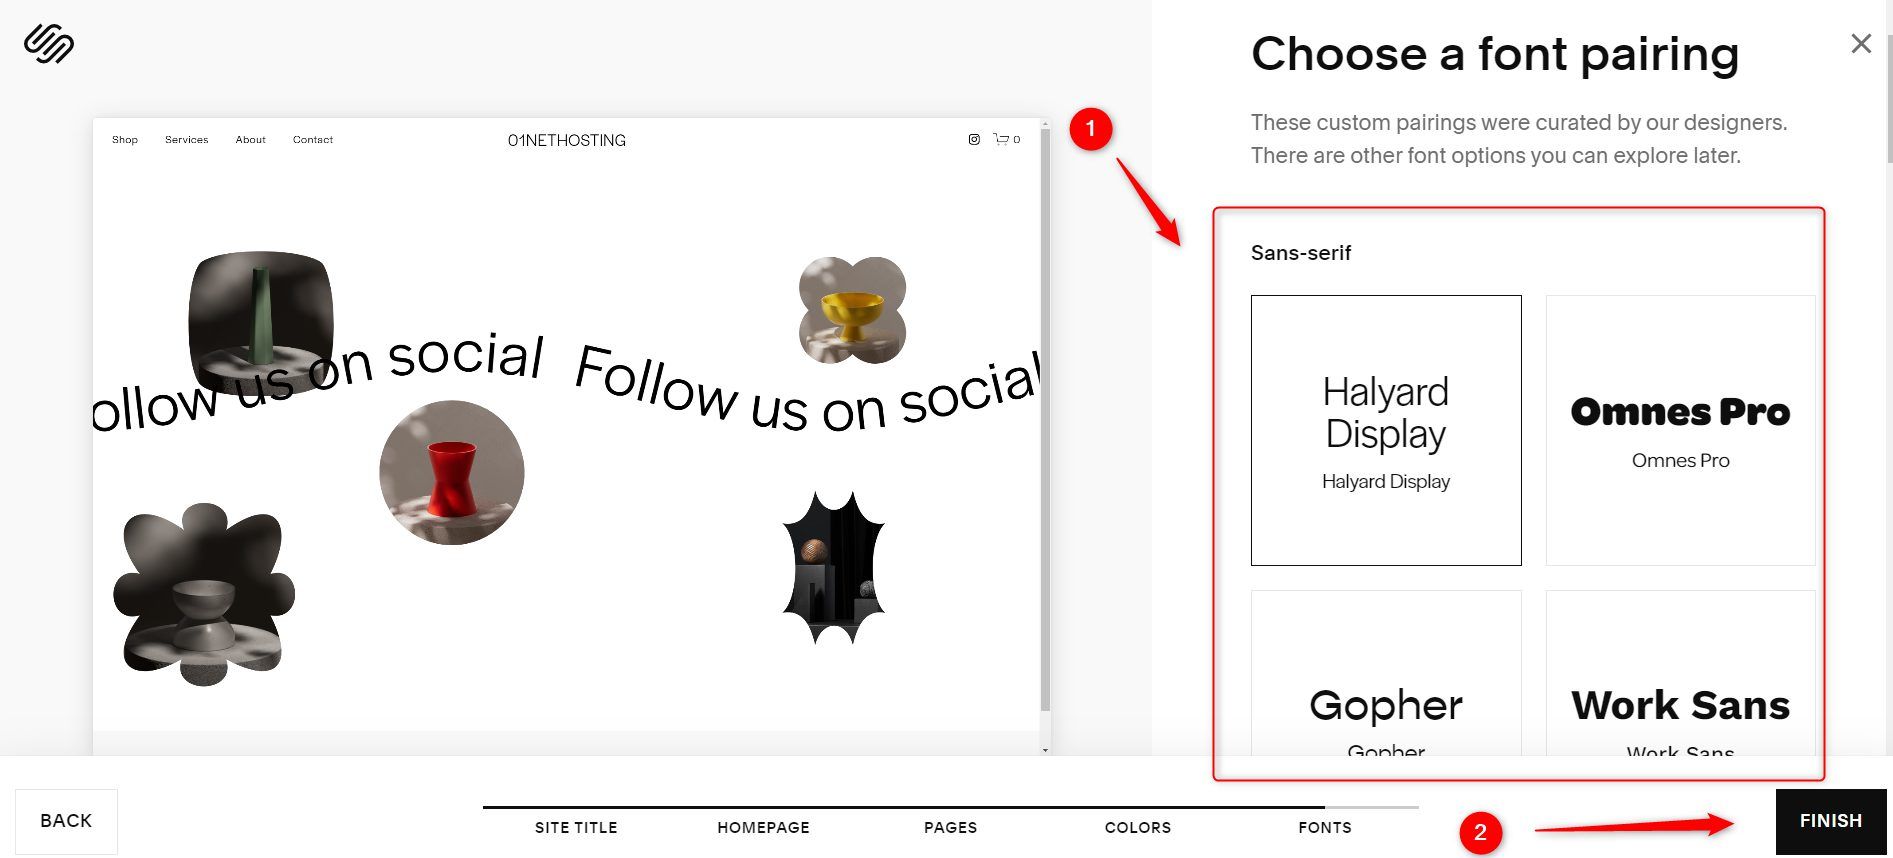
Now choose your preferred font paring and click on the FINISH button.
2. Design Your Website
Once you finish the previous steps, the next step to build your site with Squarespace is to design the pages.
Customize Your Homepage
The homepage is unarguably the most important web page you should create on your Squarespace website. It is the first page most visitors will see, so it is important to ensure it has a great design with a layout that benefits both your business and the users.
Create a Site with Squarespace
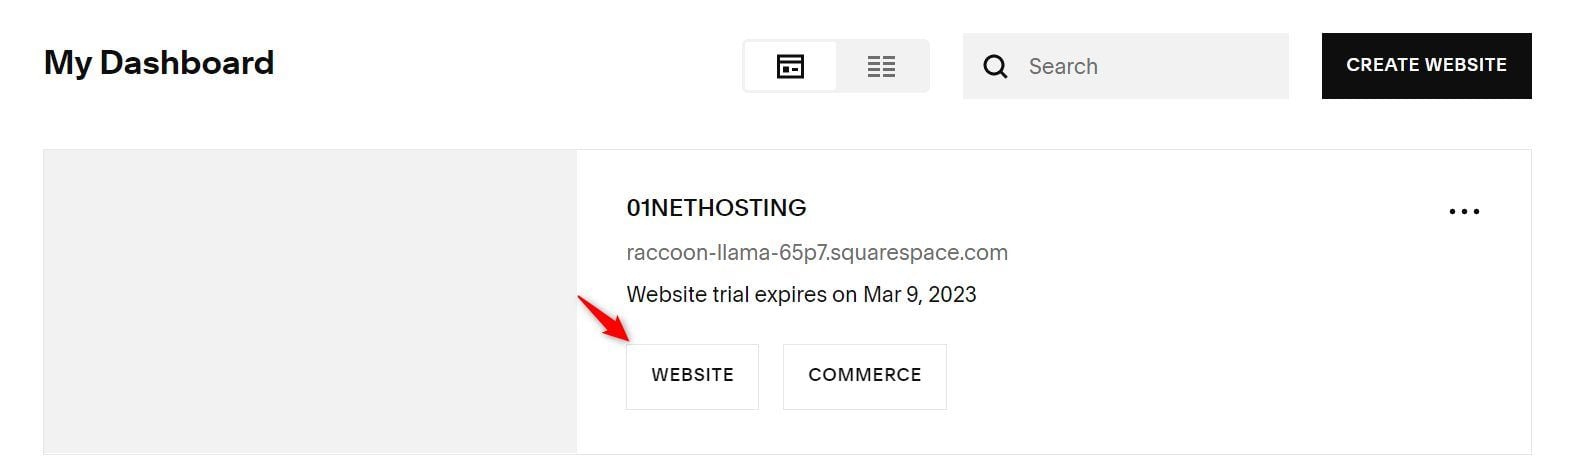
The last step should take you to the Squarespace editor. However, if it doesn’t, go to the Account Dashboard, as explained earlier.
Navigate to the domain you want to edit and click on the WEBSITE button.
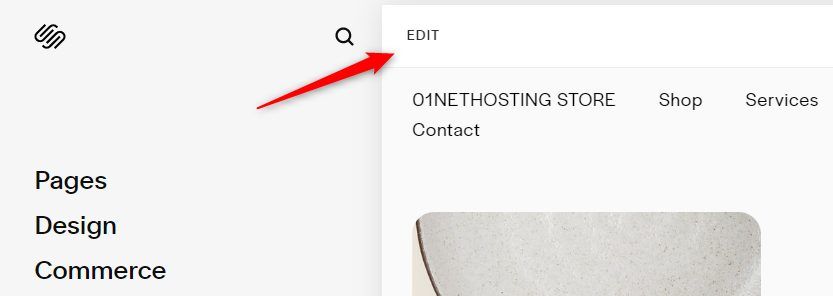
You are now in the Squarespace editor. Click on the EDIT link to start customizing the homepage.
Editing The Header
The first thing to edit on your homepage is the Header. Thus, hover your site on the already generated header. Click on the EDIT SITE HEADER button.

Once it opens up the pop-up control, click on the Site title & logo link.
Upload your general logo in the first space provided for the LOGO IMAGE by clicking on the plus sign or anywhere inside the box.
If you have a special image for mobile devices, scroll down and upload it in the space provided for the MOBILE LOGO IMAGE. Otherwise, the site will display the first logo you uploaded on both mobile devices and desktop screens. Now click on the BACK link.
Now, click on the Elements link to customize items like social icons on the header.

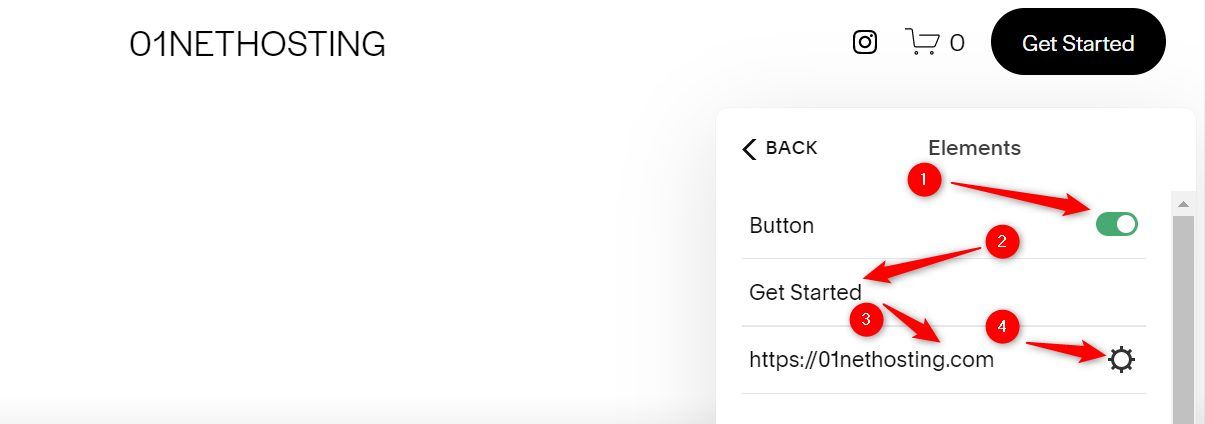
If you wish to add a call-to-action (CTA) button to prompt visitors to take a specific action like purchasing something or just a login link, toggle on the button, so it shows green. Then, specify the title of the CTA button in the space provided. If it is a link, write it in the box provided, as shown in the screenshot below. Otherwise, click on the Settings icon next to it.
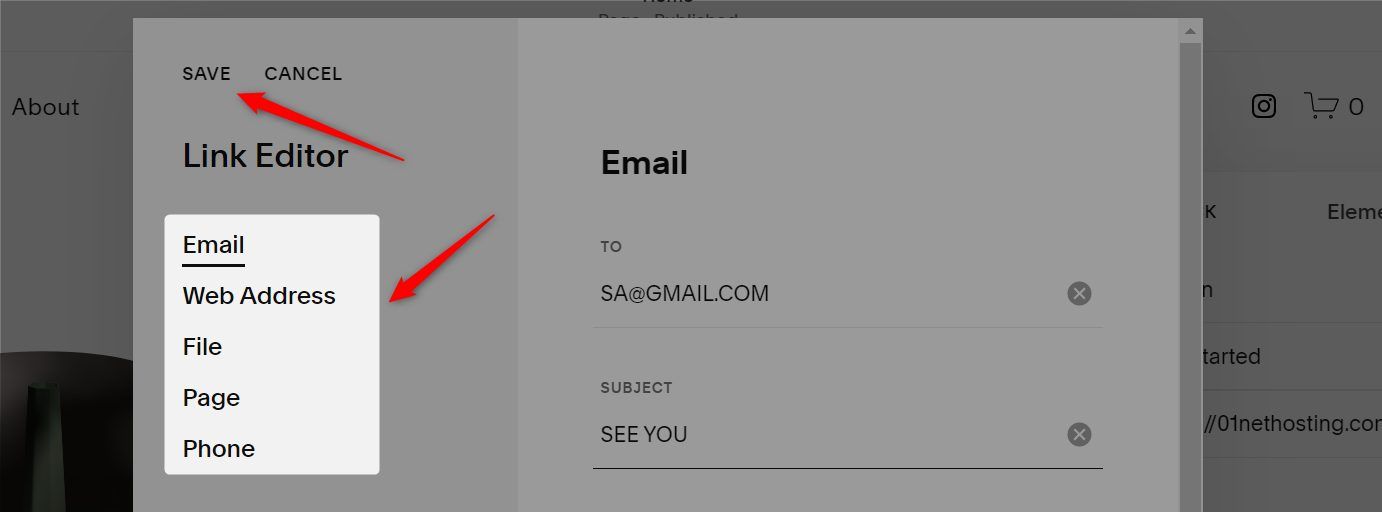
As shown in the screenshot below, the CTA button can link to a website address, an email address, a file, an existing page on your site, and a phone number. Click on the one you want and provide the details required. Once done, click on the SAVE link.
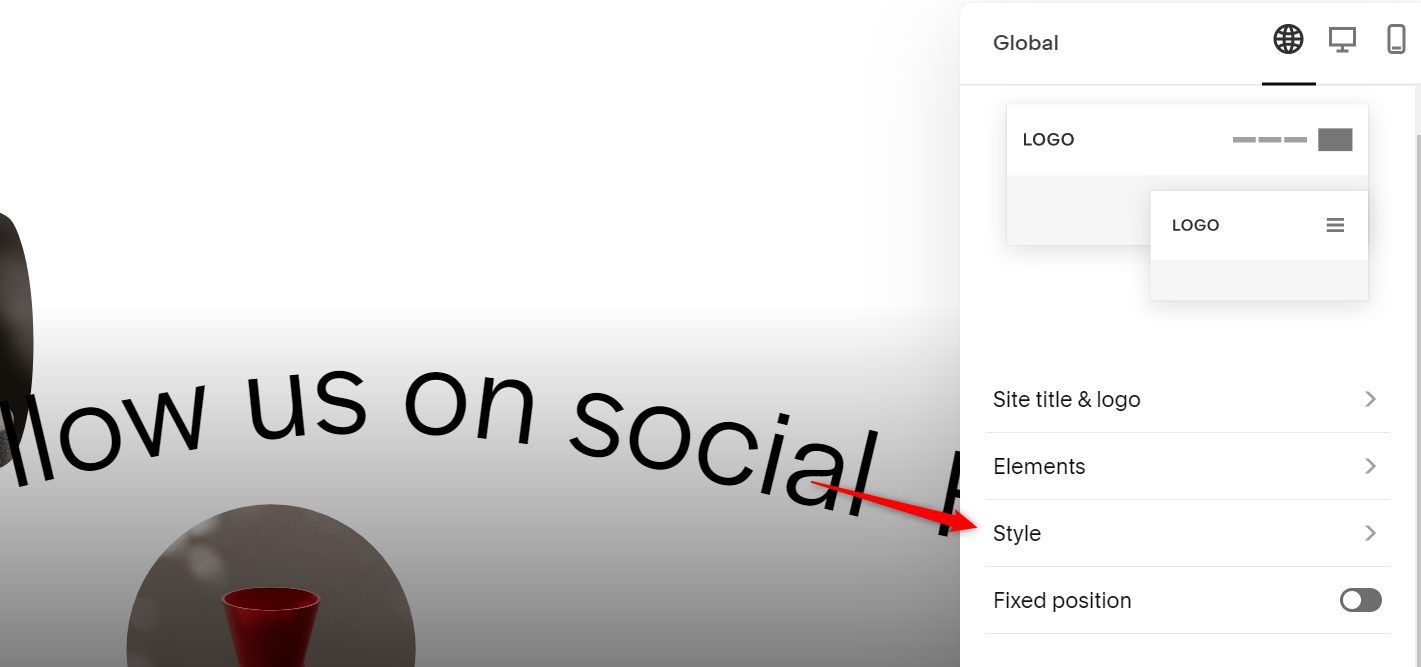
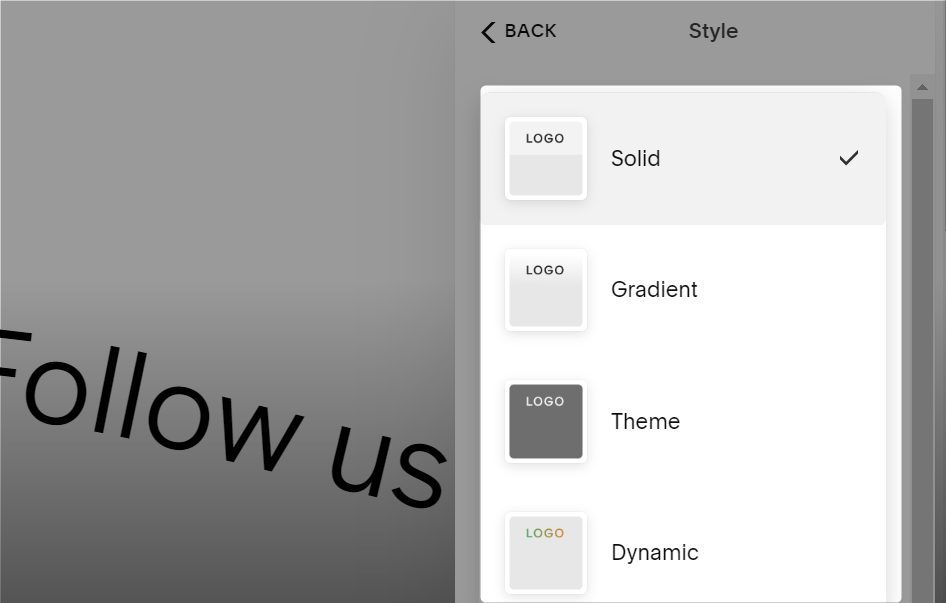
Now, click on the Style link. This allows you to change the colors (navigation and background), border, blur background, and drop shadow of the header.
Choose the style you prefer and customize it accordingly.
The last change to make to your header while building your site with Squarespace is to specify if you want it ‘sticky’ or not. A sticky header will remain at the top of the screen while visitors scroll through the page, while the normal type vanishes under the same conditions. Making your header sticky will save visitors the time scrolling back up your page to click on an important button in your header.
Create your website on Squarespace
To make your header ‘sticky,’ toggle on the Fixed Position setting. Then choose the Fixed header style you prefer. The Basic style will keep your header in the fixed position either the visitor scrolls up or down. While the Scroll Back style will recall the header immediately when the visitor starts scrolling up. The header is not visible when scrolling down.

Click on the desktop or mobile device icon to change the layout of your header for both screen sizes.

Editing The Footer
The next step in this tutorial on how to create a site on Squarespace is to edit the footer. Scroll down the page until you see this Add Site Footer prompt. Click on the ADD SECTION button.

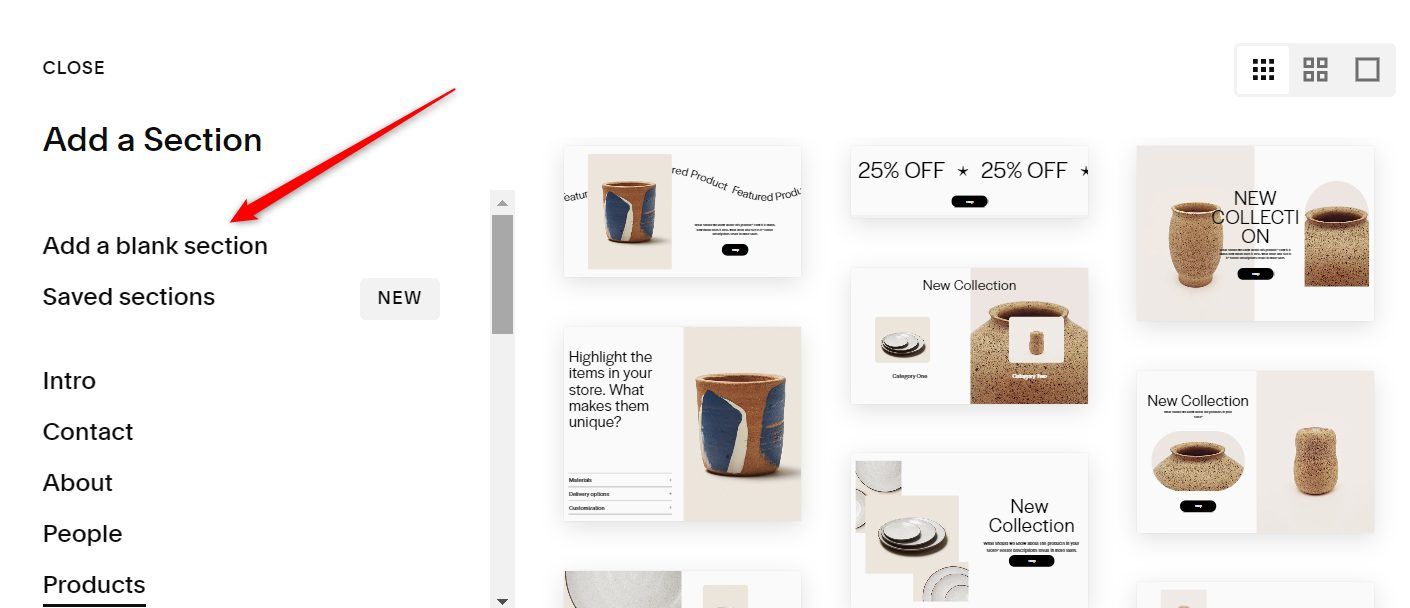
Click on the Footer link on the left-hand side of the page. Once the templates show up, click on the one you prefer. It will be automatically added to your footer. You can now edit, add, and remove the blocks.
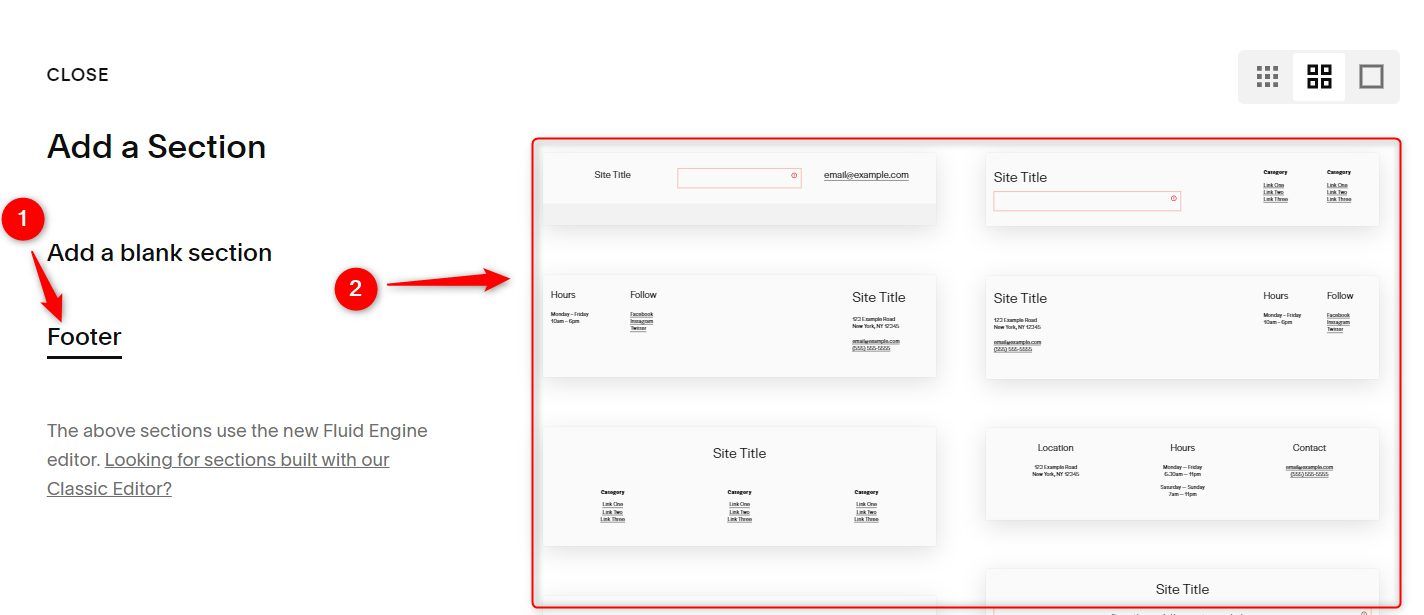
If you wish to design your footer from scratch, click the Add a blank section link instead.
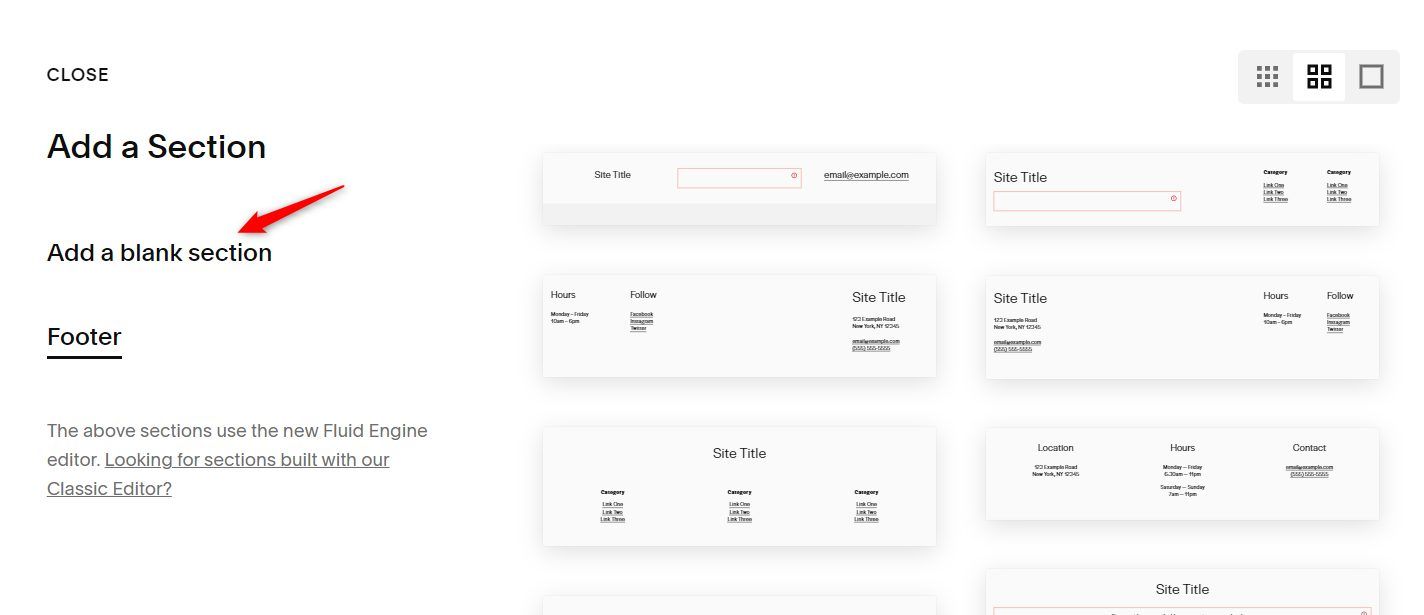
Let’s assume you are using the blank section option. You need to add blocks to your footer section now.
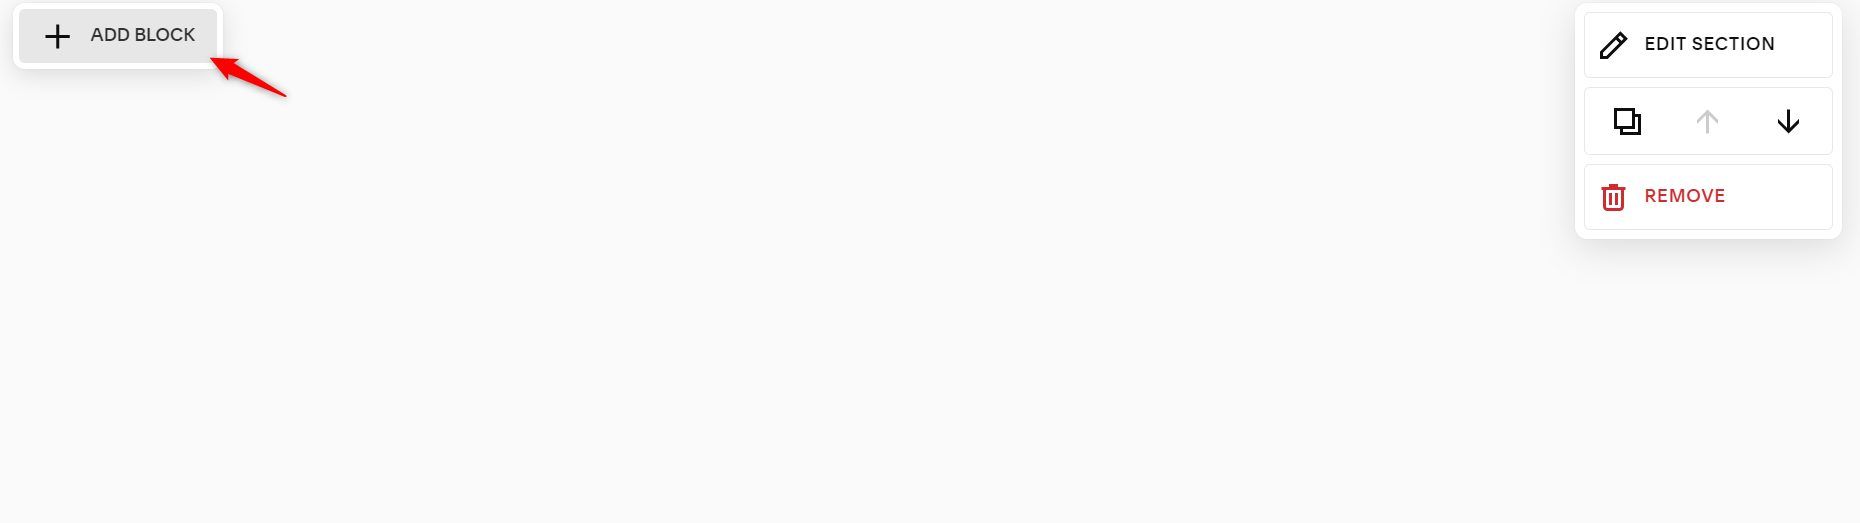
To do that, hover your mouse in your footer area and navigate to the ADD BLOCK button. Click on it.
Choose the blocks you would like to add to your footer area one after the other. To make it faster, you can type the block’s name in the search box, and you will find it, provided that’s what it is called in the Squarespace editor.
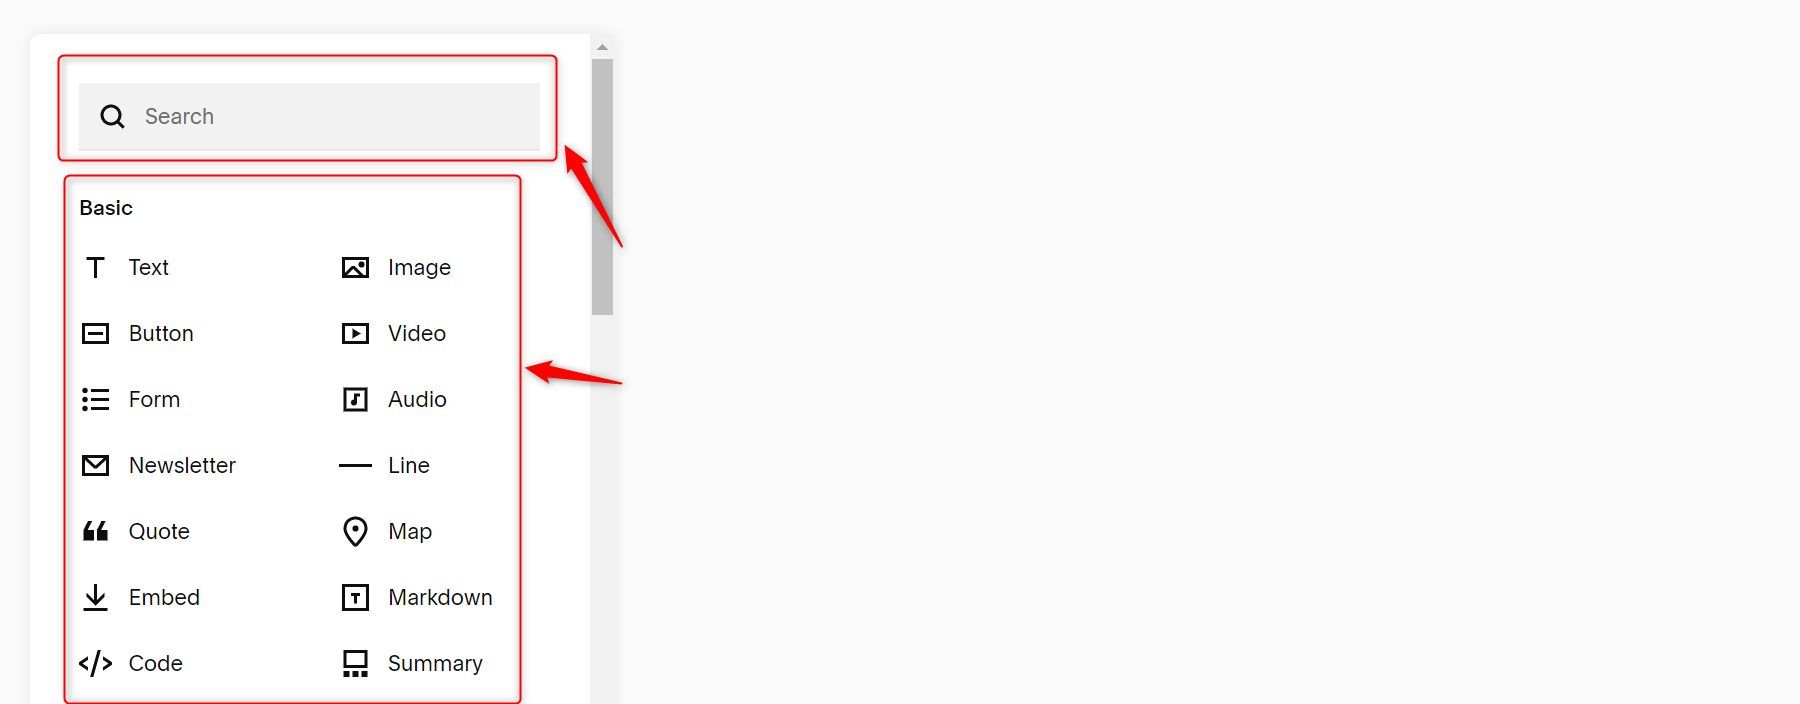
Some popular blocks you can add to your footer include Social Links, Text (for site title), Content Link, Newsletter, Button, Search, etc.
Once you have added a block to the footer, click on it. Then, click on the pencil icon to edit it.
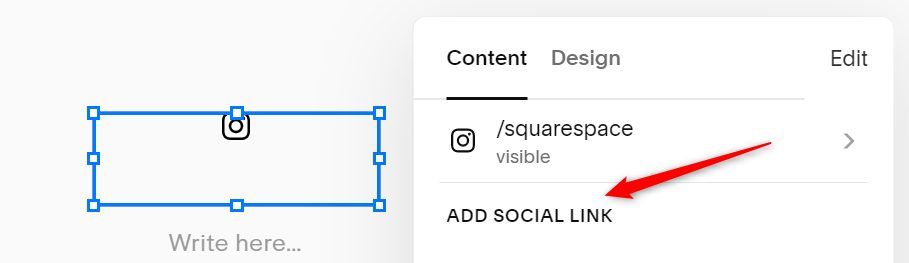
For the Social Link block, click on the ADD SOCIAL LINK button. Then paste or type the link to any of your social media accounts in the space provided and tap the Enter or Return key.
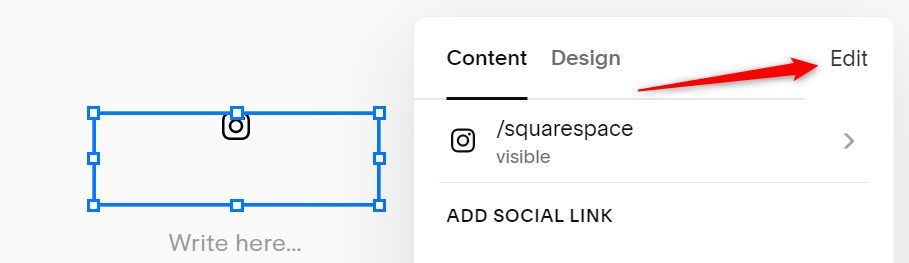
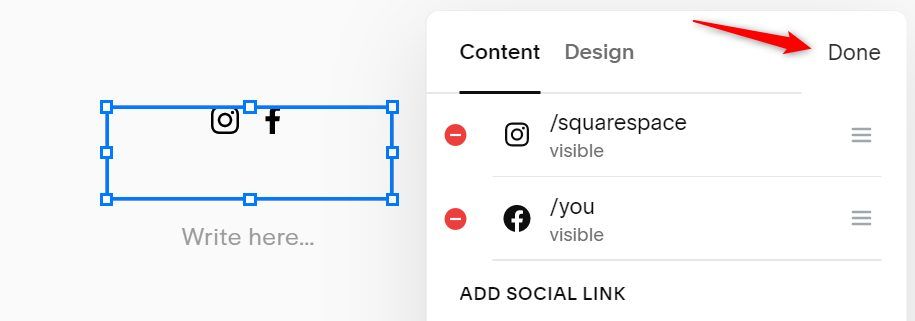
Click on the EDIT link to change the arrangement of the icons by double-clicking and dragging them to your preferred positions.
Click on the DONE link afterward.
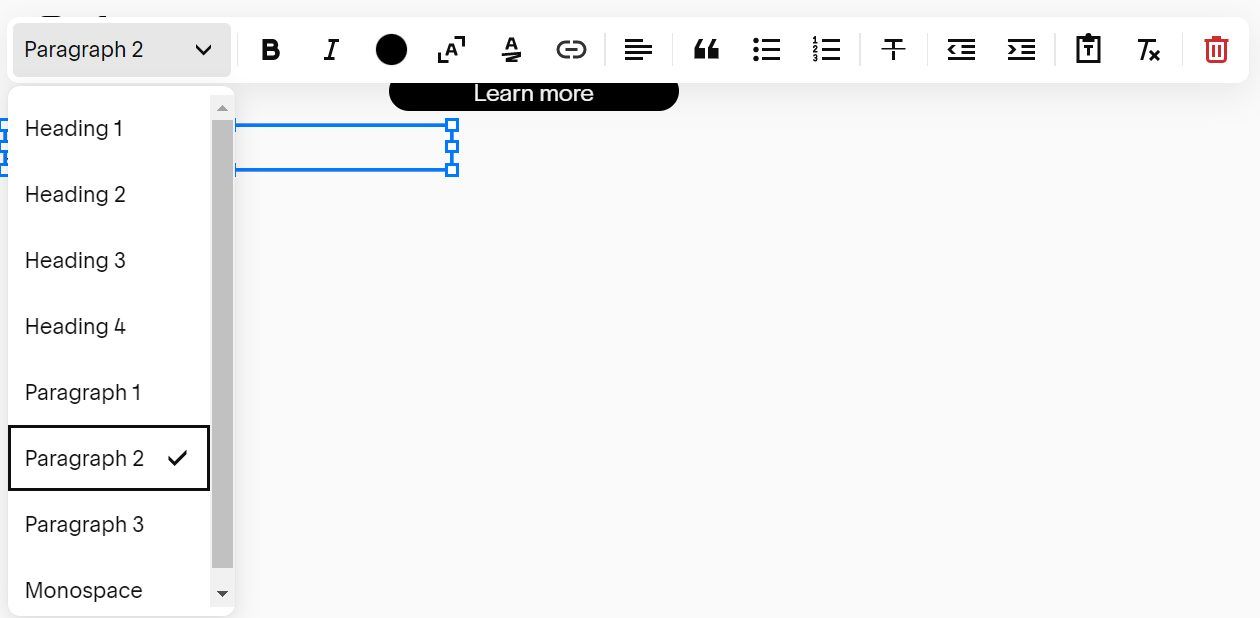
To edit the Text block, click on it and then double tab in the text area to open the editor. Choose the type of text you are adding to the page. It could be a paragraph, monospace, or a heading. Click on the right one and continue typing your text. You may also use the editor options to customize your text.
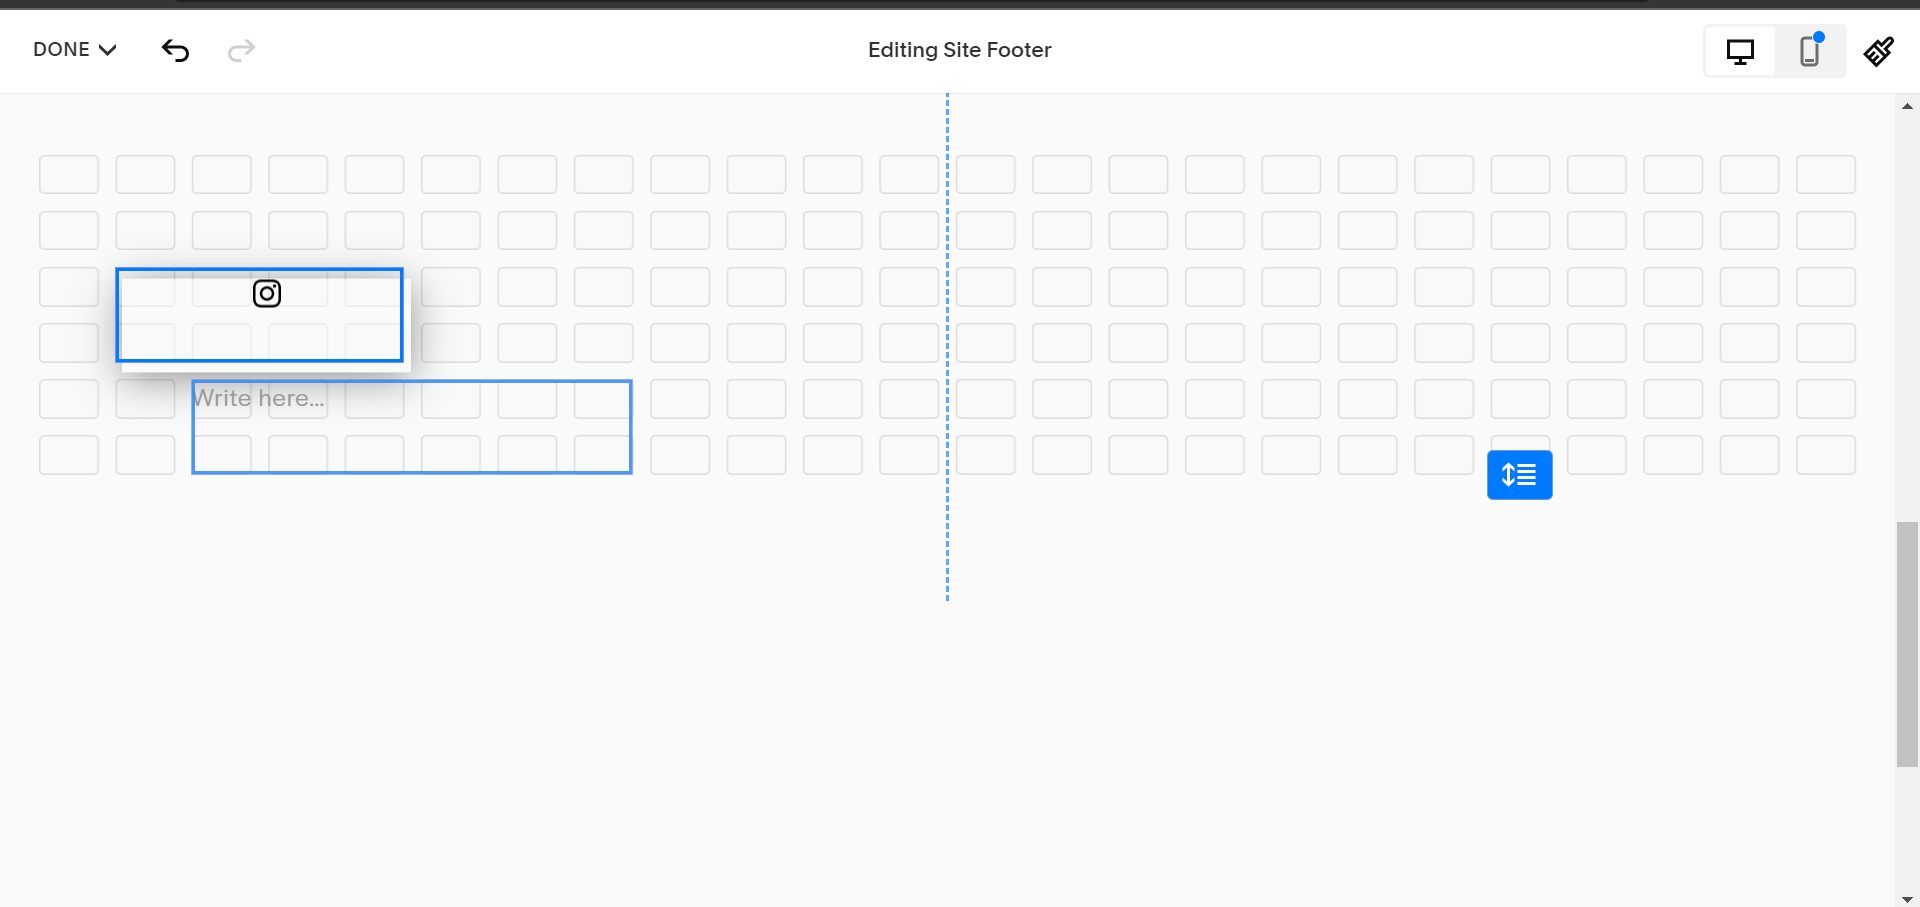
Once you are done editing each block, you can double it to move it to the right position. Use the grids of the suggested blue boundaries when you are moving as a guide for the best nearest positions. This will help you integrate an adaptive layout for the website you are creating with Squarespace to make it mobile-friendly.
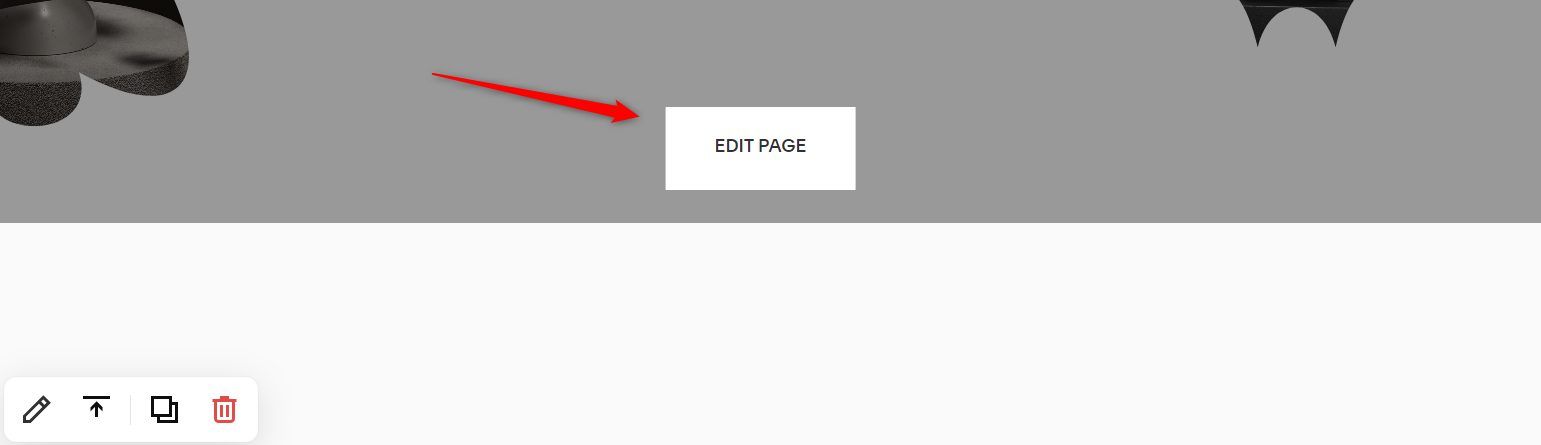
Once you are done adding, editing, and moving the blocks you need for your Footer section, scroll up the editor and click on the EDIT PAGE button.
Customizing the Body of the Homepage
Now that you have created your footer, the next step to build your website with Squarespace is to customize the body of the page.
This is where all the other important sections come in. You can add sections like products, subscriptions, portfolios, testimonials, people, etc, to your page.
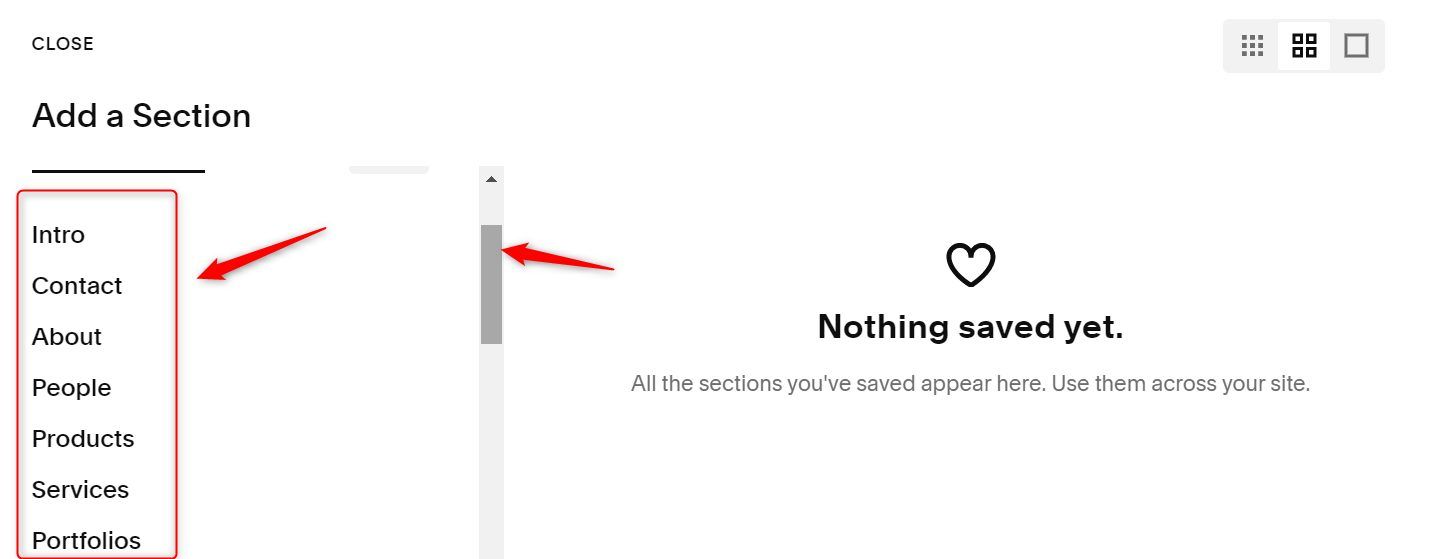
To add a section to your page, go to the top or the bottom of an existing section. Click on the ADD SECTION button. The button at the top will add a new section above an existing section, while the bottom button adds a section below it.

Use the scroll control to find the section type you want to add to the page. After you have found it, click on it. Then choose your preferred template from the available ones by clicking on it.
If you prefer to start with an empty section that you will customize, click on Add a blank section instead. We recommend using the Squarespace section templates to create your site if you are a beginner.
Once the sections have been added to your page, you can edit the blocks by clicking the pencil icon next to them. Their customization options will always pop up so you can know how much you can change about them.
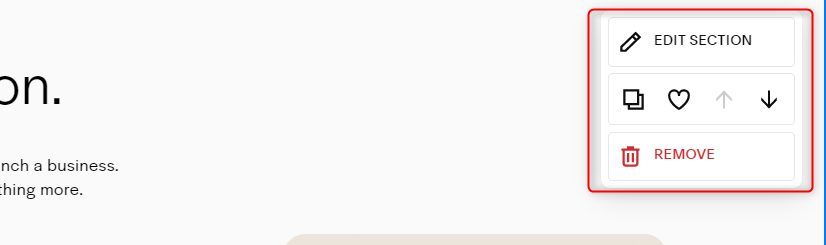
If you wish to edit a section’s settings, move your mouse to it. Then click on the EDIT SECTION button. To duplicate the section, click on the copy icon. The duplicated section will appear below the original. Move the section up or down a level, by clicking on the up and down arrows, respectively. Click on the REMOVE button to delete a section you don’t need anymore.
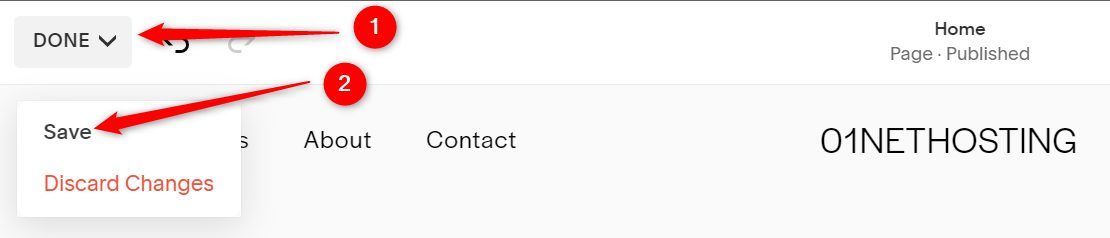
Once done adding the important sections you need for your homepage, move your cursor to the top left corner of the editor. Click on the DONE link and then the Save link. This saves your work and exits the full screen editor mode.
Add and Customize Other Pages
After finishing the customization of your homepage, the next thing to do when building your Squarespace site is to add other important pages you may need.
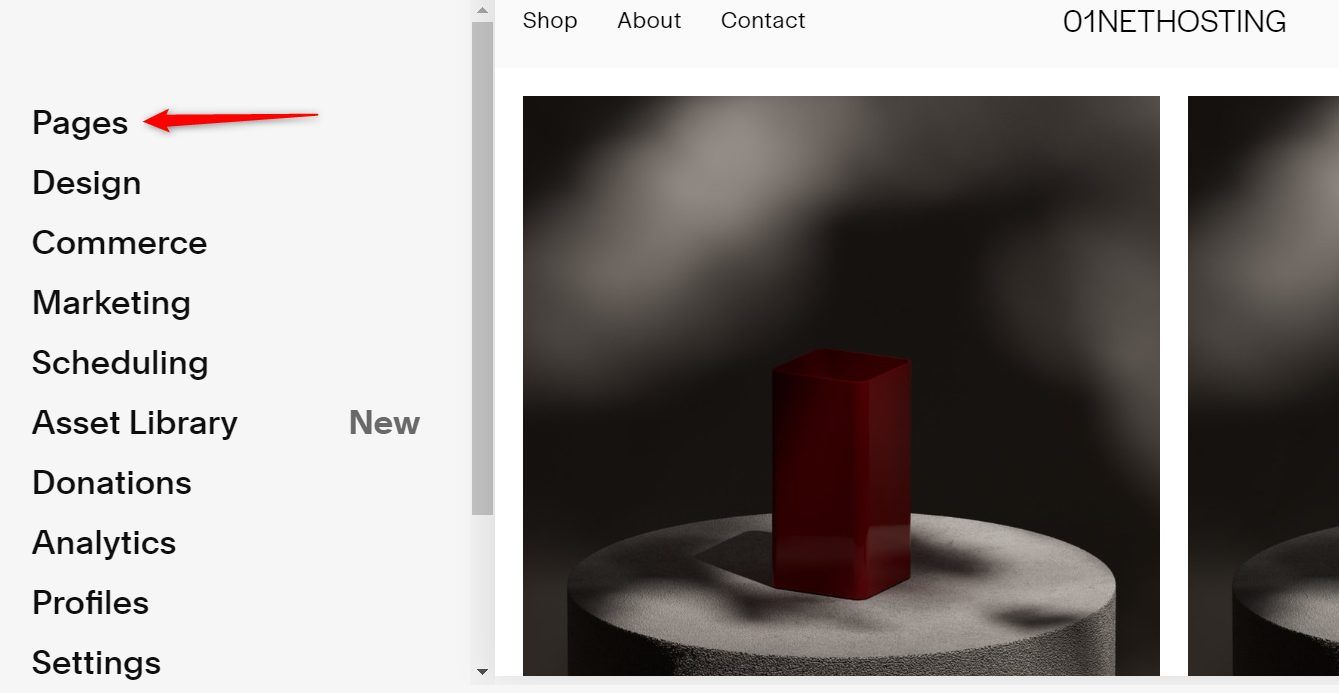
After exiting the full screen editor mode, click the Pages link on the sidebar.
The pages in the Main Navigation section are those in your menu bar, while those in the Not Linked section are not. You can move a page to any of the two sections by double-clicking and dragging it.
Click on the page you want to edit you wish to edit from the list. Then click on the EDIT link to open Squarespace’s full screen editor.

If you have a custom page that you wish to build on your Squarespace website instead, click on either the plus sign links. Then click on the type of page you want to create and choose a template on the next page.
Alternatively, you can click on the Blank Page link option to start your design from scratch. The already created header and footer sections, however, will be intact.
Designing any other page is the same as the homepage, so follow the same steps from our homepage customization for blocks and sections.
3. Setup Your Store (Only if You Want to Create an eCommerce)
When creating an eCommerce website with Squarespace, setting up your online store is the next step.
Add Products
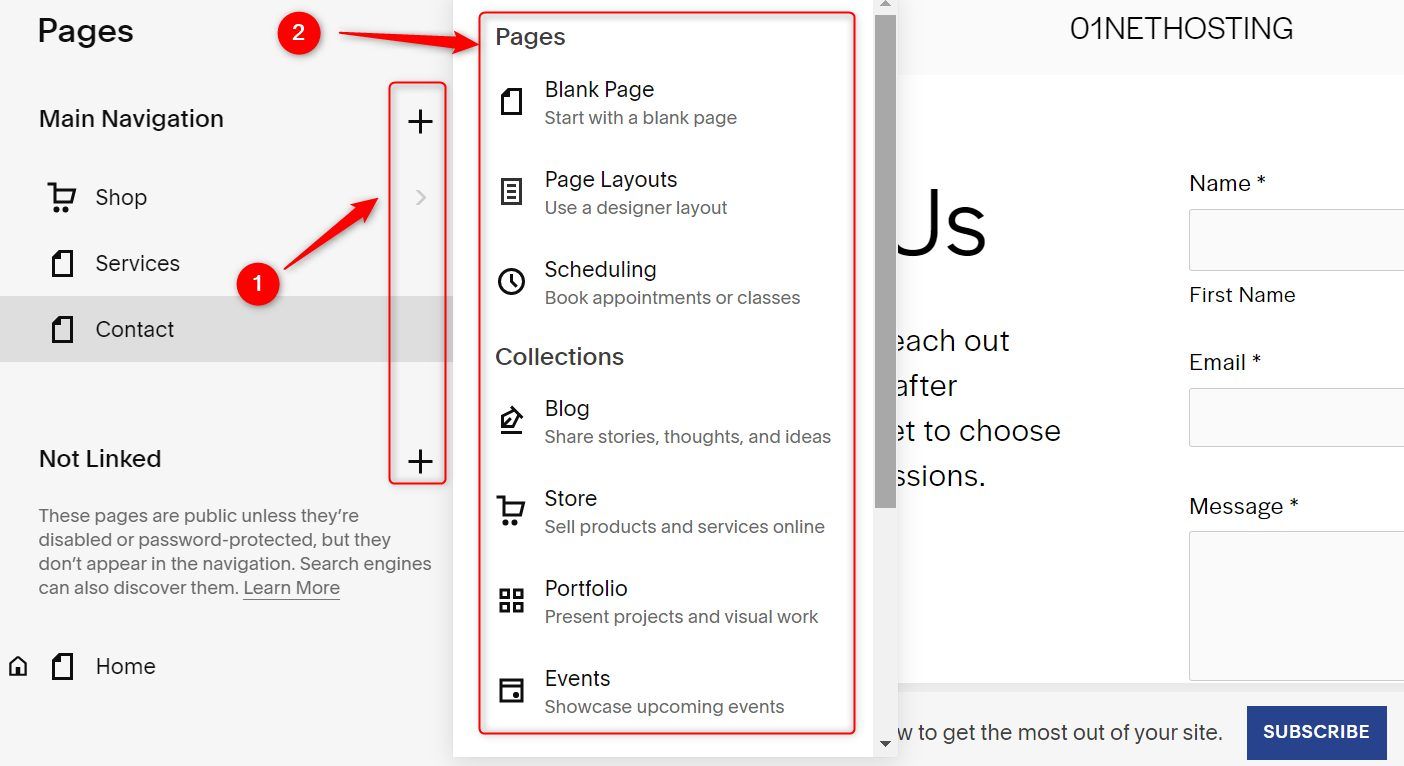
To add products, you must first create a page for your store. Now, go to Pages.
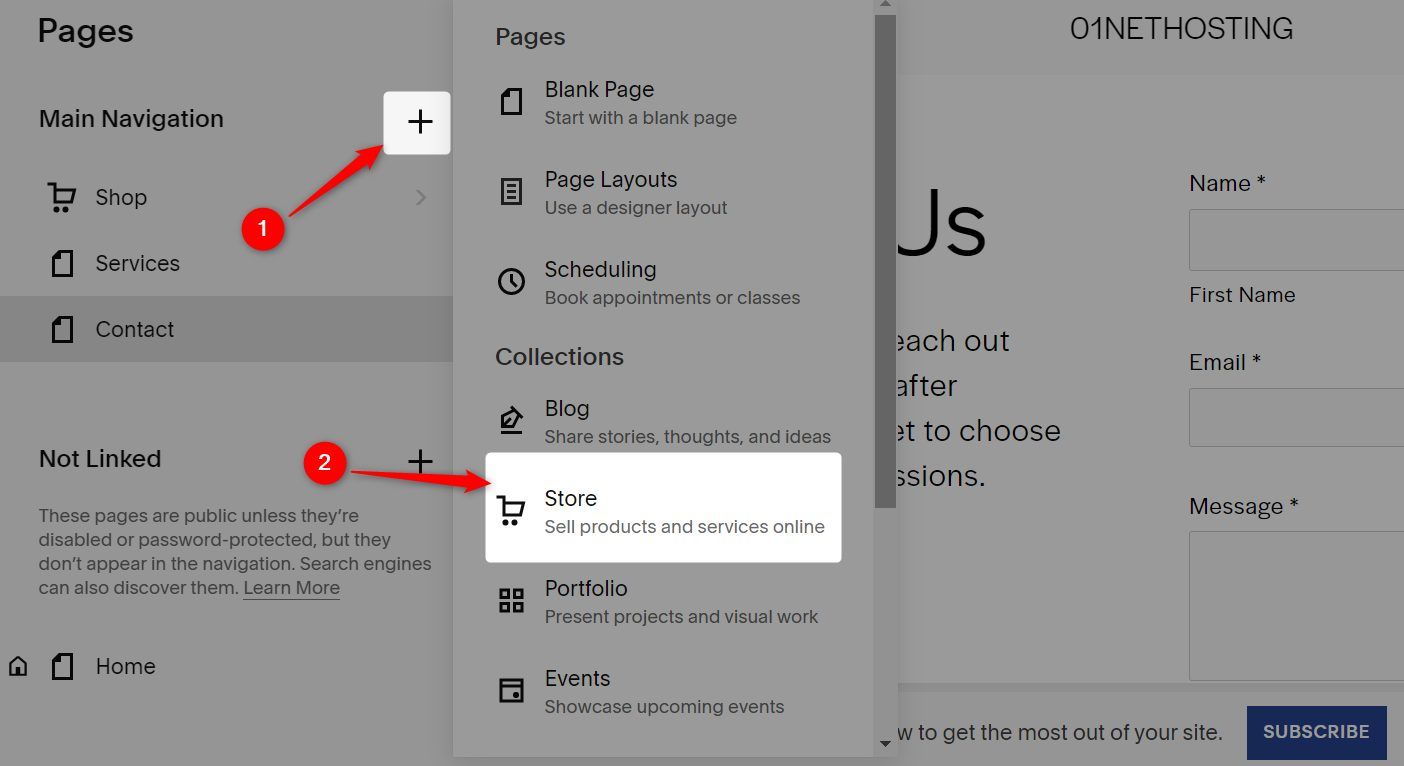
Click on the plus sign in the Main Navigation section. Then, click on the Store template type.
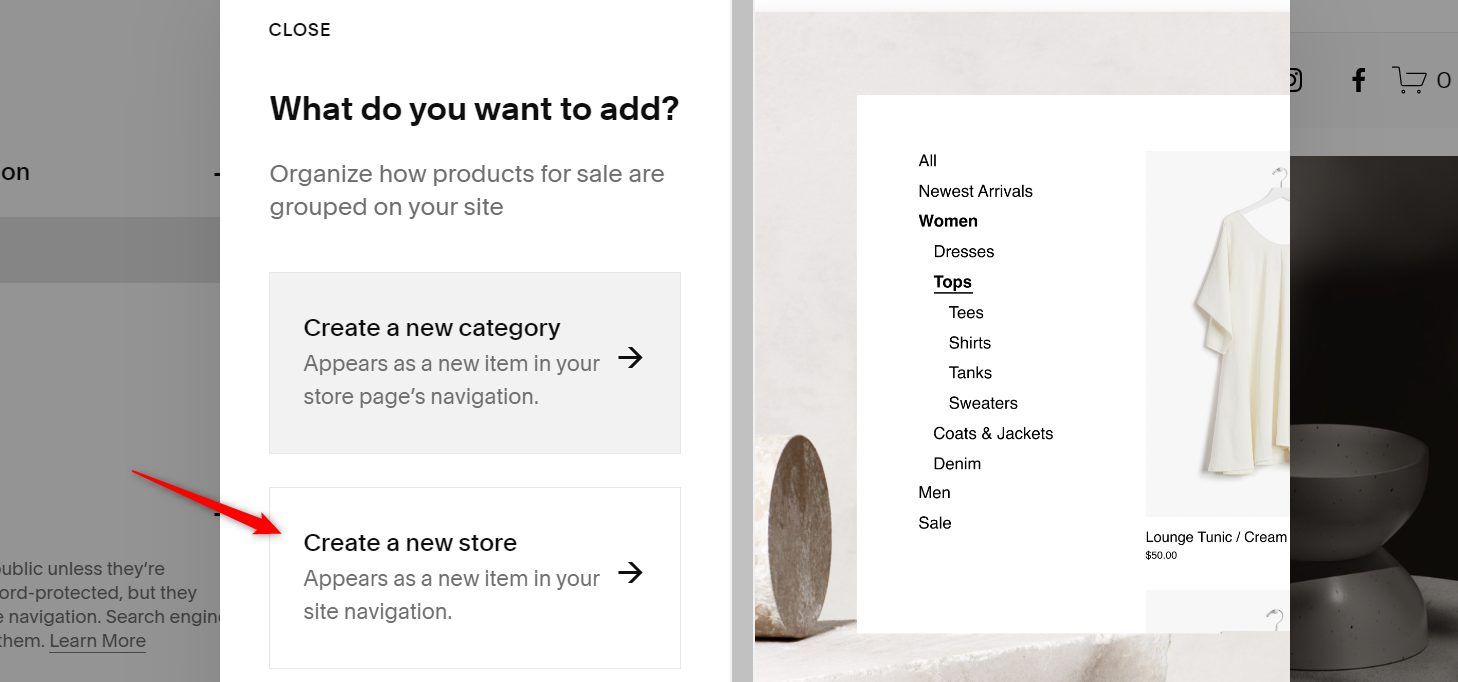
On the next page, click on the Create a new store button.
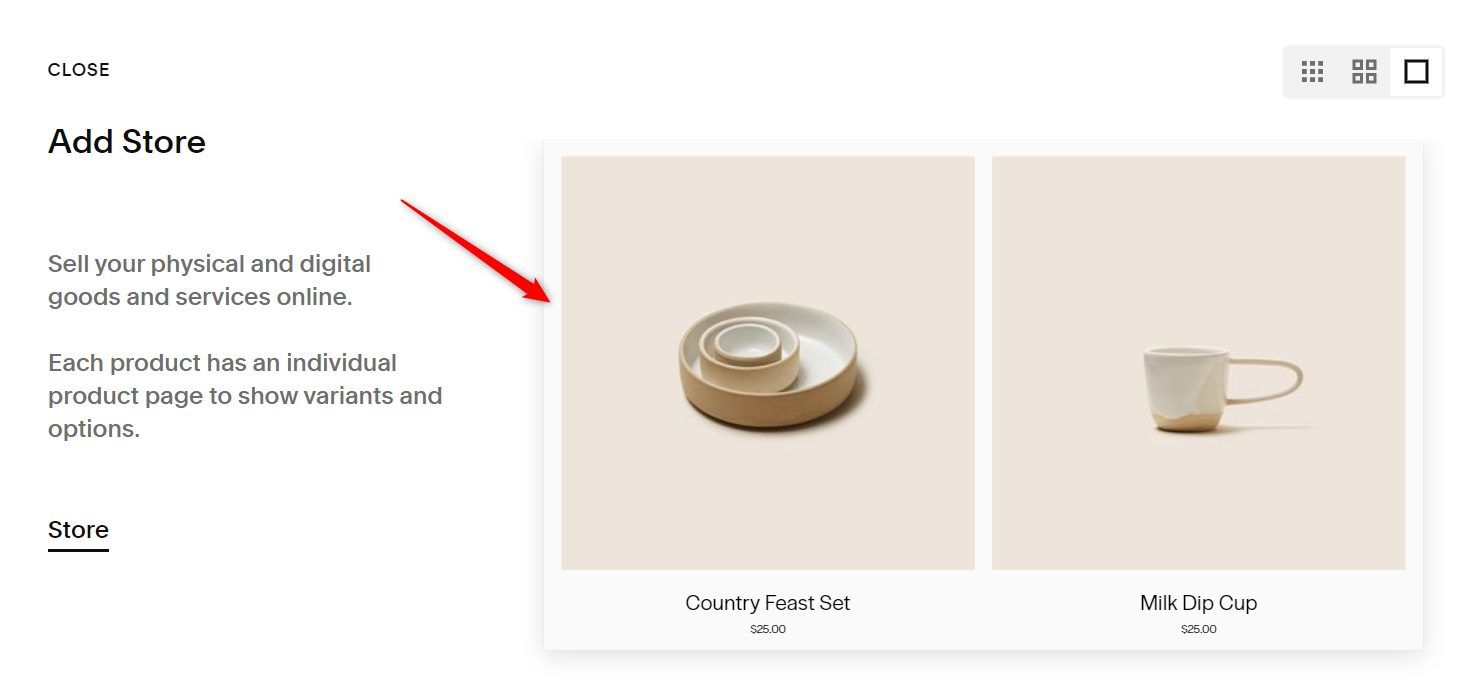
Now click on your preferred store template.
Once done, go back to the Pages screen and try to add another Store page.
This time, choose the Create a new category option.
Select the store for which you would like to create a category.
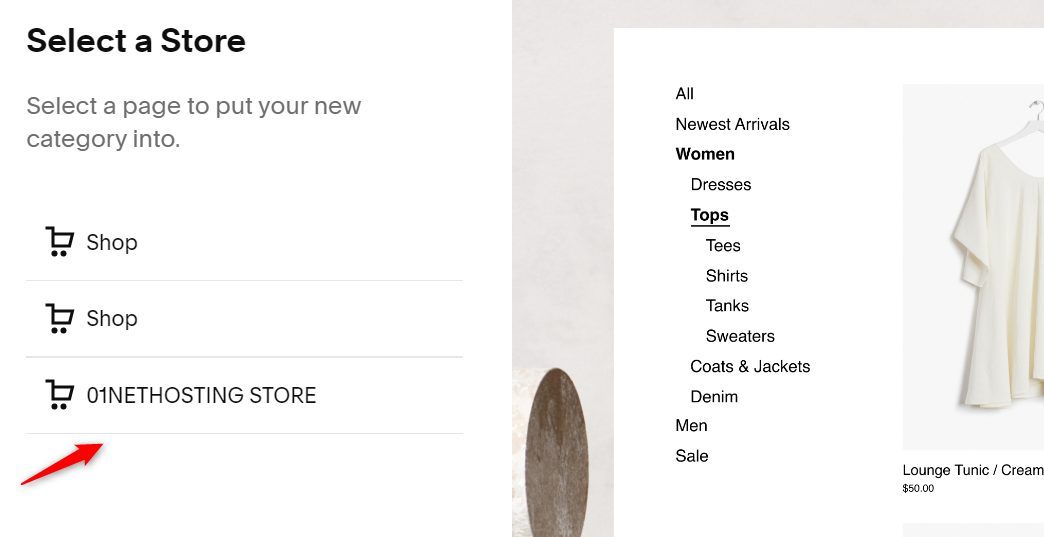
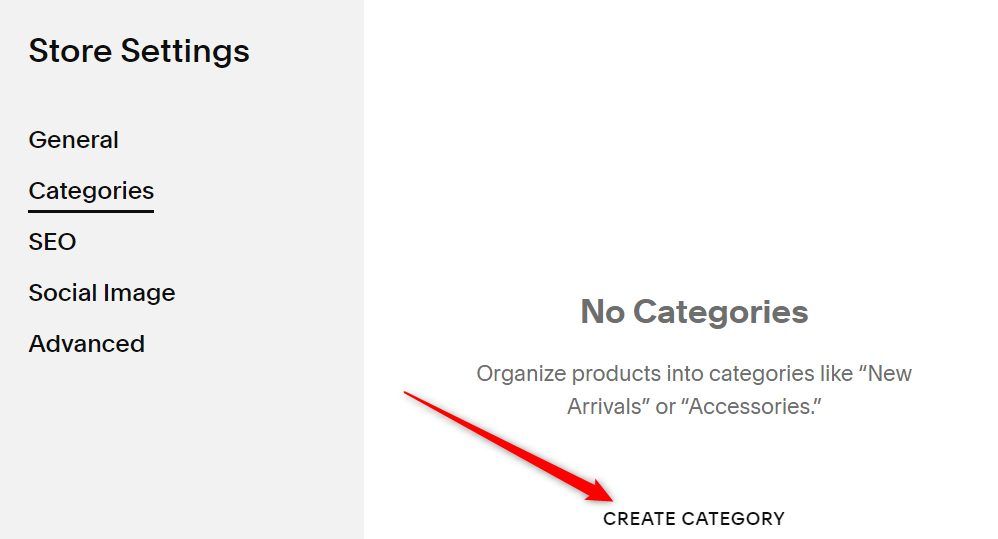
Click on the CREATE CATEGORY link.
Type the name of the category you would like to create and click on the ADD link. Repeat this for as many categories as you want to add to that store.
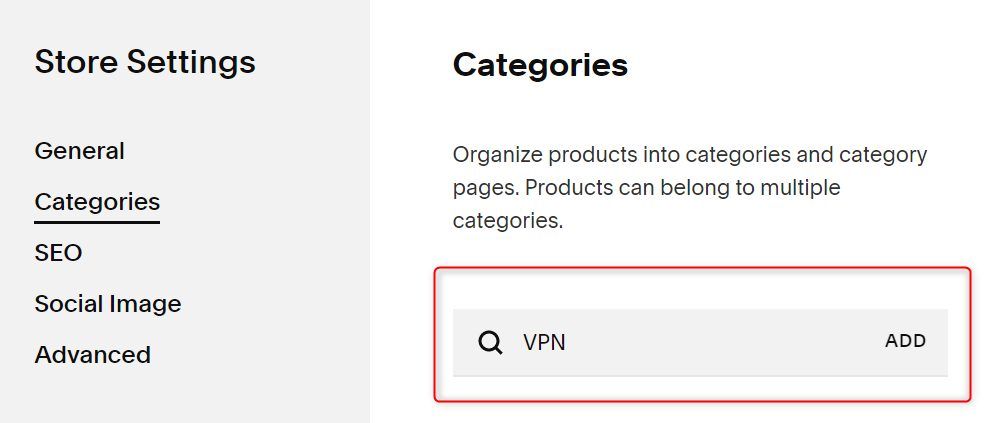
Hint: A store can be dedicated to clothes and each category can be a different type of cloth, like tees, skirts, tanks, etc.
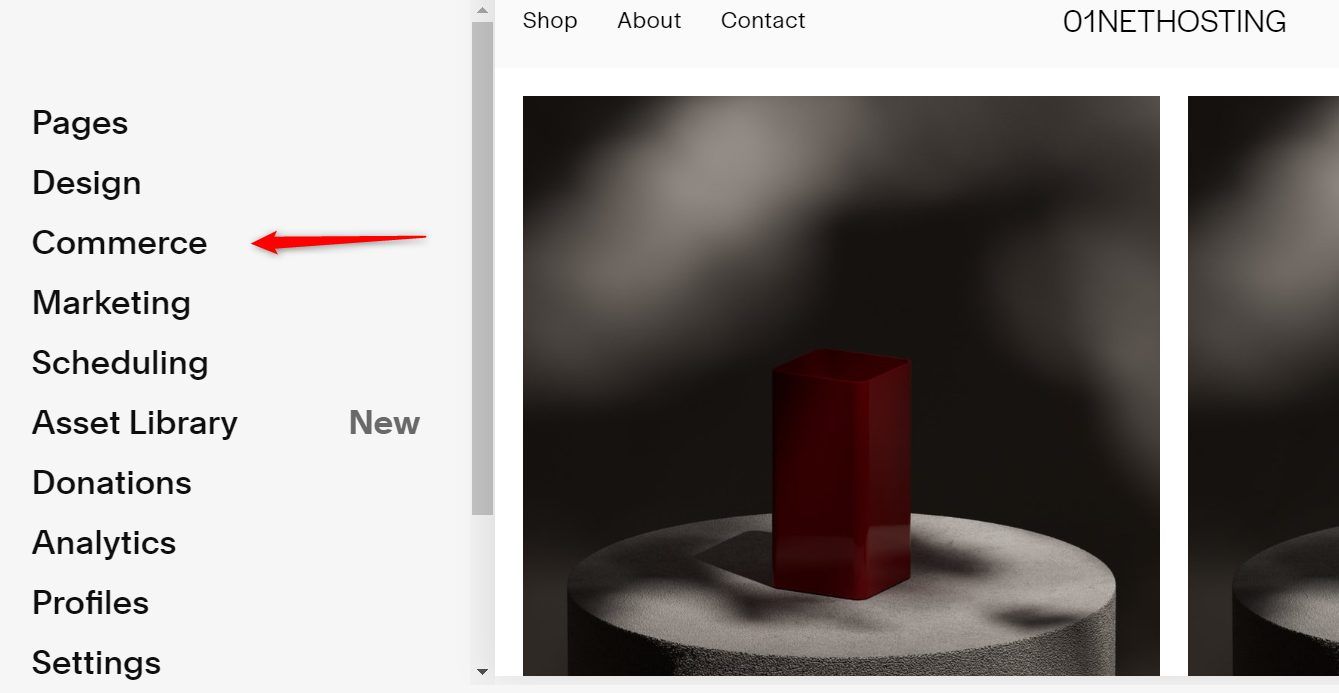
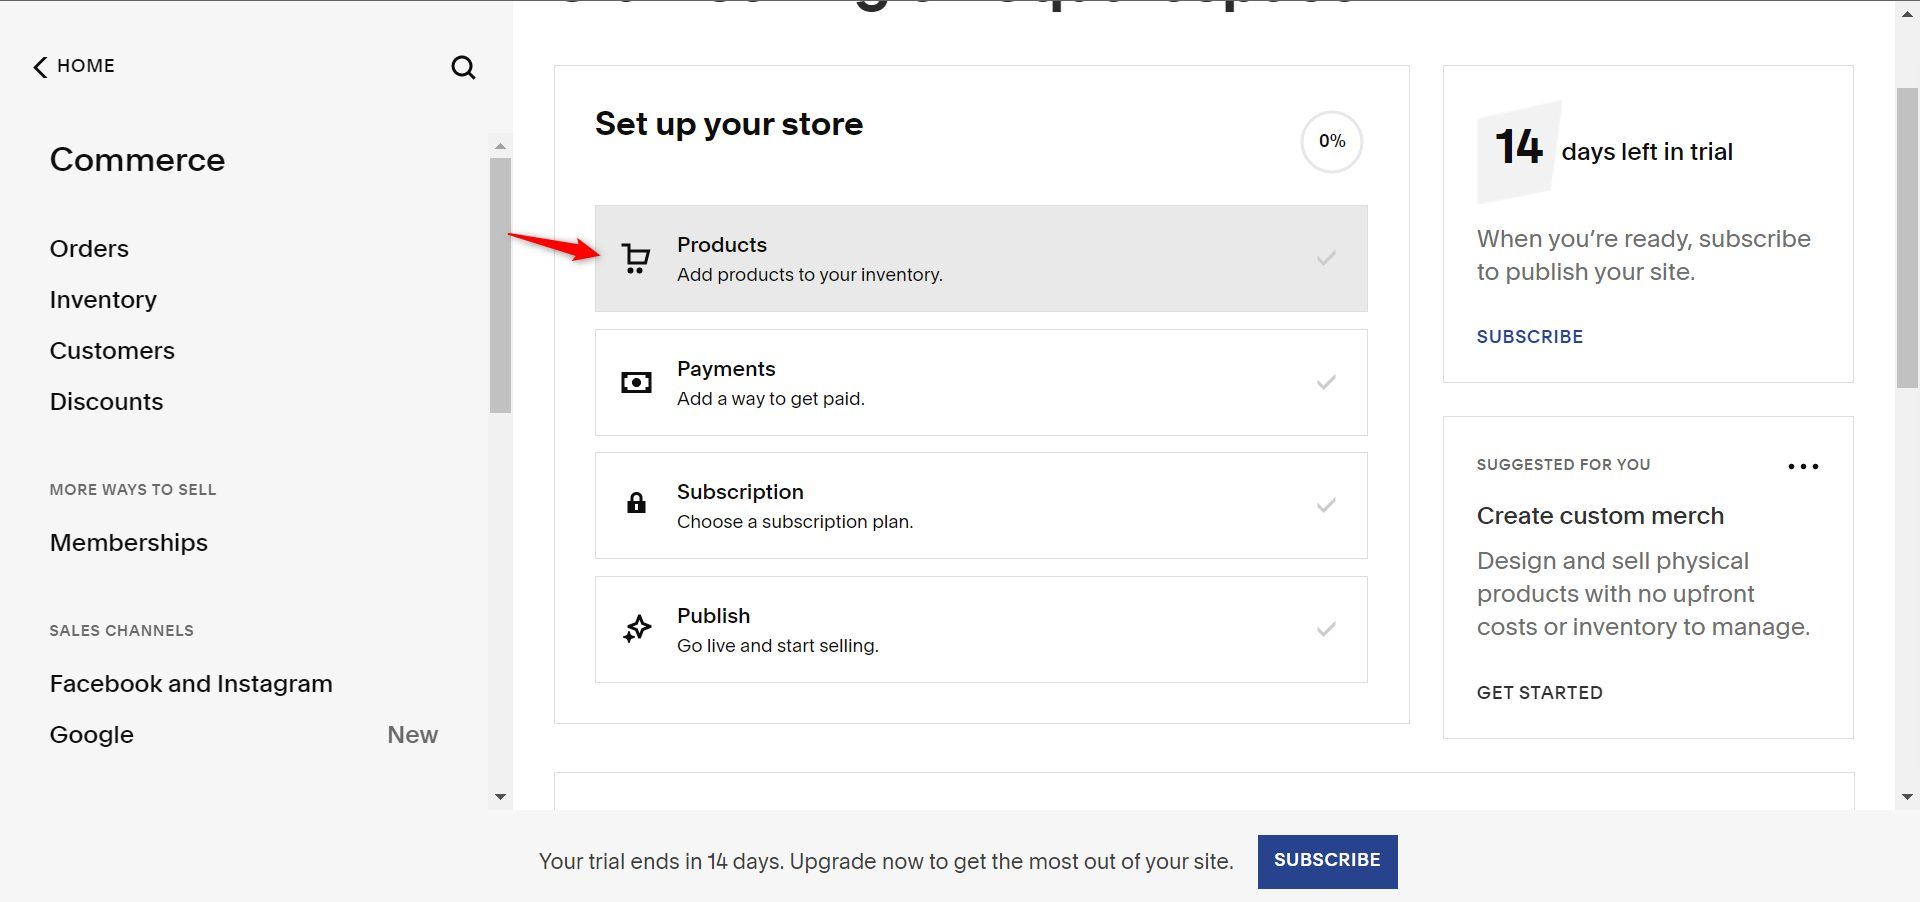
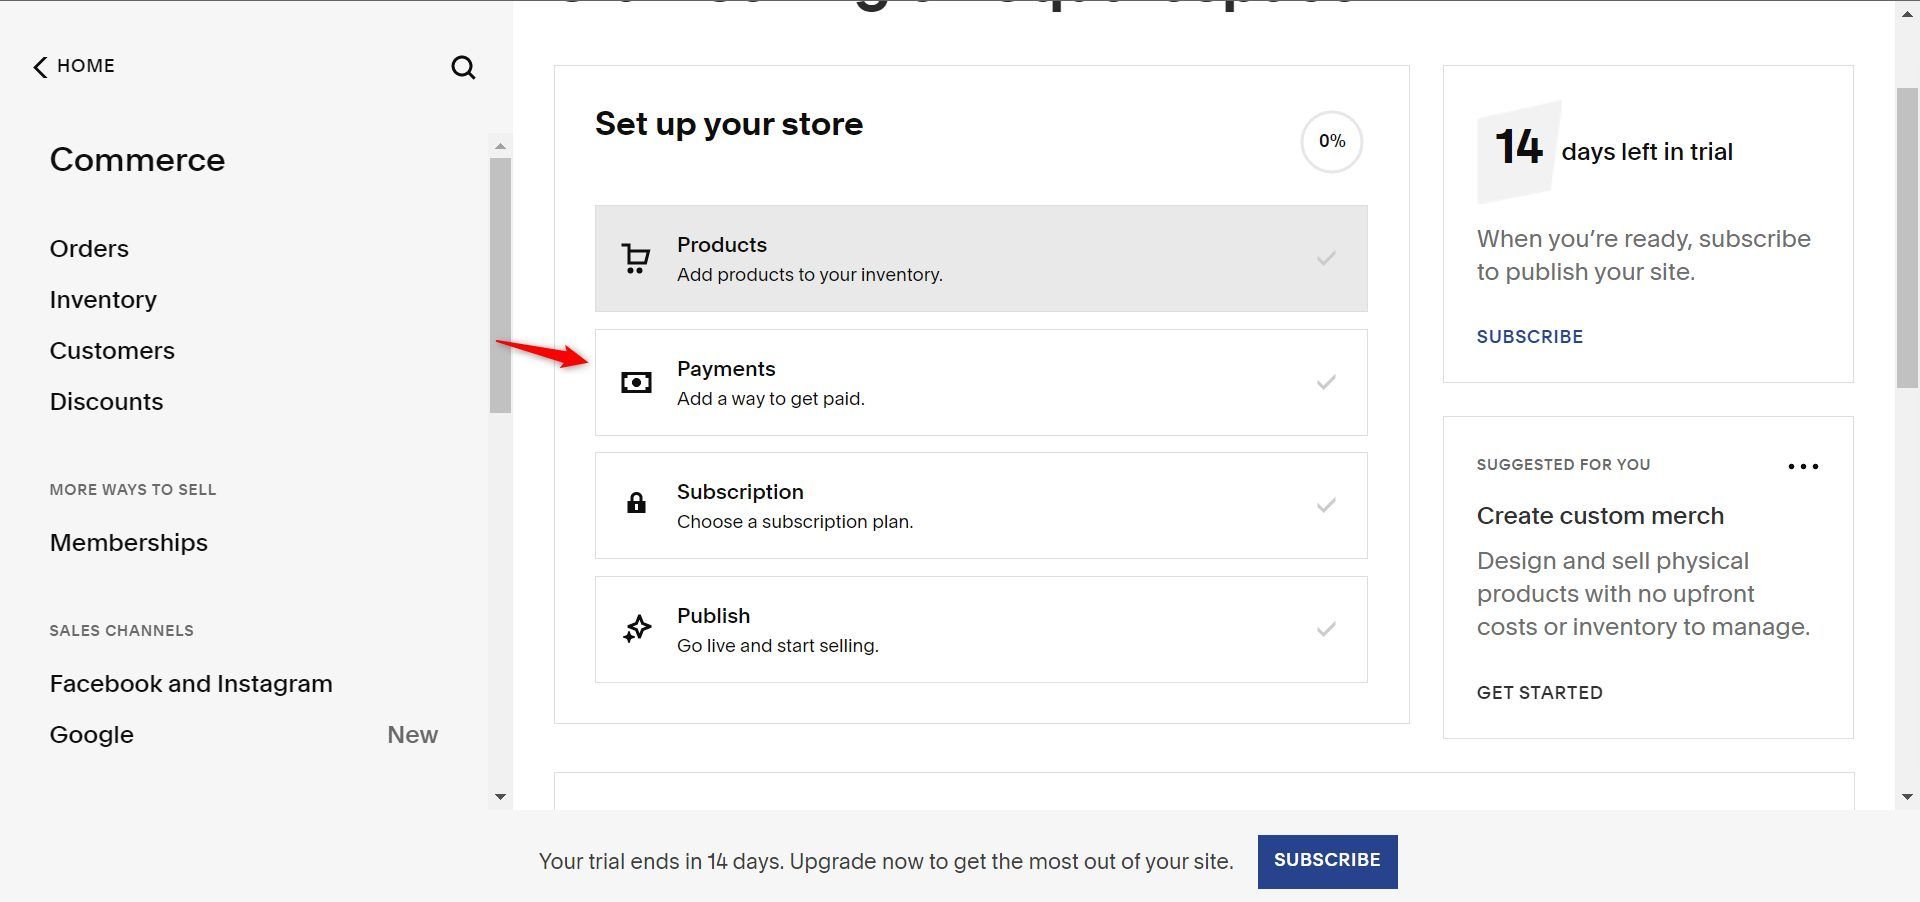
Afterward, go back to the main editor page (not full screen). Then click on the Commerce link in the sidebar.
Click on the Products button in the Set up your store section.
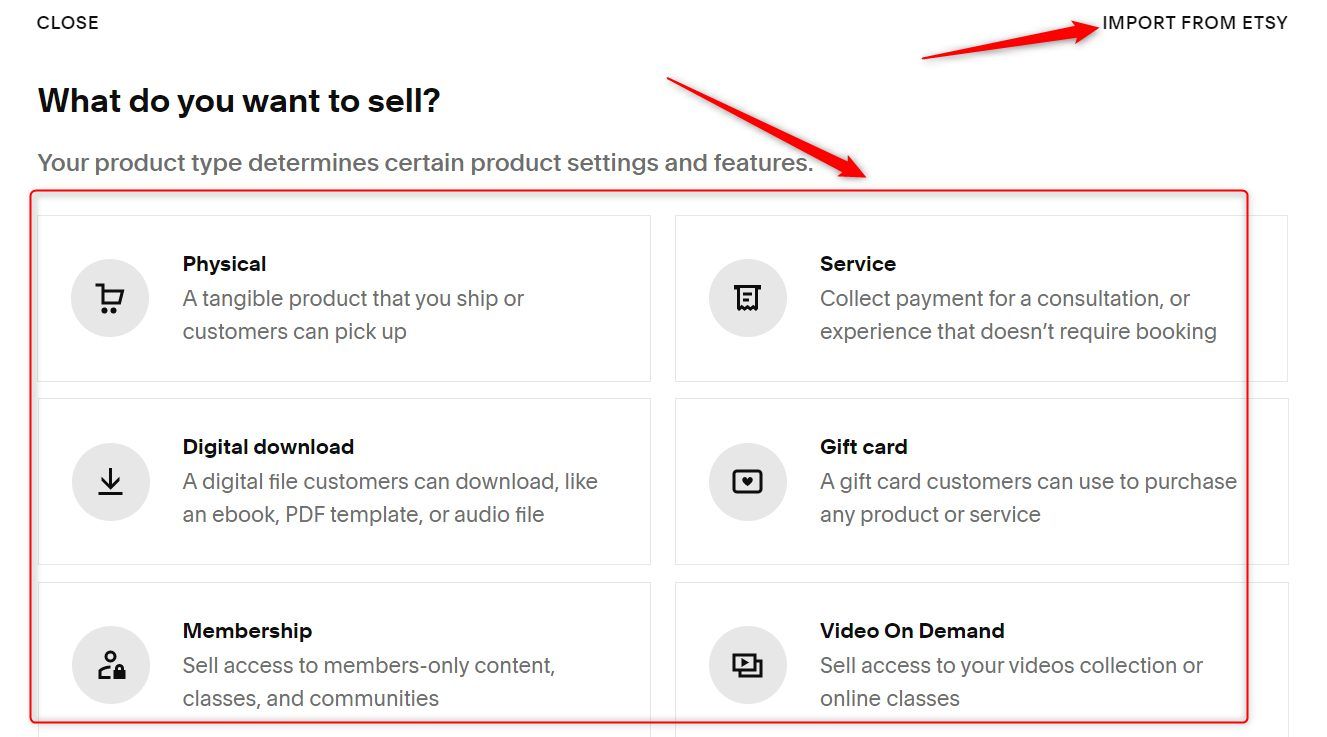
Then choose the type of product you’d like to add by clicking on it. Alternatively, you can click the IMPORT FROM ETSY link to sell Etsy products in your Squarespace store.
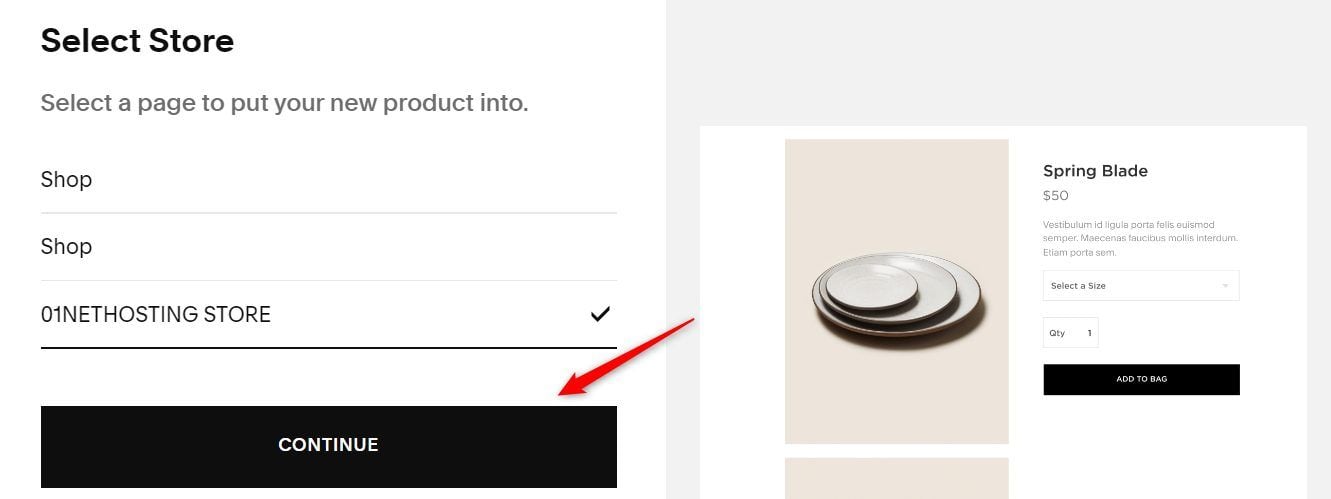
Select the store where you want to add a product and click the CONTINUE button.
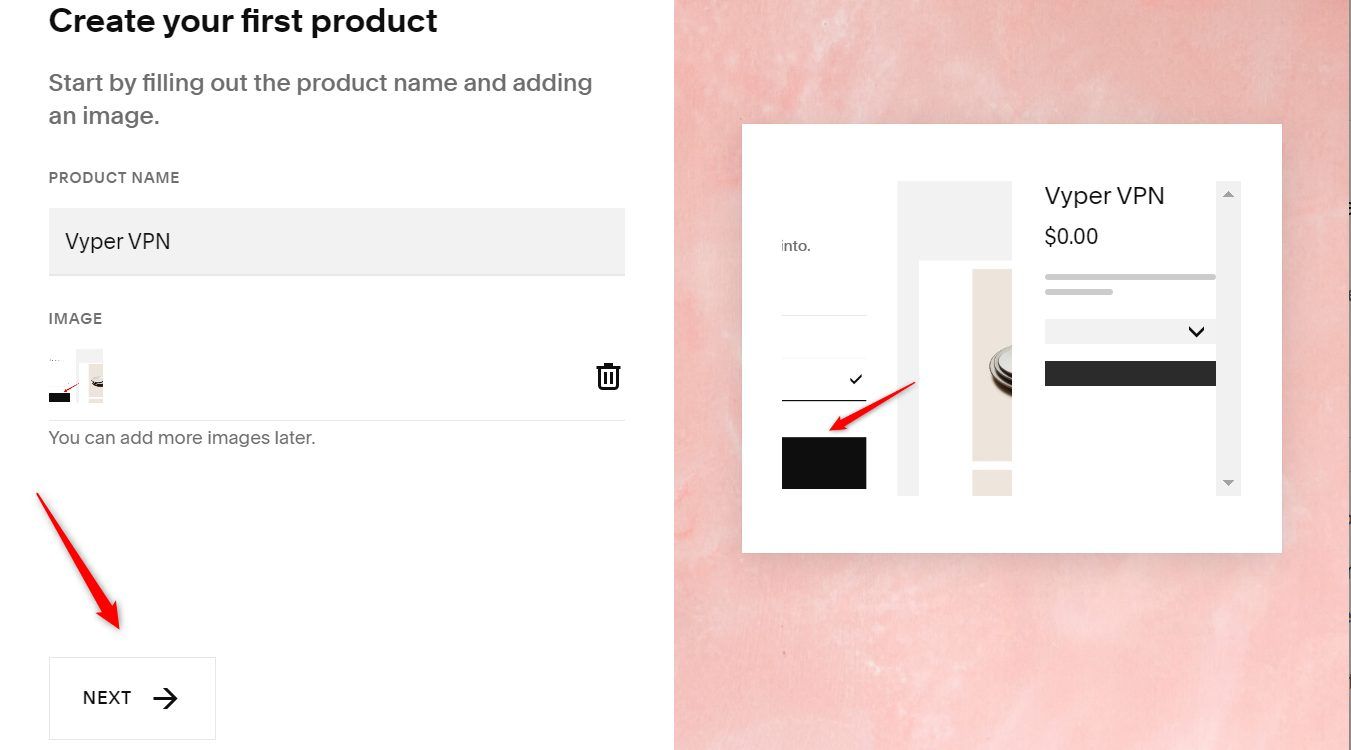
Now, type the name of your product and upload an image of it. Click on the NEXT button afterward.
Set your price and declare your inventory. Then, click on the ADD MORE DETAILS button.
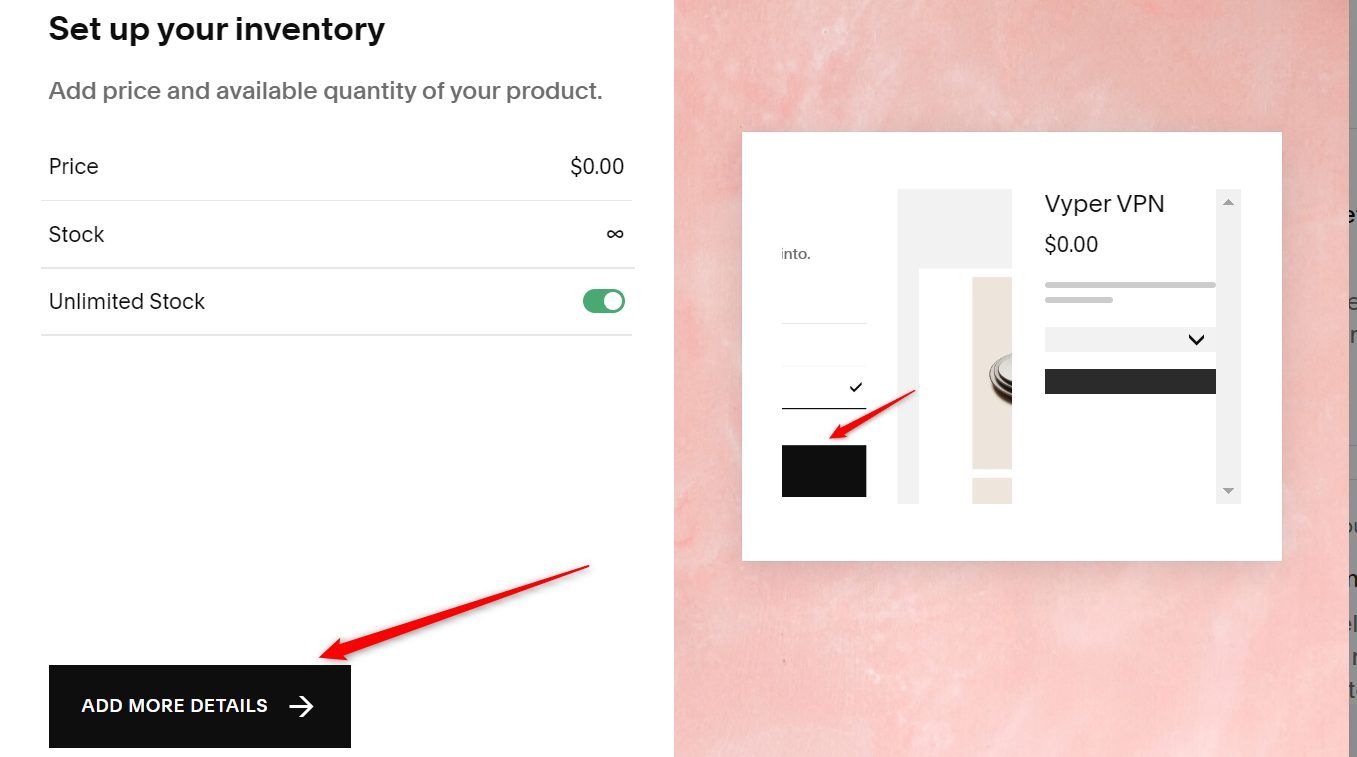
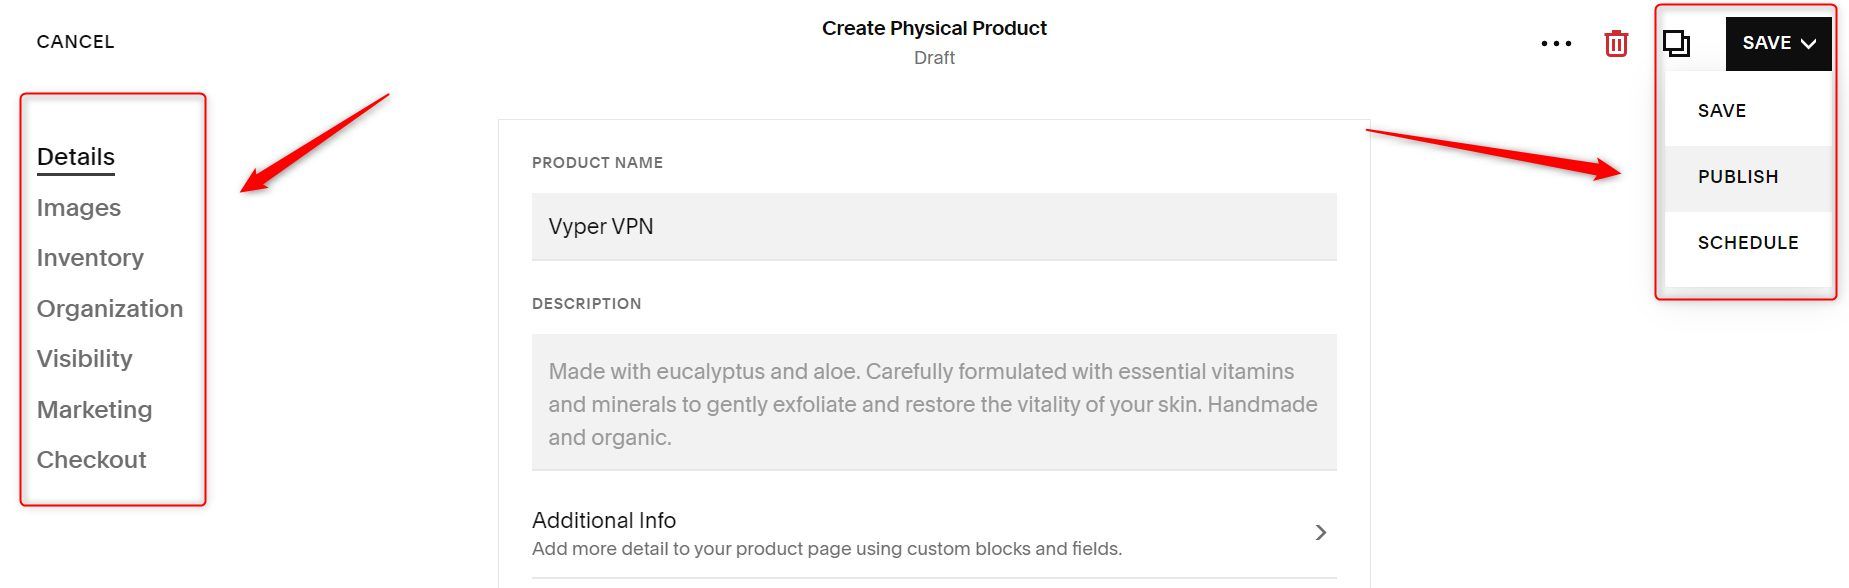
You can now add more details to your product, including the SEO settings (title, URL, and meta description). Click the SAVE button afterward and choose whether to save, publish or schedule the product.
Repeat this process for every product you want to add on your online store.
Payments and Order Fulfillment
Setting up your payment is the next step on how to create your eCommerce website on Squarespace.
Create an eCommerce with Squarespace
To do that, go back to the Commerce Dashboard. This time, click on the Payments button.
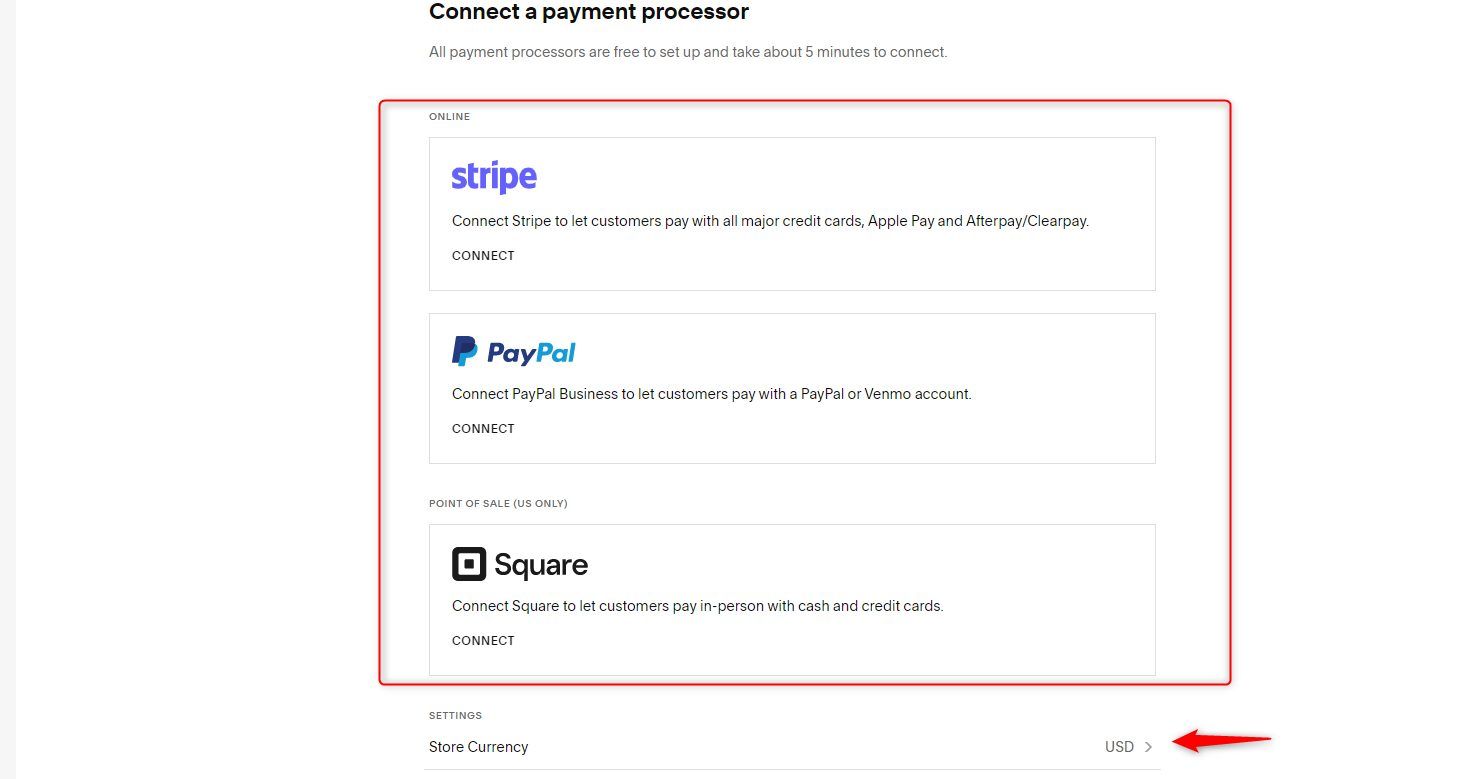
Click on the CONNECT link under your preferred payment processor and follow the onscreen instructions. You can change your store currency as well.
Once done, go to the Commerce Dashboard again. If you sell physical products that must reach the end user, click the Fulfillment button.
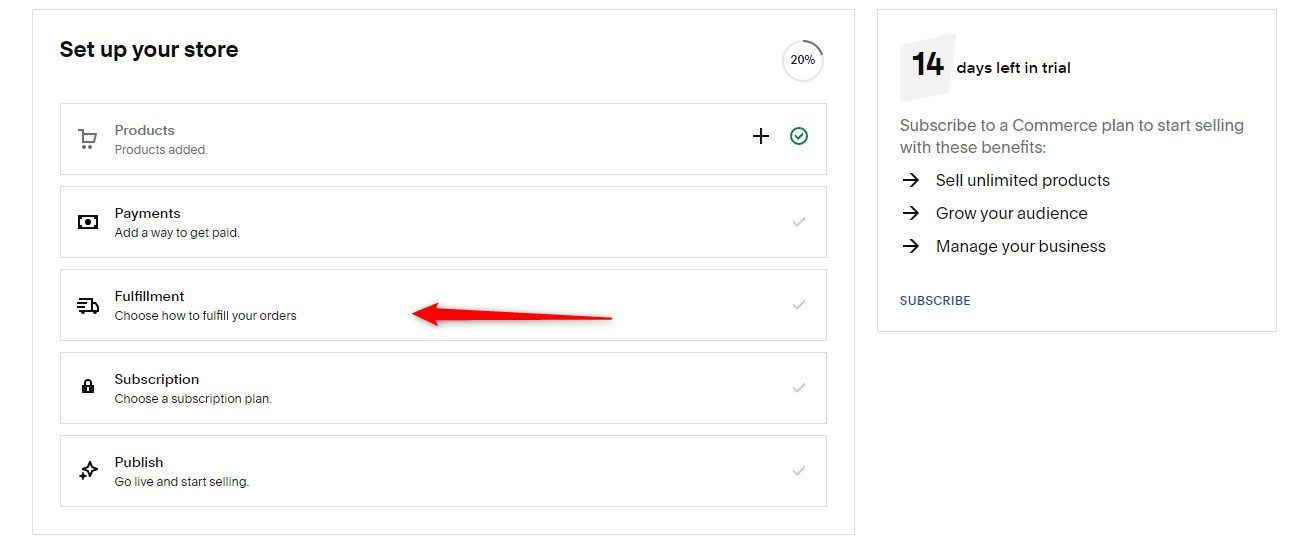
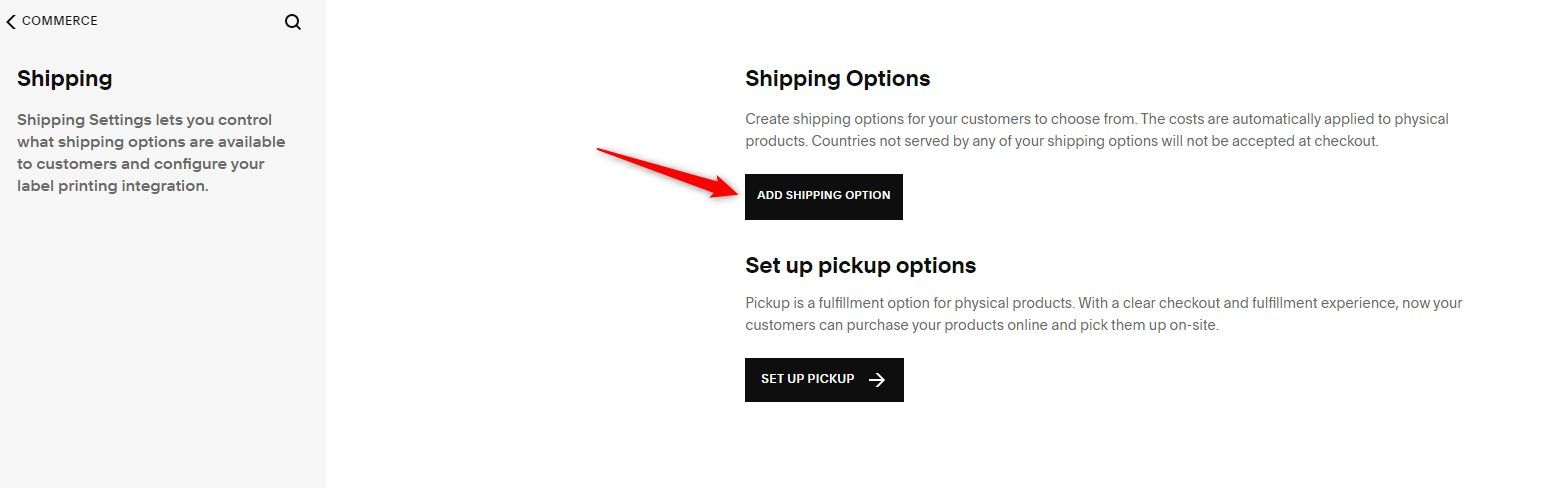
If you can ship the products to the buyers, click the ADD SHIPPING OPTIONS button. Enter the required information on the next pages.
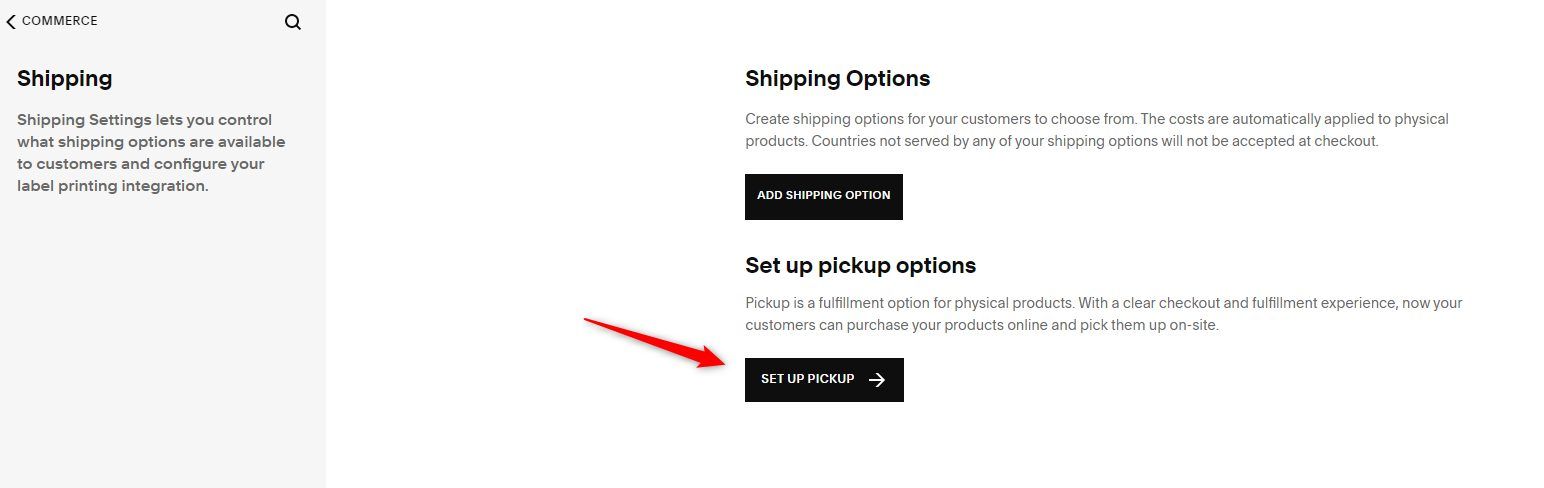
Click on the SET UP PICKUP button if you have a physical address where buyers can come to take what they buy and provide the details.
Customize Other Store Settings
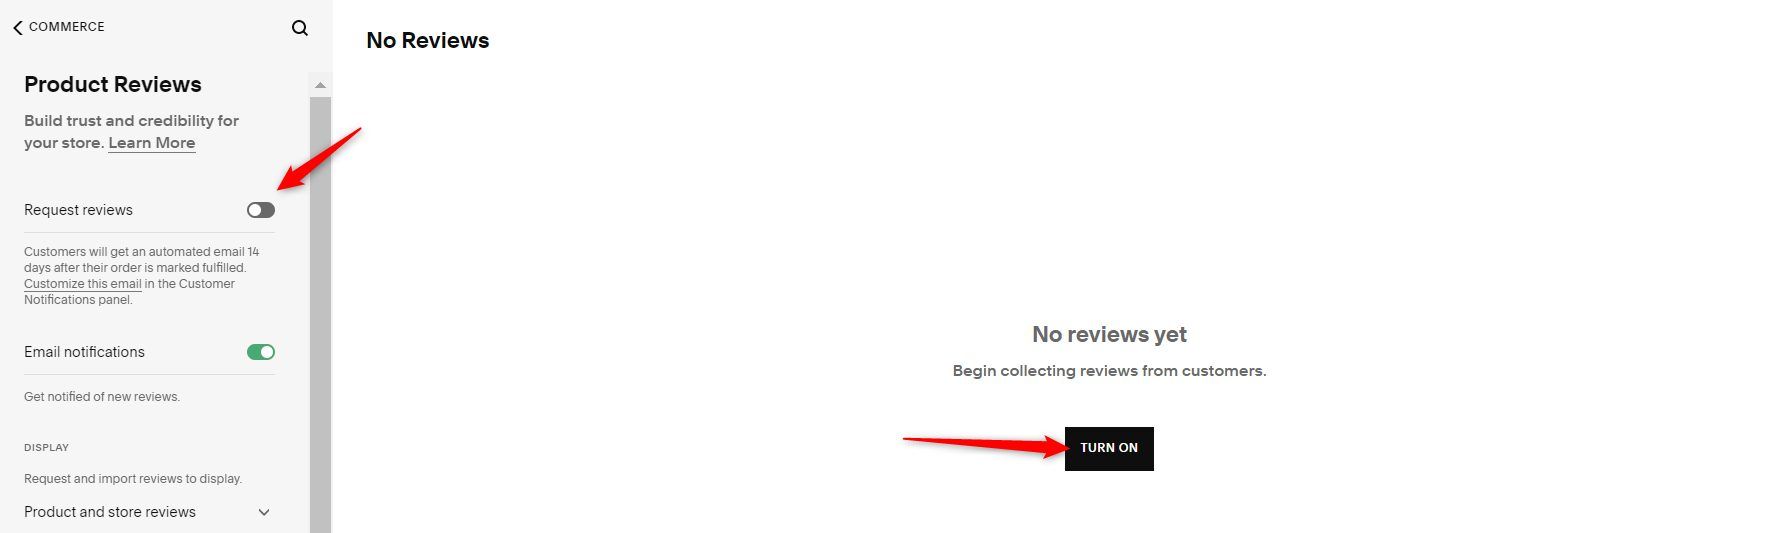
Now go back to Commerce >> Product Reviews.

Click on either the TURN ON button or the Request review toggle button.
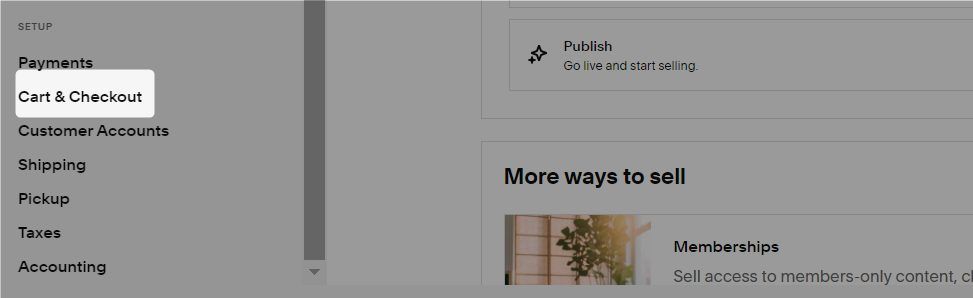
Then navigate to Commerce >> Cart & Checkout.
Toggle on the Abandoned checkout recovery option.
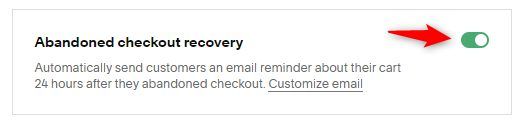
These are the most important settings to get you started. You can customize more later.
4. Do Your SEO
It is important to ensure the SEO of the website you create on Squarespace is perfect for ranking.
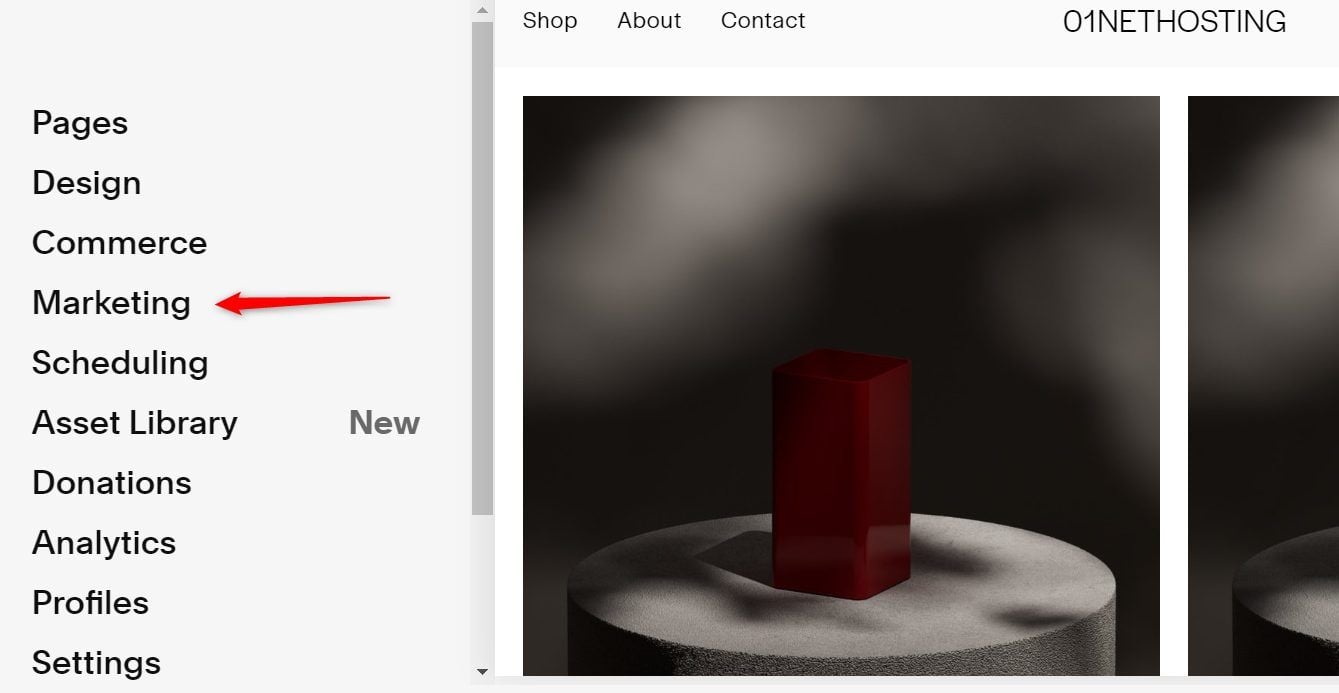
To do that, go back to the main editor page. Click on the Marketing link.
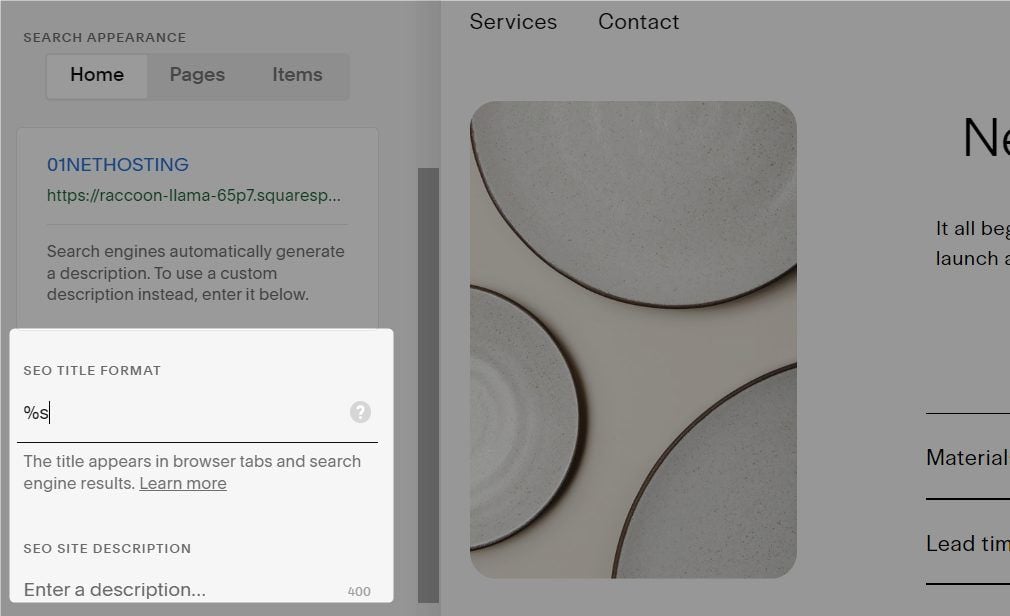
Then navigate to the DISCOVERY section and click on SEO.

Set the SEO title format and the meta description of your homepage.
Afterward, switch the tabs to set the title format for other pages and items.
To set the SEO of individual pages, go to the Pages screen.
Hover your cursor on the page and click on the settings button or icon beside the name.
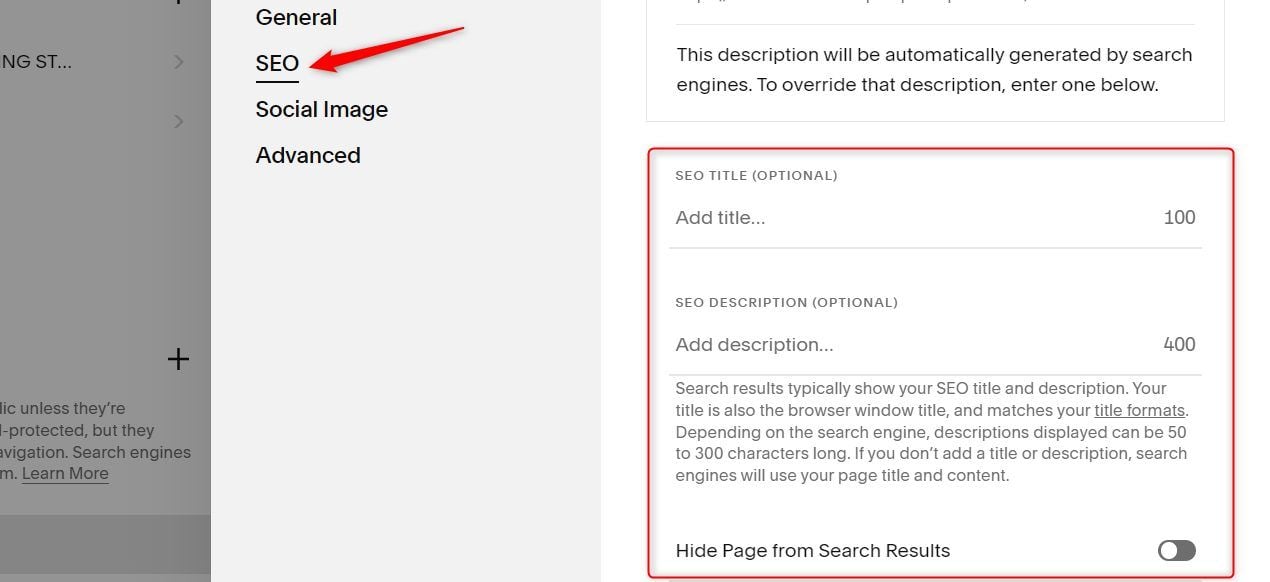
Click on the SEO link and set your SEO title and meta description. You may also decide not to index a particular page on search engines by toggling on the Hide Page from Search Results option offered by Squarespace.
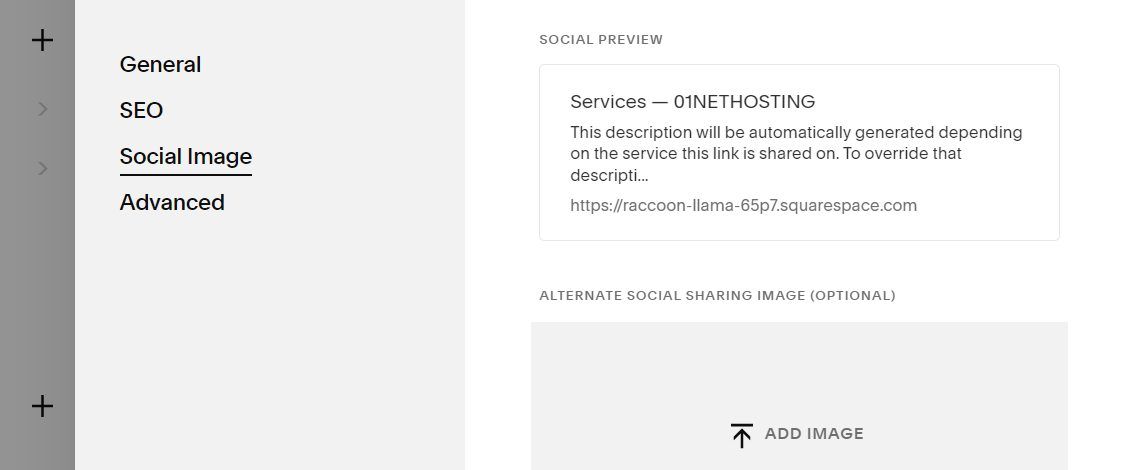
Additionally, for better social SEO, you may add an alternative image.
5. Create a Blog Post
If you are creating a website on Squarespace for blogging purposes, knowing how it works is important. You need to first create a page for your blog posts.
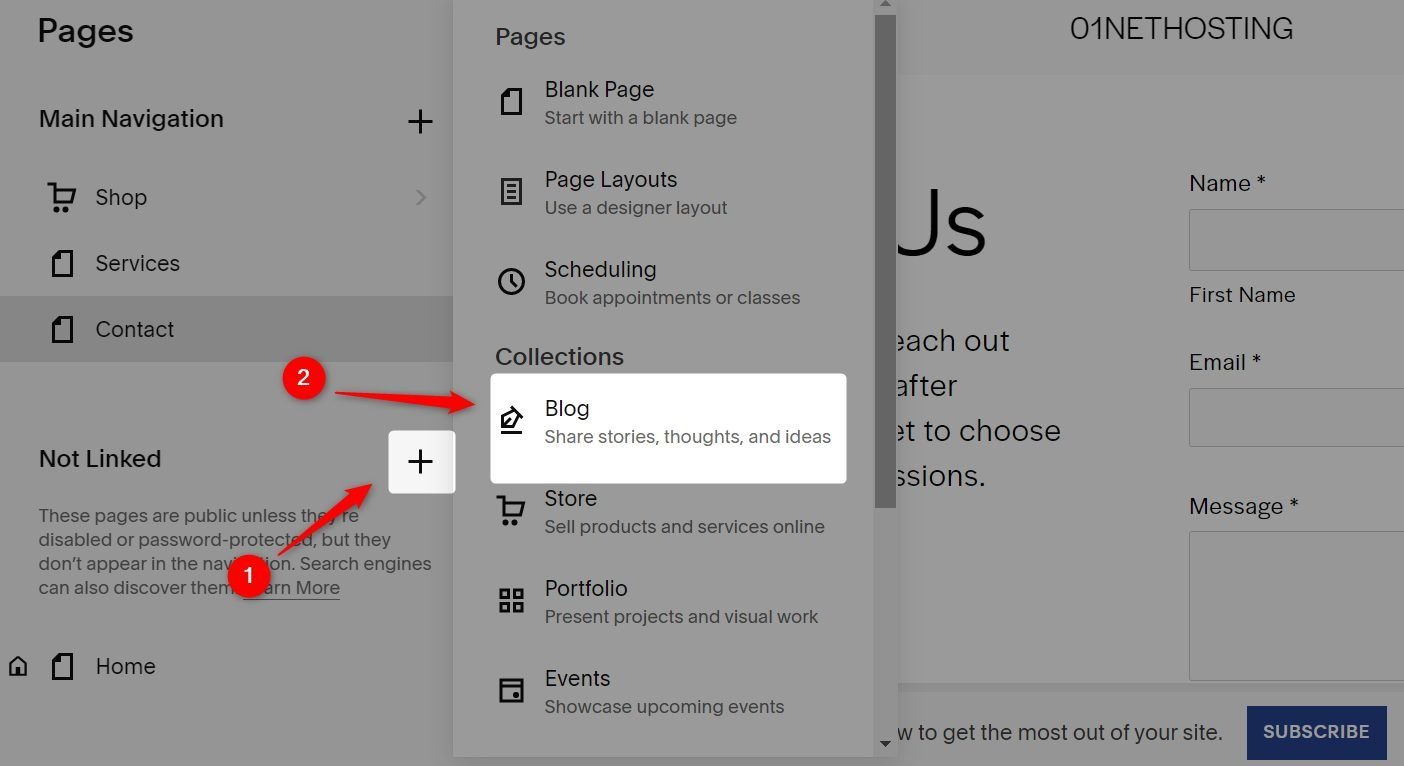
To do that, go to the Pages screen. Then, click on the + plus sign and choose the blog page type.
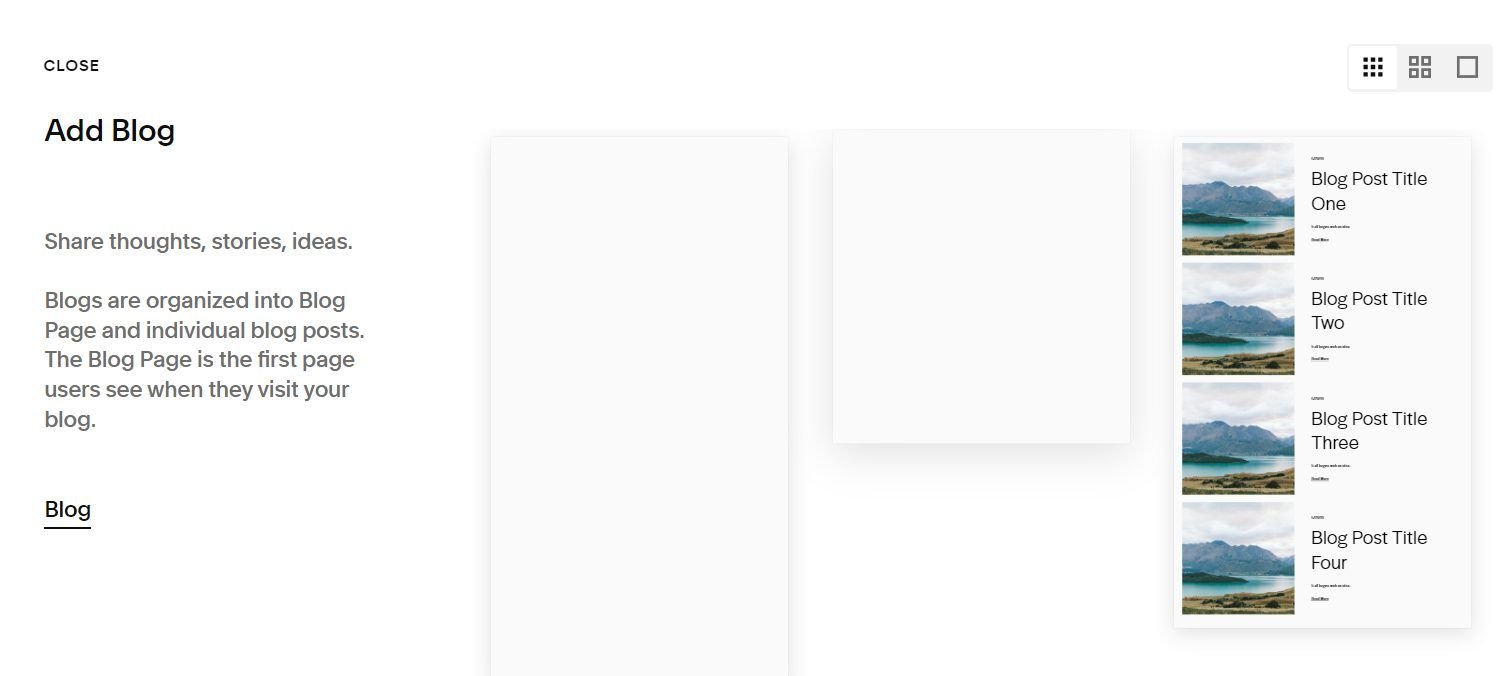
Choose your preferred blog template by clicking on it.
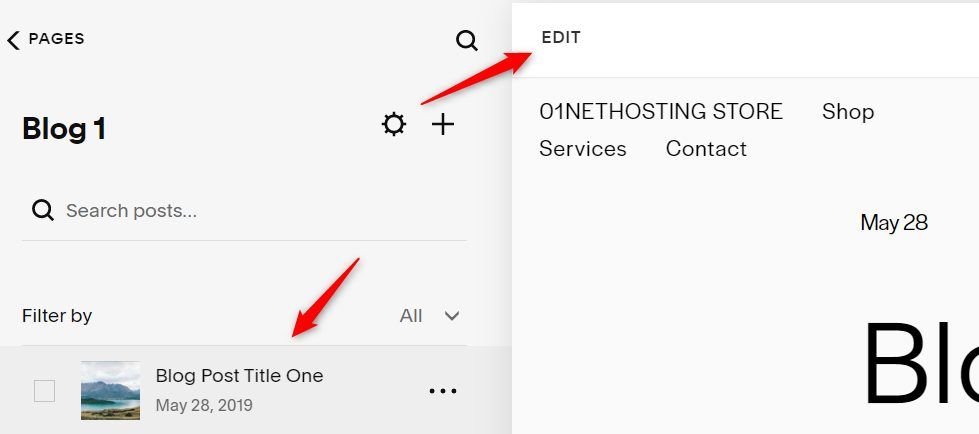
Still, on the Pages screen, scroll down to the Blog page you just created and click on it.
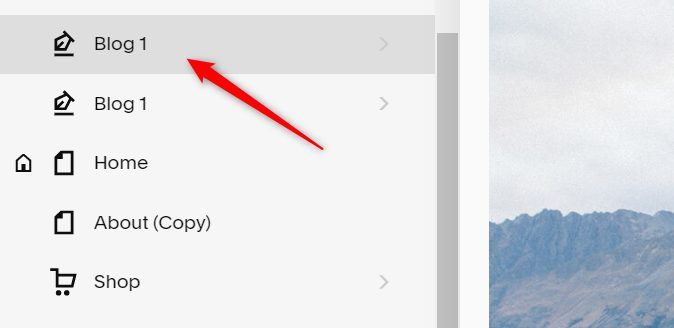
Now choose the blog post you want to edit by double-clicking. Then click on the EDIT button to launch the full screen editor.
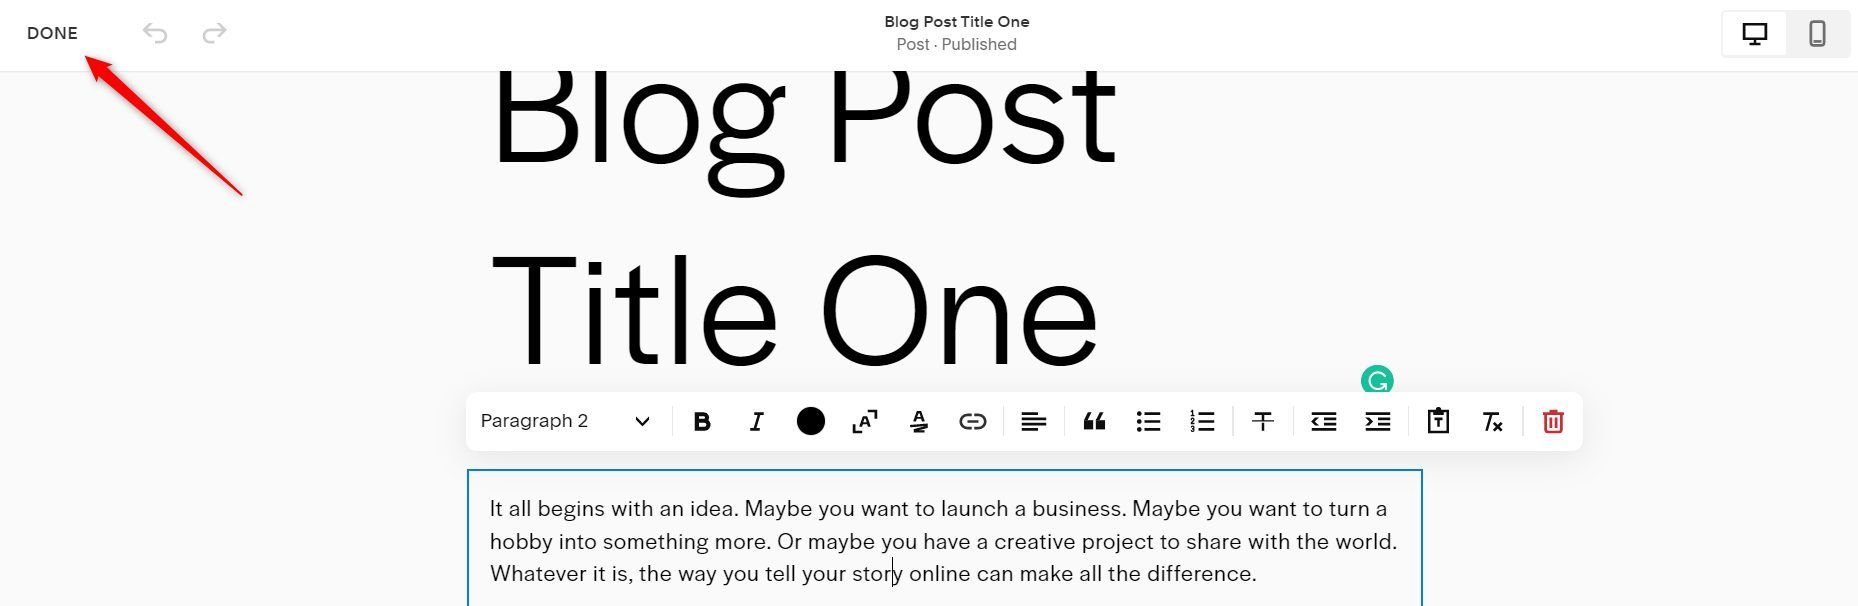
Edit the blog post and click on the DONE link when you are done.
6. Purchase Squarespace Subscription
Now that you have successfully built a website with Squarespace, it is time to link the site to your domain and purchase a premium package to access more features.
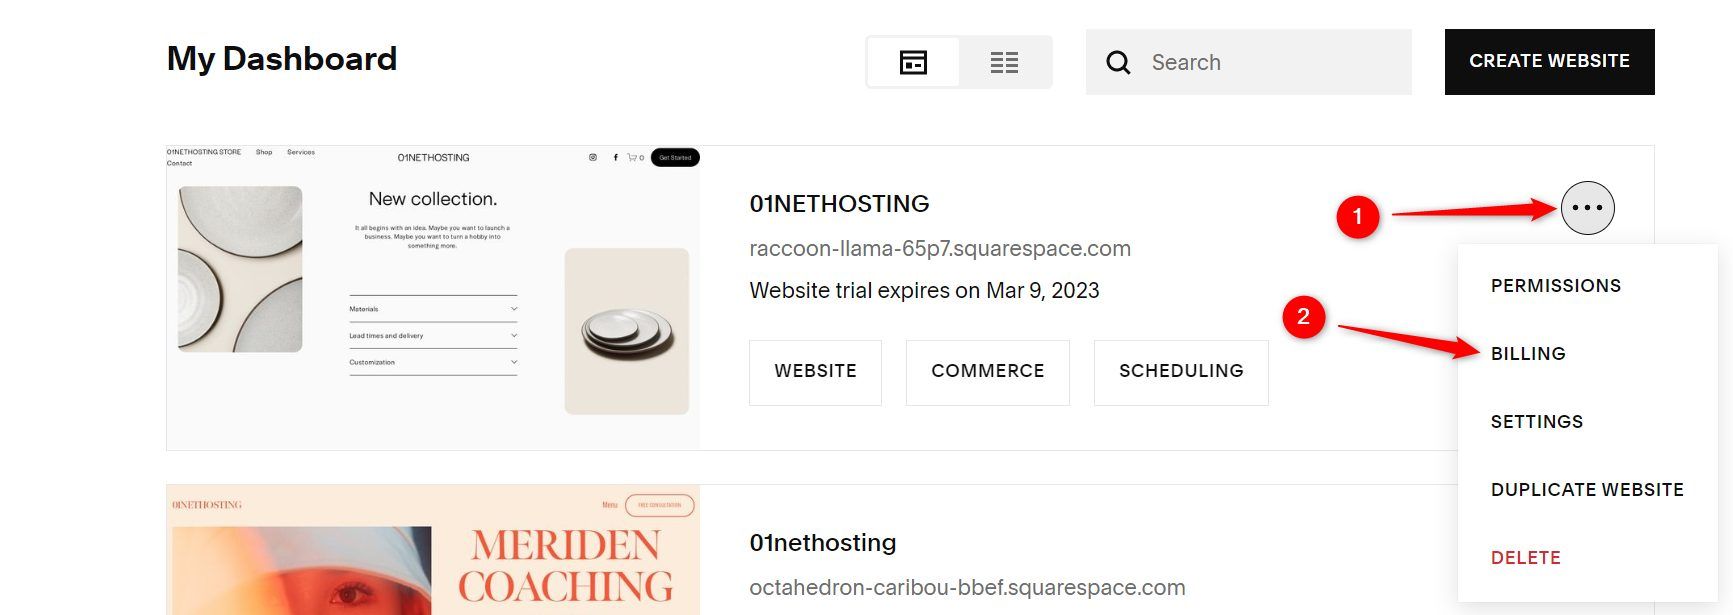
Go back to your Account Dashboard. Click on the 3 dots and then click on the BILLING link.
On the next page, click on either of the trial subscriptions.
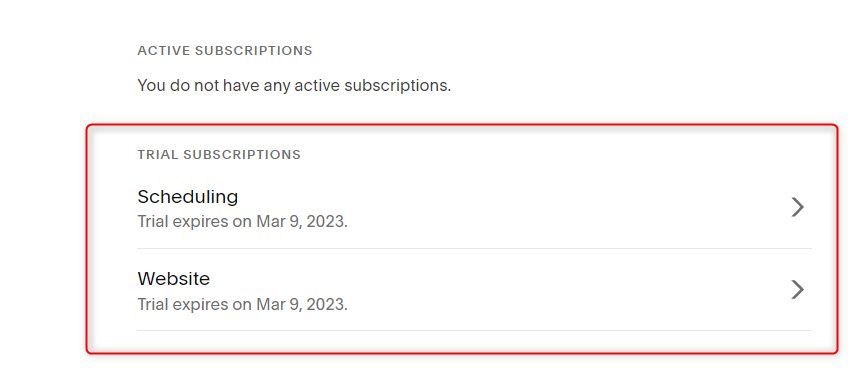
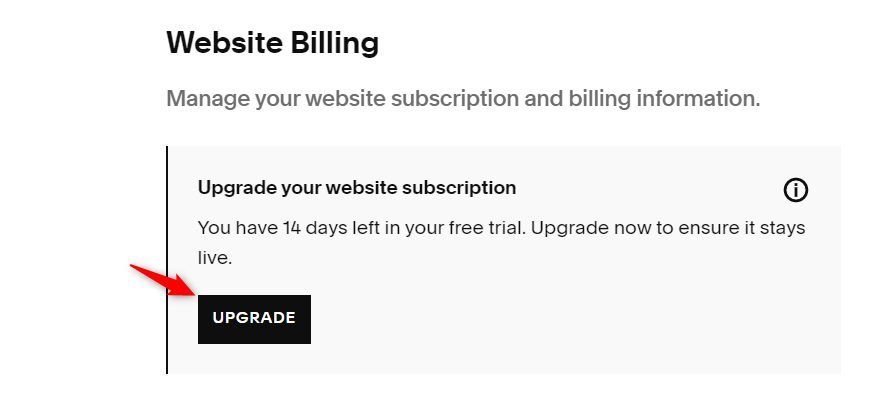
Then click on the UPGRADE button.
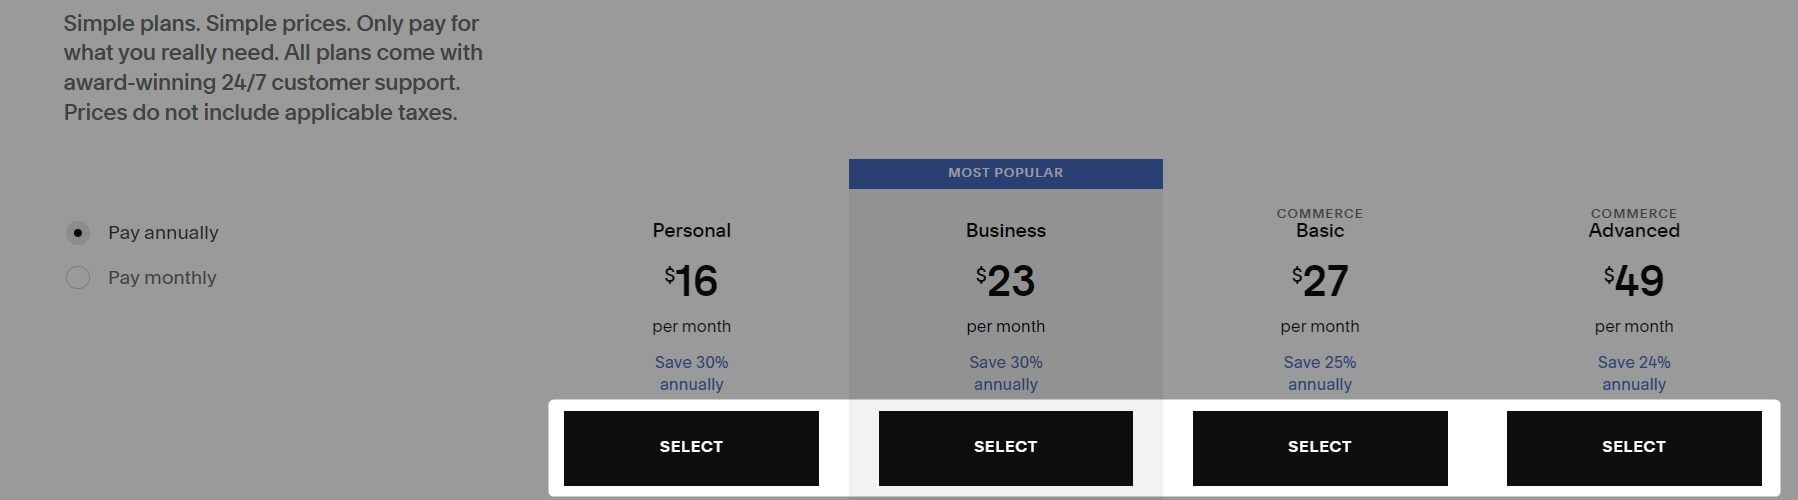
Click on the SELECT button under your preferred plan.
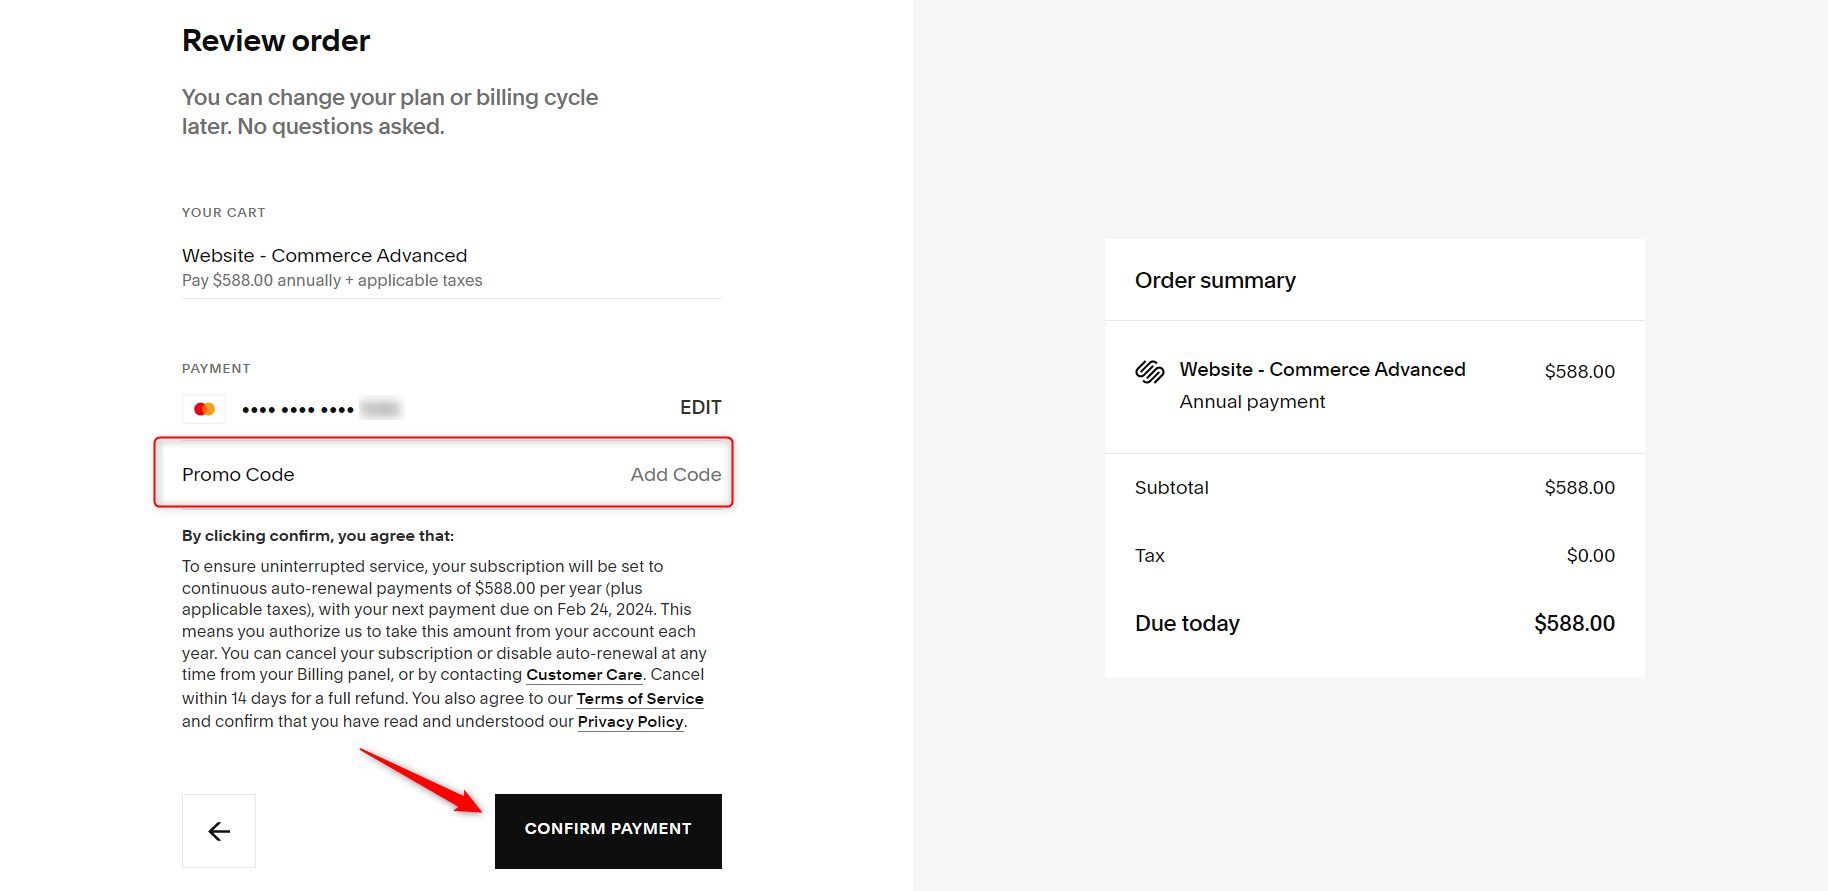
Input your card details and click on SAVE AND CONTINUE.
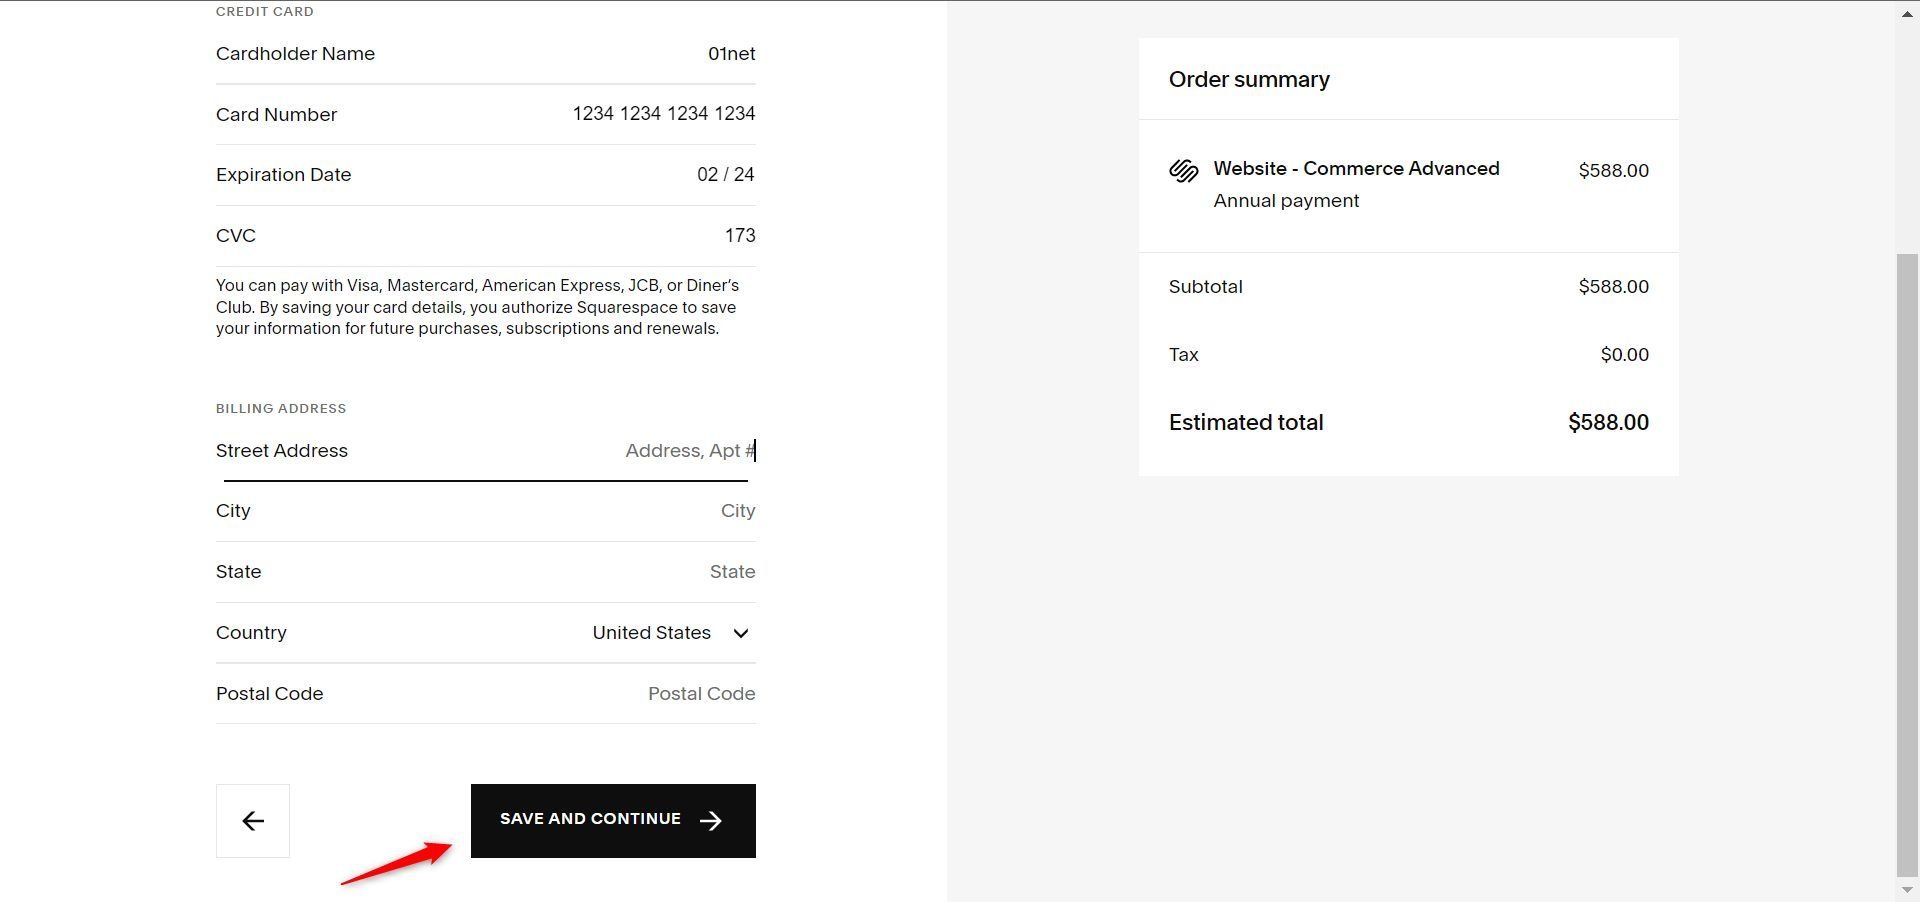
If you have a promo code for Squarespace, type it in the space provided and click on ADD CODE. Then, click on the CONFIRM PAYMENT button.
7. Connect Your Domain and Update Your DNS
The last steps when creating a site with Squarespace are connecting your domain and updating your DNS at your current registrar.
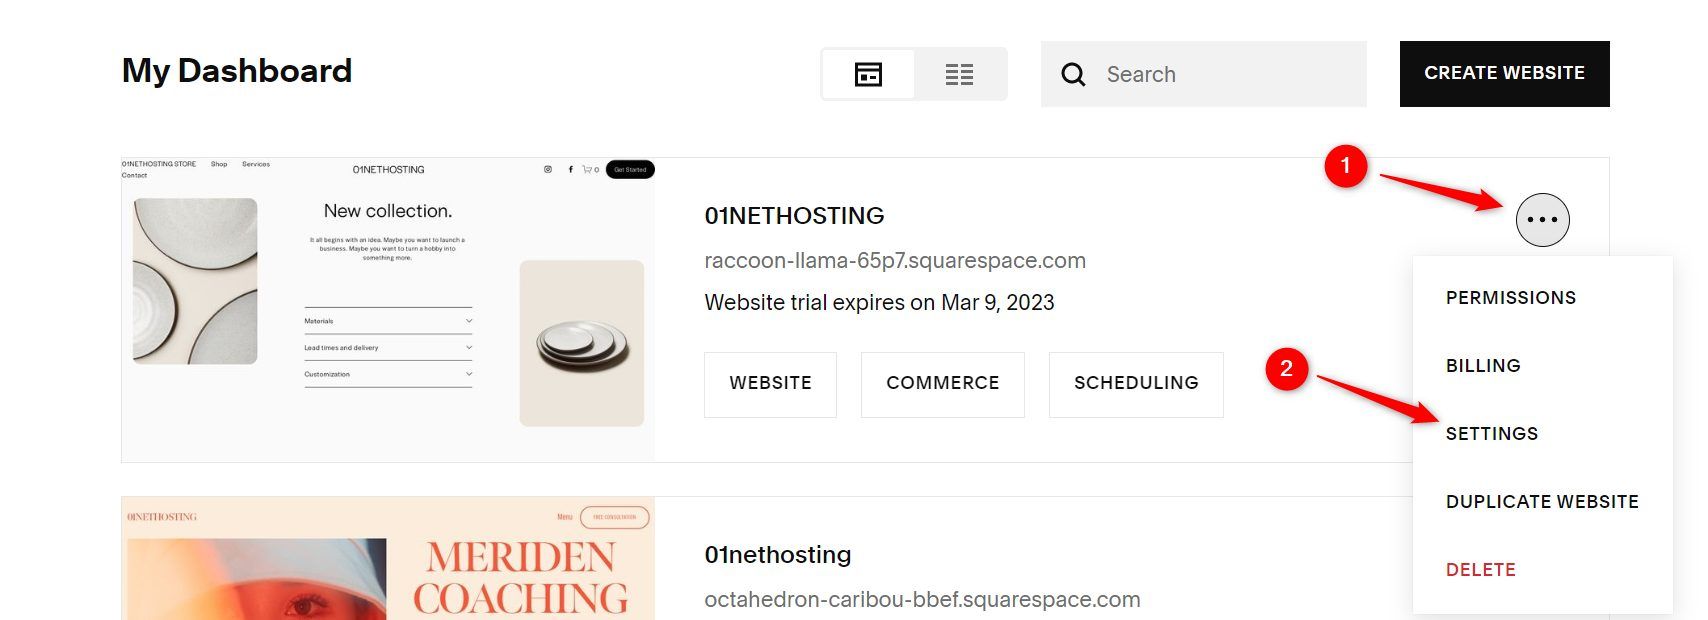
Again, go back to your Account Dashboard. Click on the 3 dots on the website you purchased the plan for, as shown below and then SETTINGS.
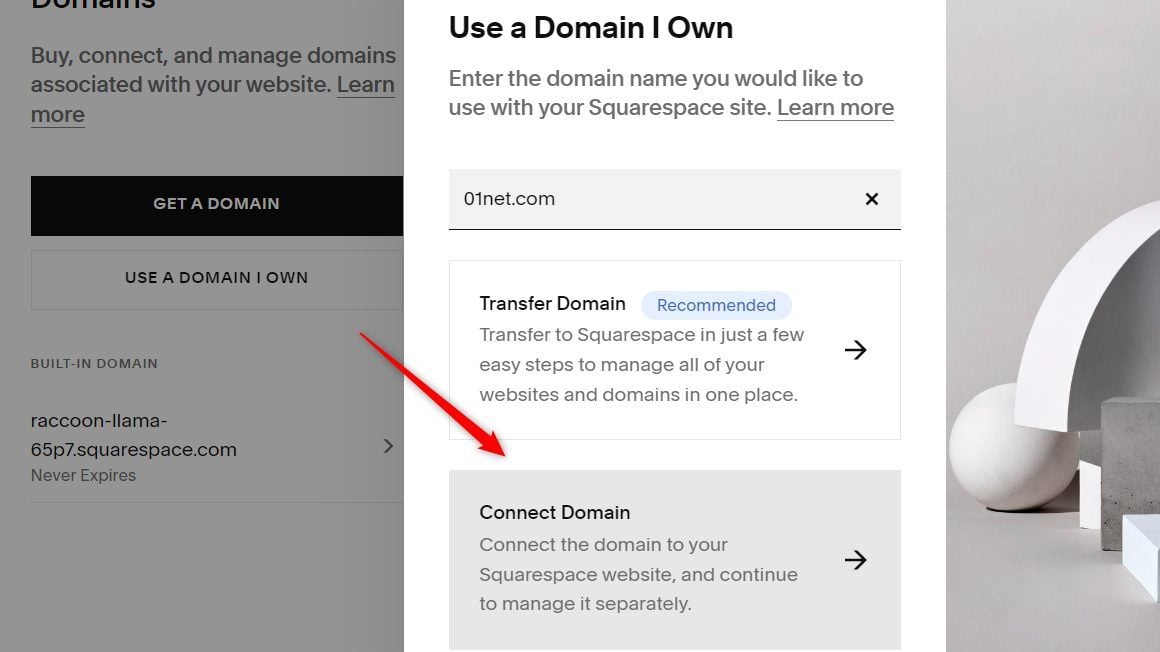
Scroll down and click on Domains.

Click the USE A DOMAIN I OWN button and type the domain name in the box. Then, click on the CONNECT DOMAIN button.
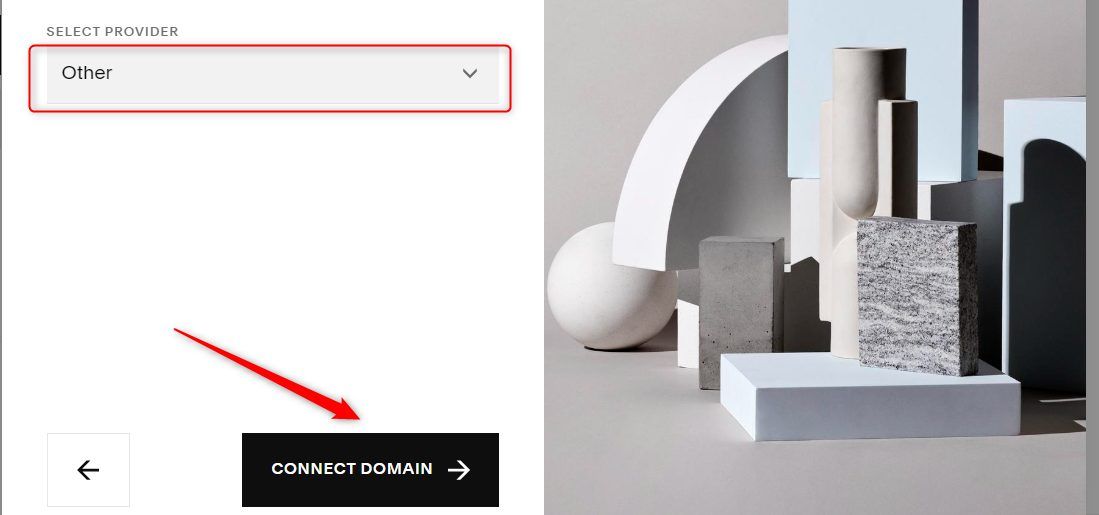
Choose your provider from the list and click on the CONNECT DOMAIN button.
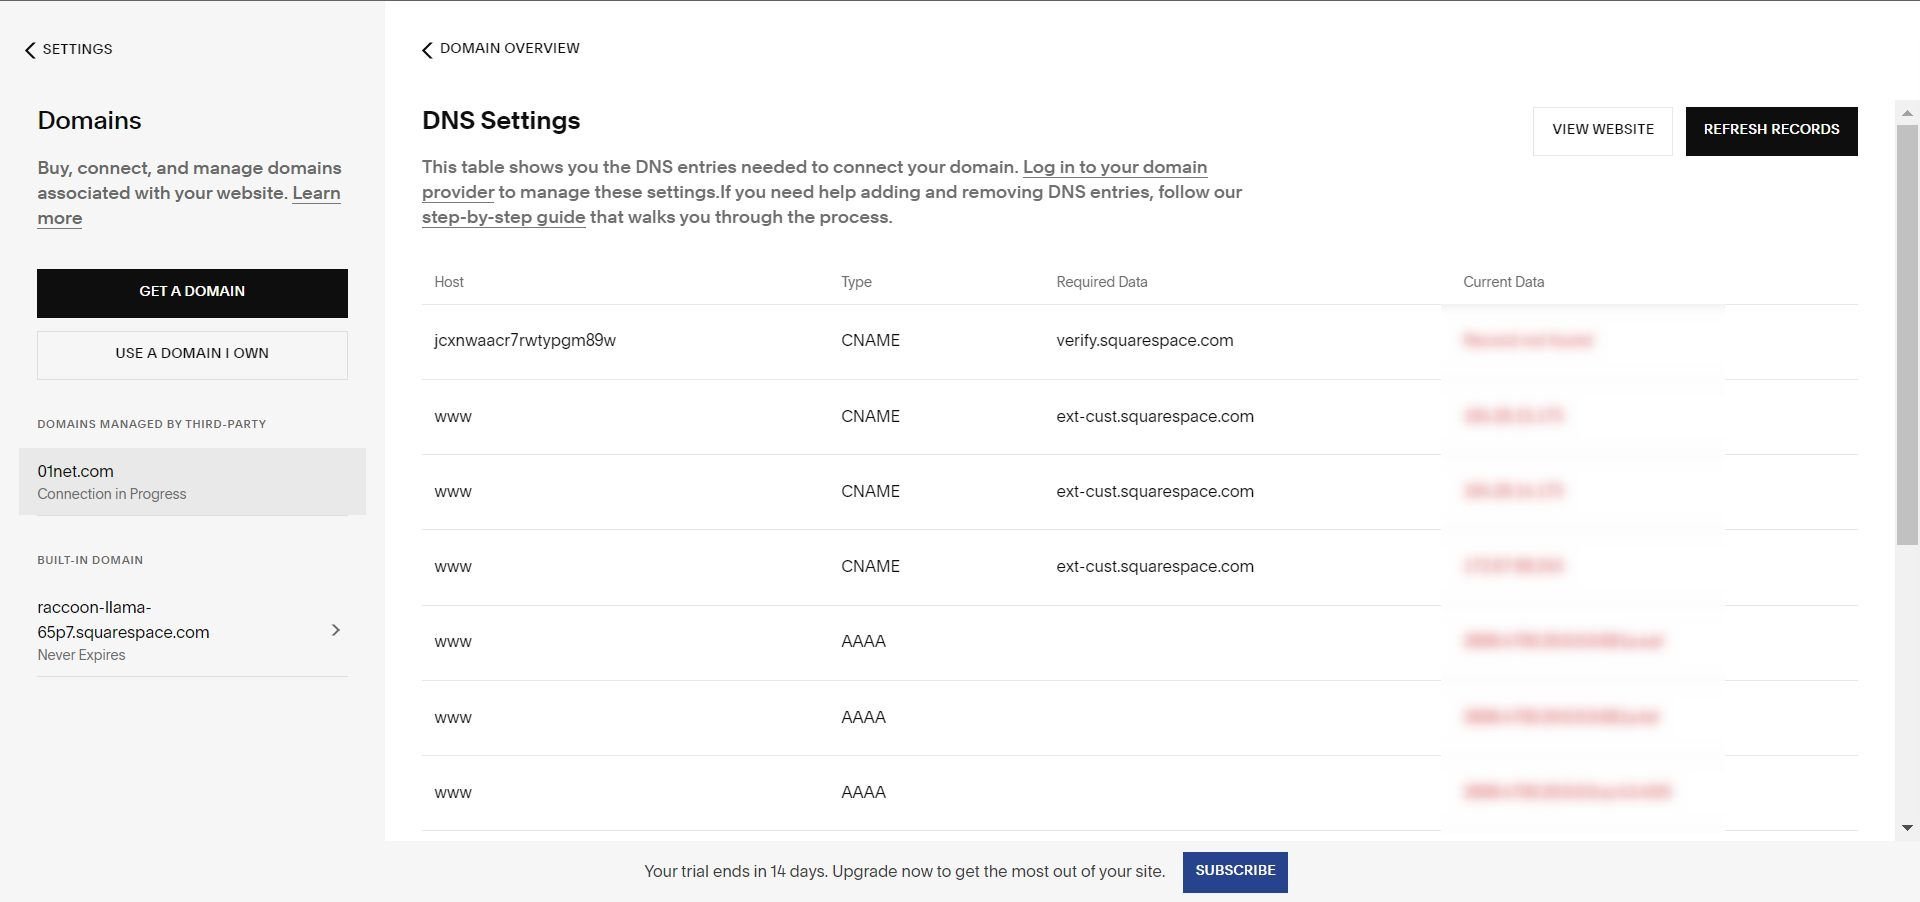
Now go to your domain registrar to update your DNS records to match the ones at Squarespace.
This is how easy it is to create a website with Squarespace. In less than an hour you will be able to build your site with Squarespace.
Note however that once all the steps have been taken, everything will not be finished. You must now regularly feed your site with content and make it known on the Internet.