SiteGround is a great choice if you wish to migrate your website to a new web host. It provides top hosting services to its customers worldwide and at affordable prices.
A few areas where SiteGround is great is performance, as it has one of the best custom technologies to help you achieve top website loading speed and performance. It also has one of the best security technologies. These are only a few reasons you should transfer your website to this web host. You can find out more information in our review of SiteGround.
Migrating your site to SiteGround from any web host is very straightforward, as you can finish it within 20 minutes on the first attempt.
There are three easy ways to migrate your website to SiteGround:
- Using the WordPress Migrator plugin from SiteGround
- Manually uploading the backup files and databases to your file manager and phpMyAdmin
- Contacting the SiteGround Support Team to transfer the site
How to Migrate Your Site to SiteGround using the WordPress Migrator Plugin
SiteGround makes transferring your site from your present host very easy by providing a free Automatic Migrator plugin.
It is a WordPress plugin that makes the process automatic and takes less than 10 minutes to set up. This eliminates the need to wait forever for a migration expert to move your WordPress site, as with most other hosts.
Here is how to use this free and easy tool:
1. Purchase a Hosting Package
The first step you need to take when migrating your website to SiteGround is to buy a suitable hosting package depending on your business needs.
Explore SiteGround’s web hosting services
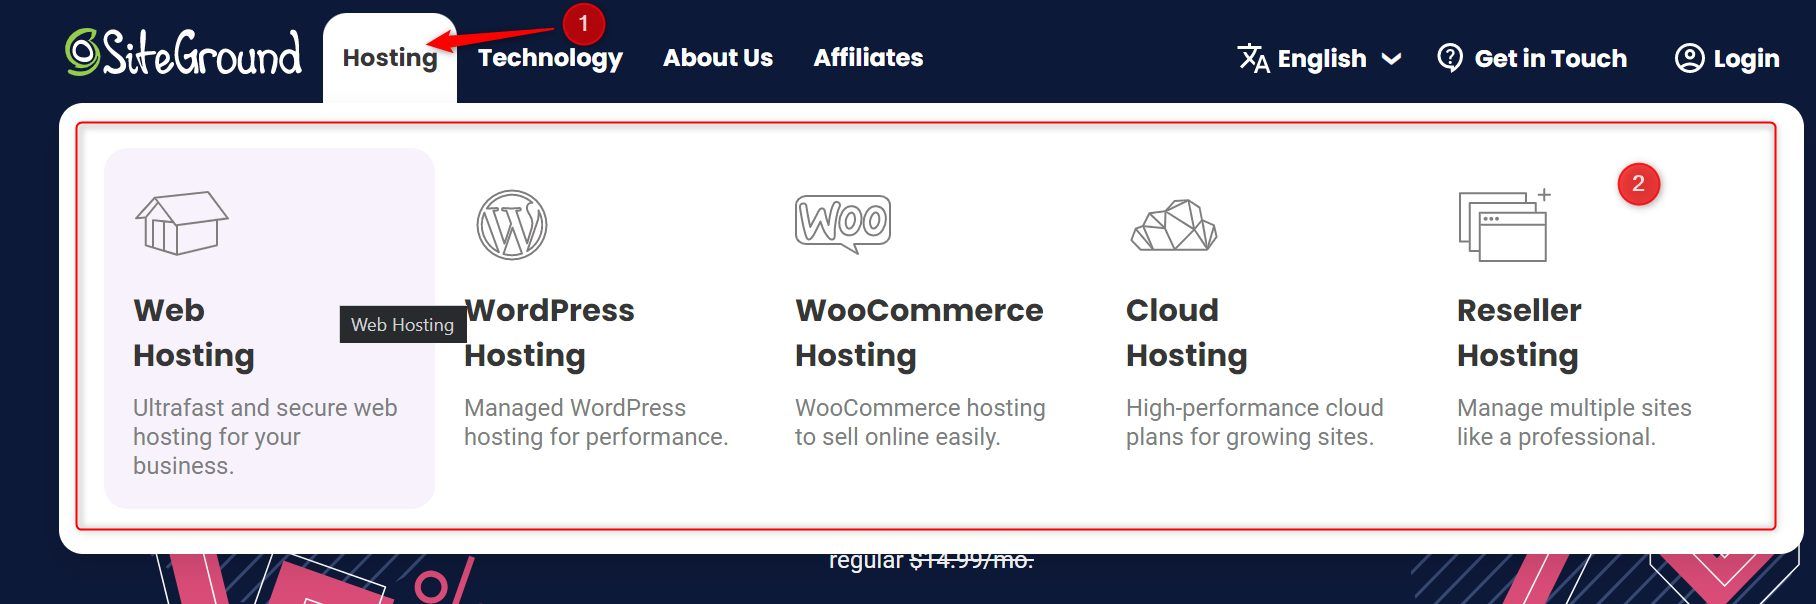
To do that, go to their website and hover your cursor on Hosting in the top menu. Choose your preferred hosting type from the drop-down menu items by clicking on it. In our case, we are choosing Web Hosting.
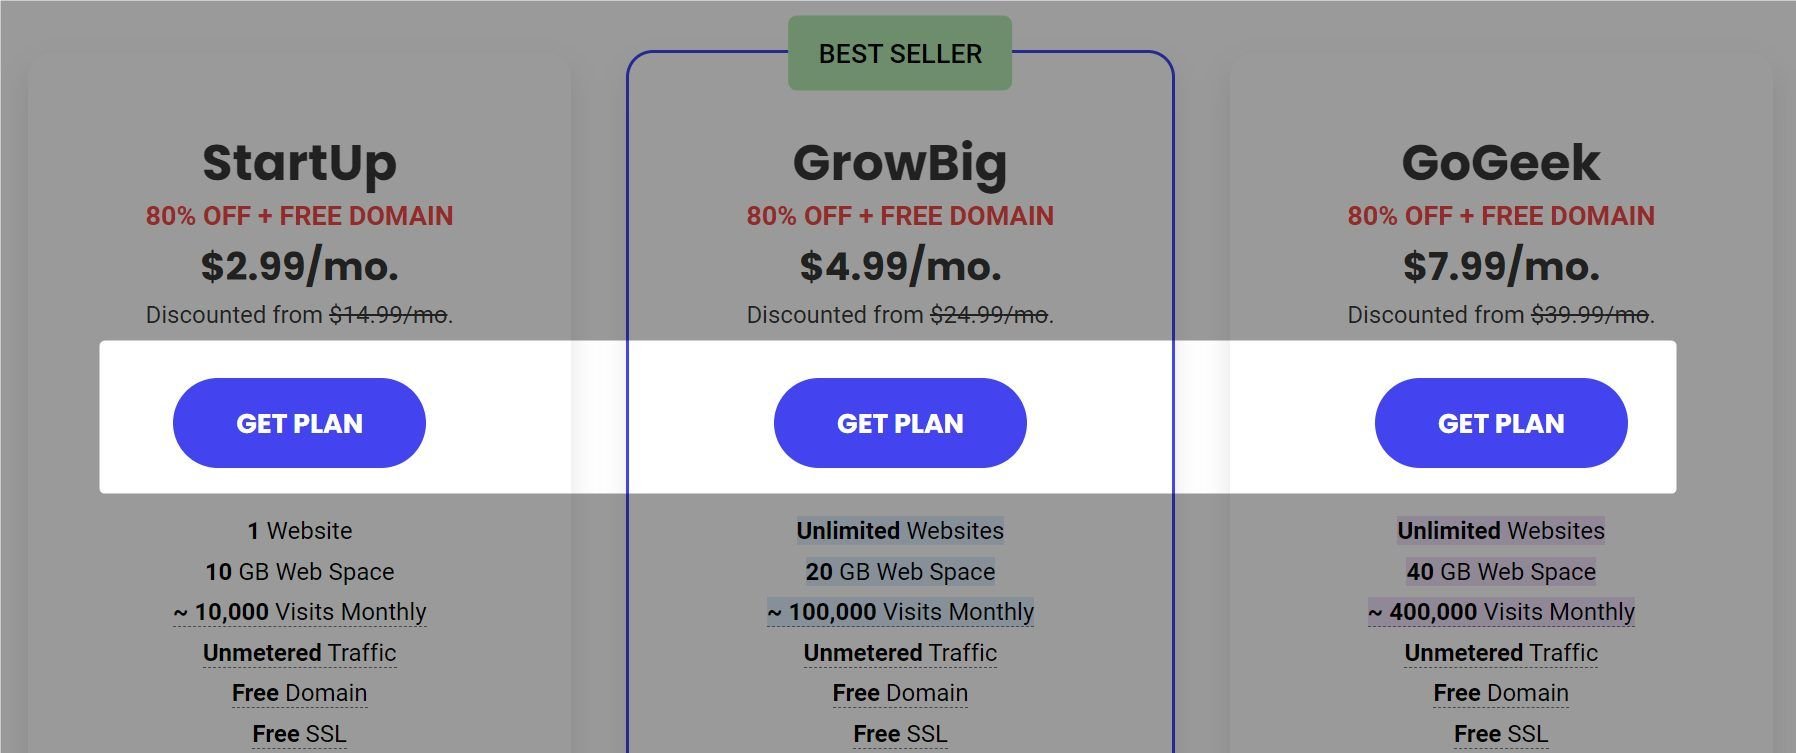
Now, choose the hosting package you need by clicking on the GET PLAN button under its price. We recommend the GoGeek package if you have a large project. However, the StartUp plan is also a good start.
If you are undecided on what type of hosting to choose, take the time to read our guides on cloud-based web hosting, WordPress, shared hosting or even dedicated hosting.
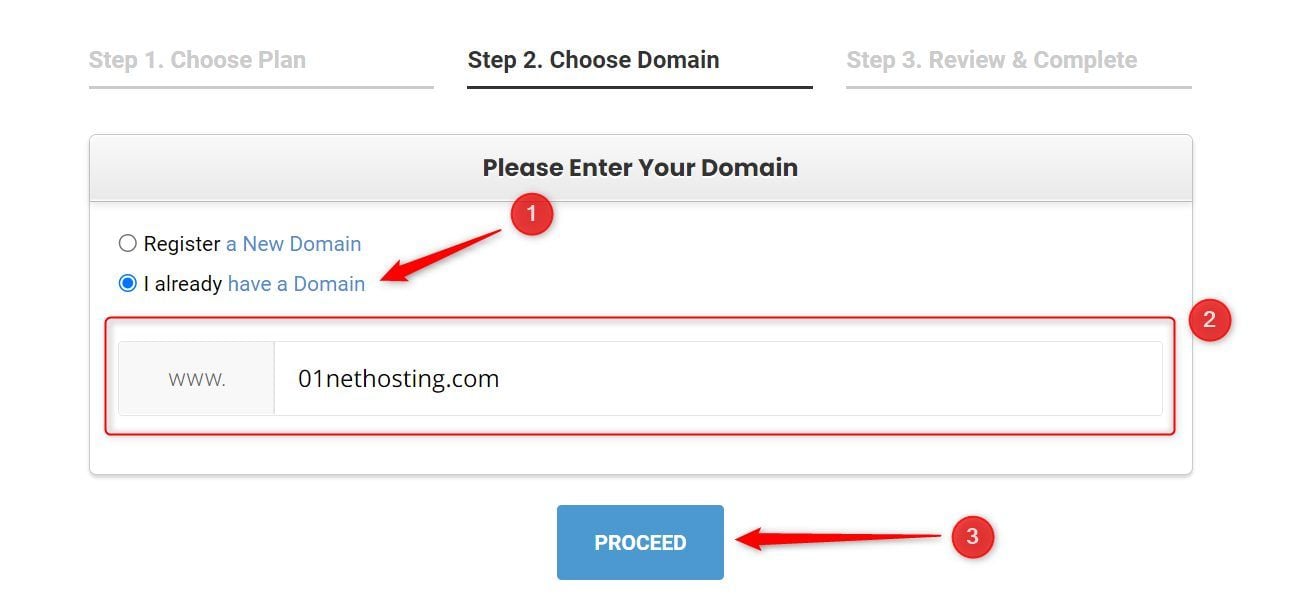
On the next page, click on the I already have a Domain option and input your domain name. Click on the PROCEED button afterward.
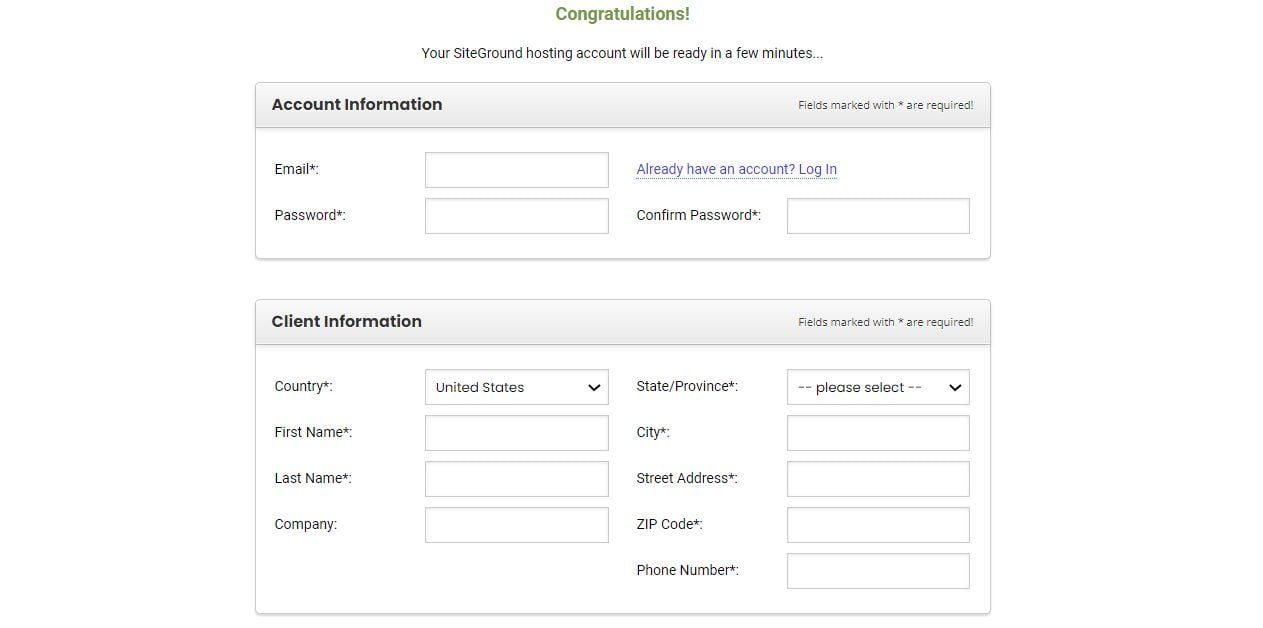
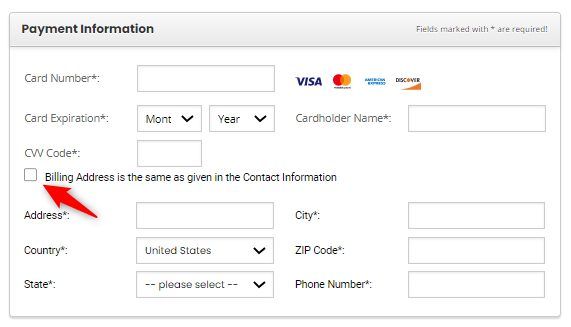
Enter the requested information about your account, including your present address and a valid phone number, to receive a validation code. Then scroll down.
Now, enter your credit card details. Leave the box at the bottom of the Payment Information section checked unless your billing address is different from the address under the Client Information section.
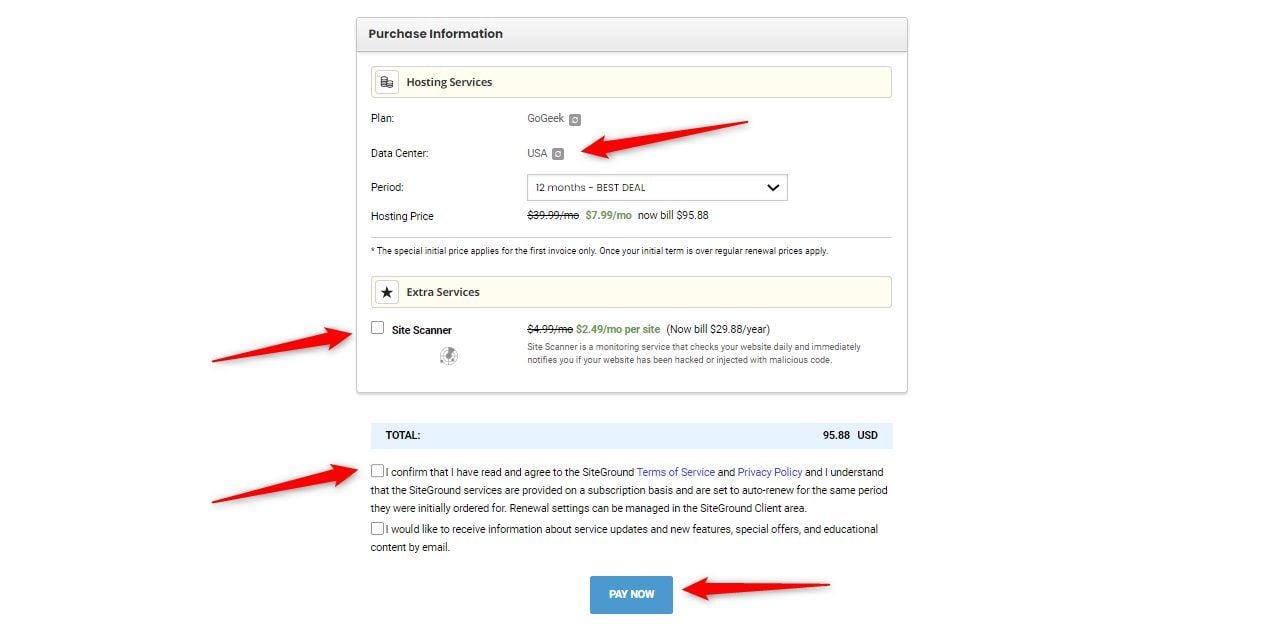
Scroll to the Purchase Information section to confirm the details of your purchase. You may choose your preferred data center location by clicking on the refresh button in front of USA and picking one.
If you need the Site Scanner add-on, click on the checkbox to purchase. Afterward, check the Terms of Service and Privacy Policy box to accept them. The second checkbox is optional, so you can make an independent choice.
Then, click on the PAY NOW button to complete the purchase.
You should then log in to your account using the URL my.siteground.com.
2. Start the Migration Process
Here is where the real fun begins in this tutorial explaining how to transfer a website to SiteGround.
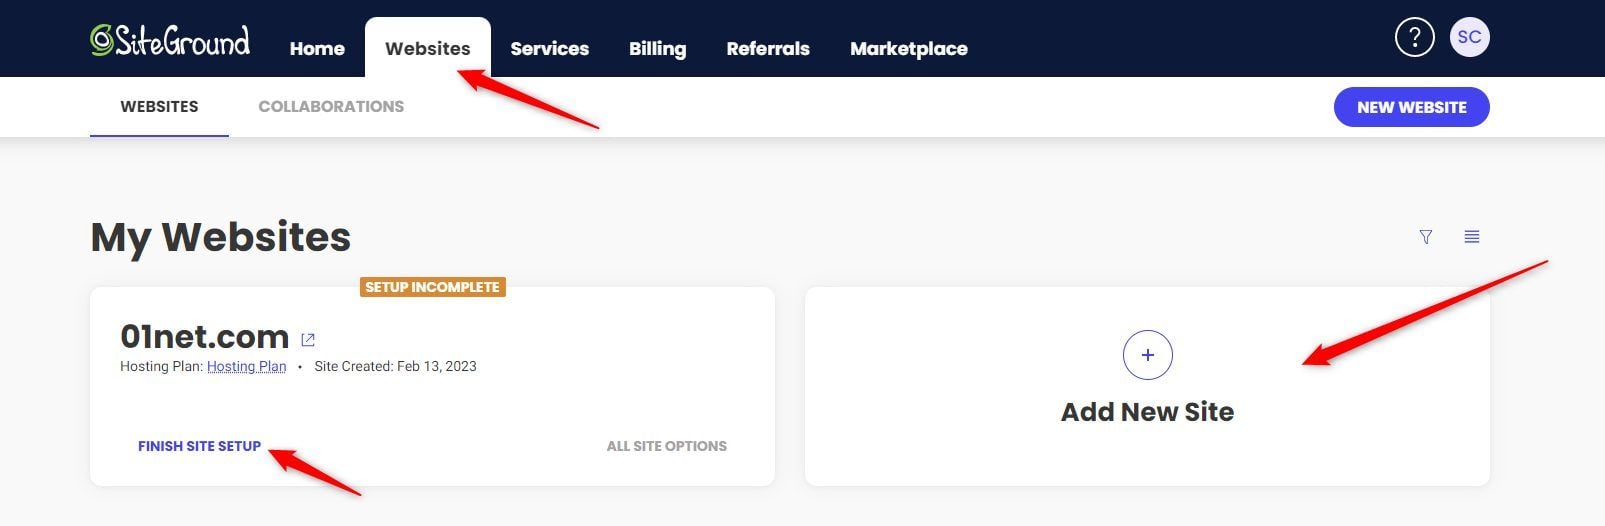
On your account dashboard, navigate to the Websites menu. Click on the FINISH SITE SETUP link or the Add New Site button.
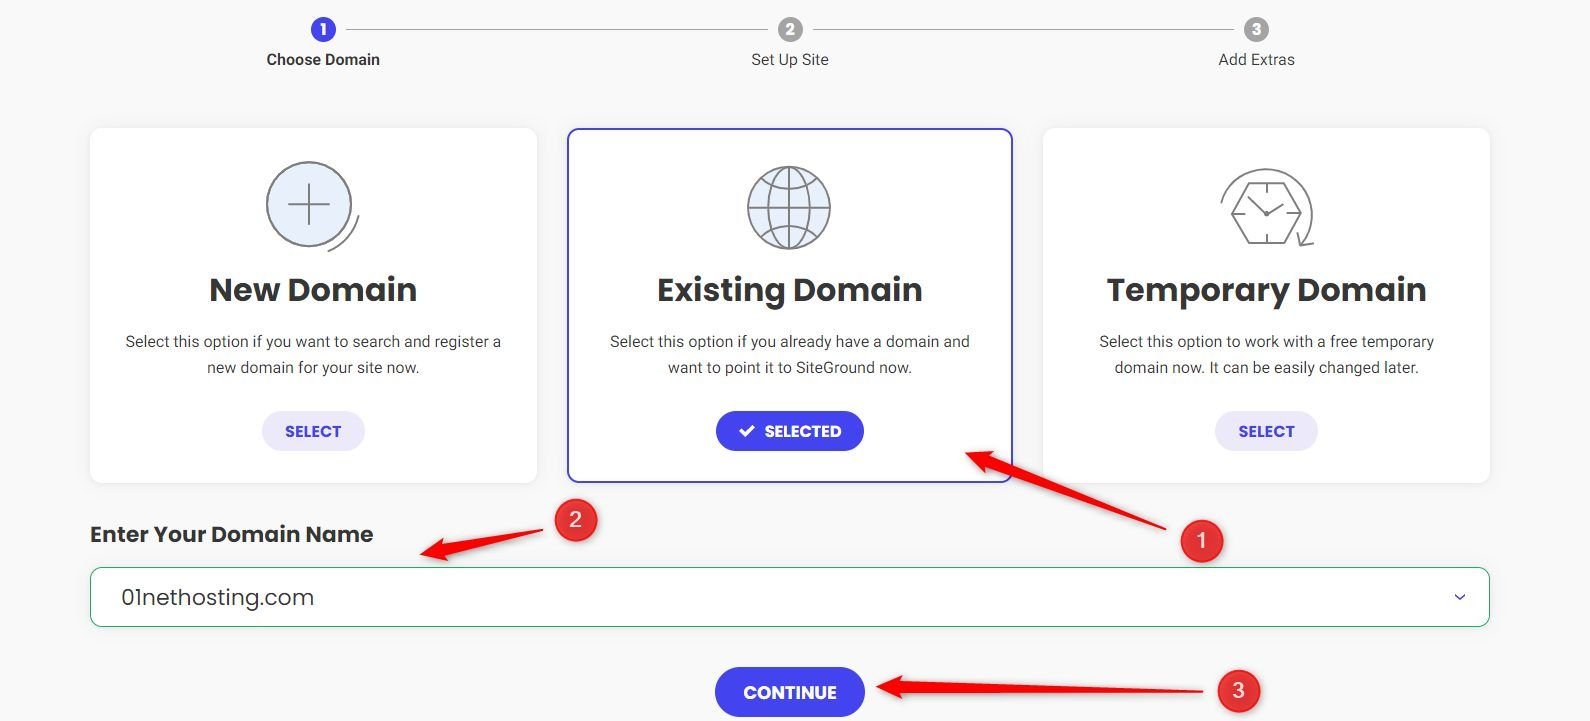
Then click on the Existing Domain box. Write your domain name in the provided space and click on the CONTINUE button.
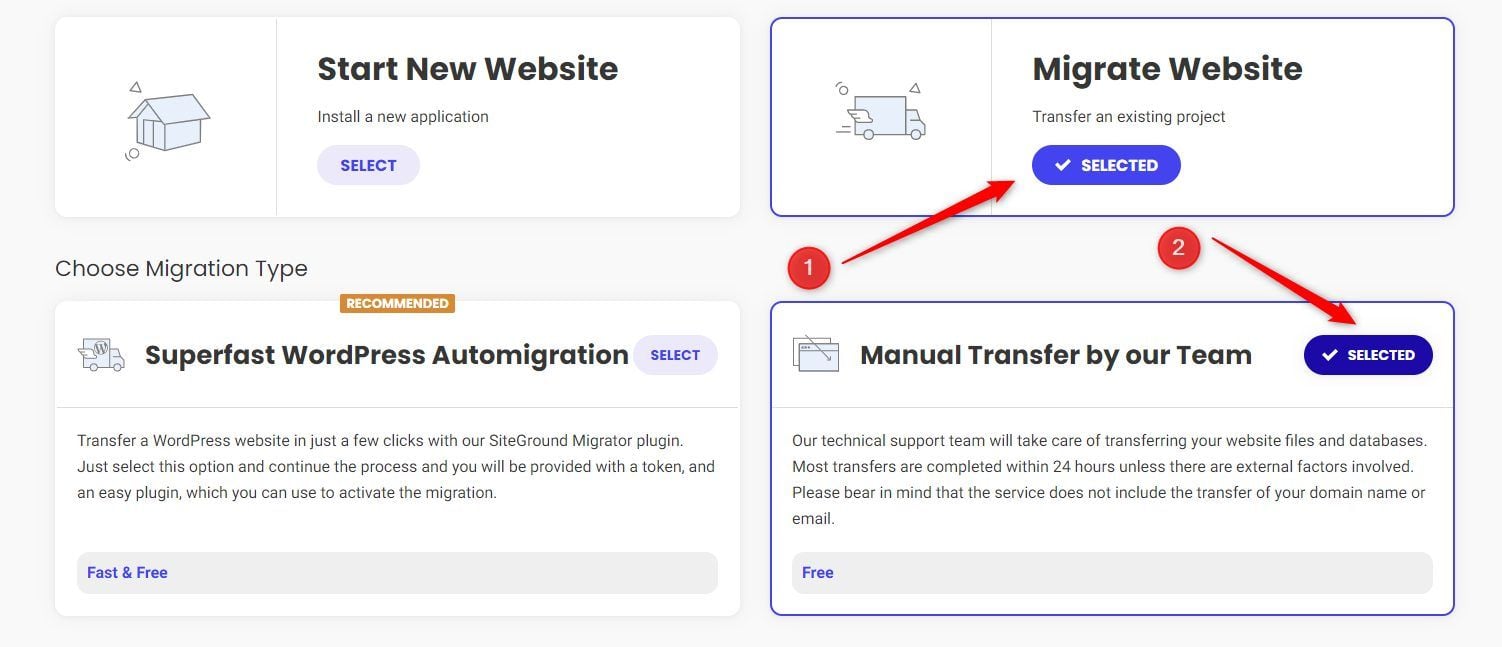
Now, click the SELECT button under the Migrate Website box. Also, click on the SELECT button under the Superfast WordPress Automigration box and then the CONTINUE button that appears below it.
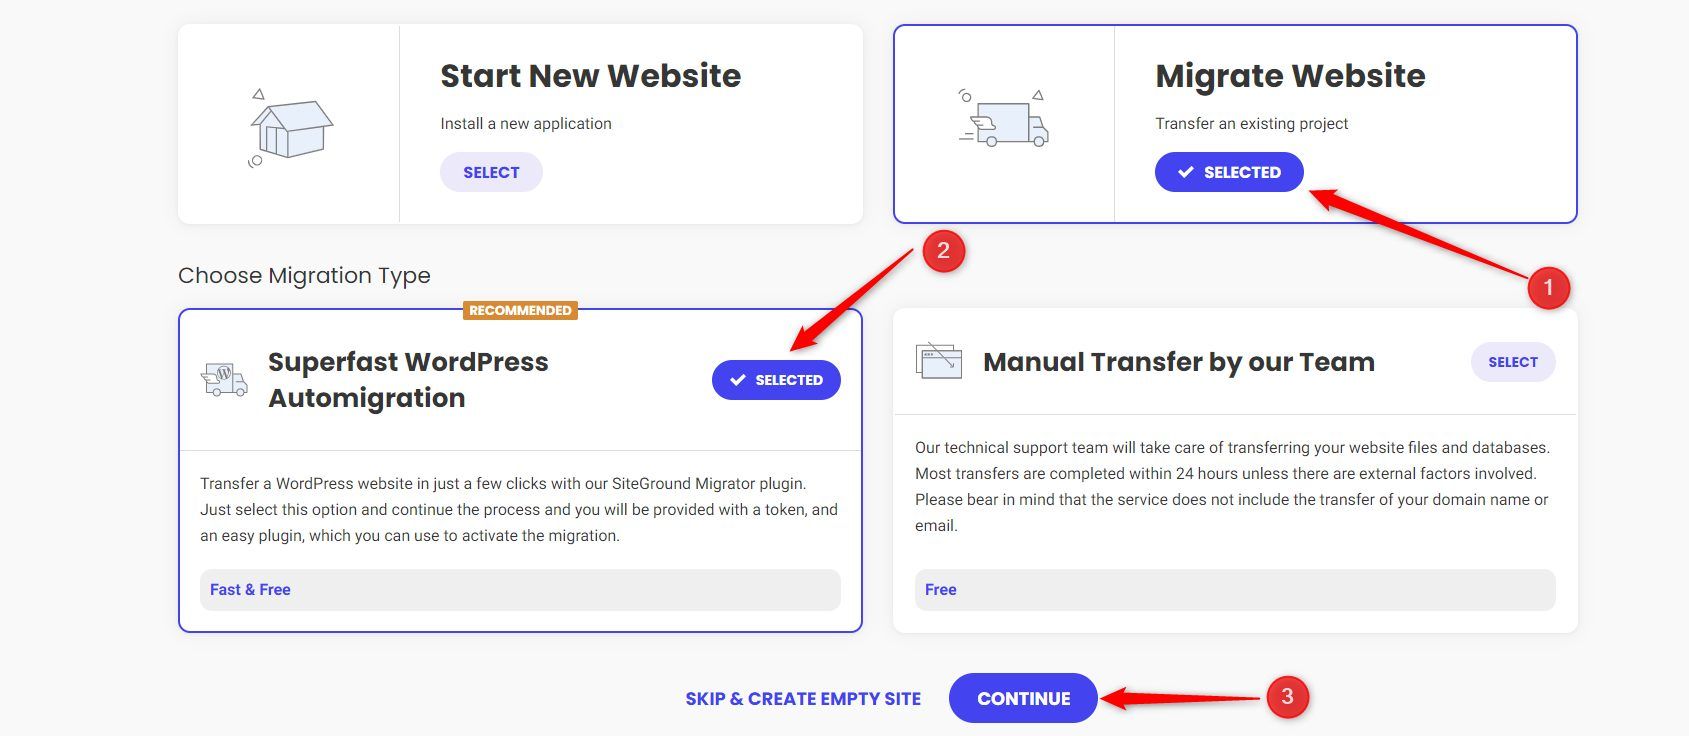
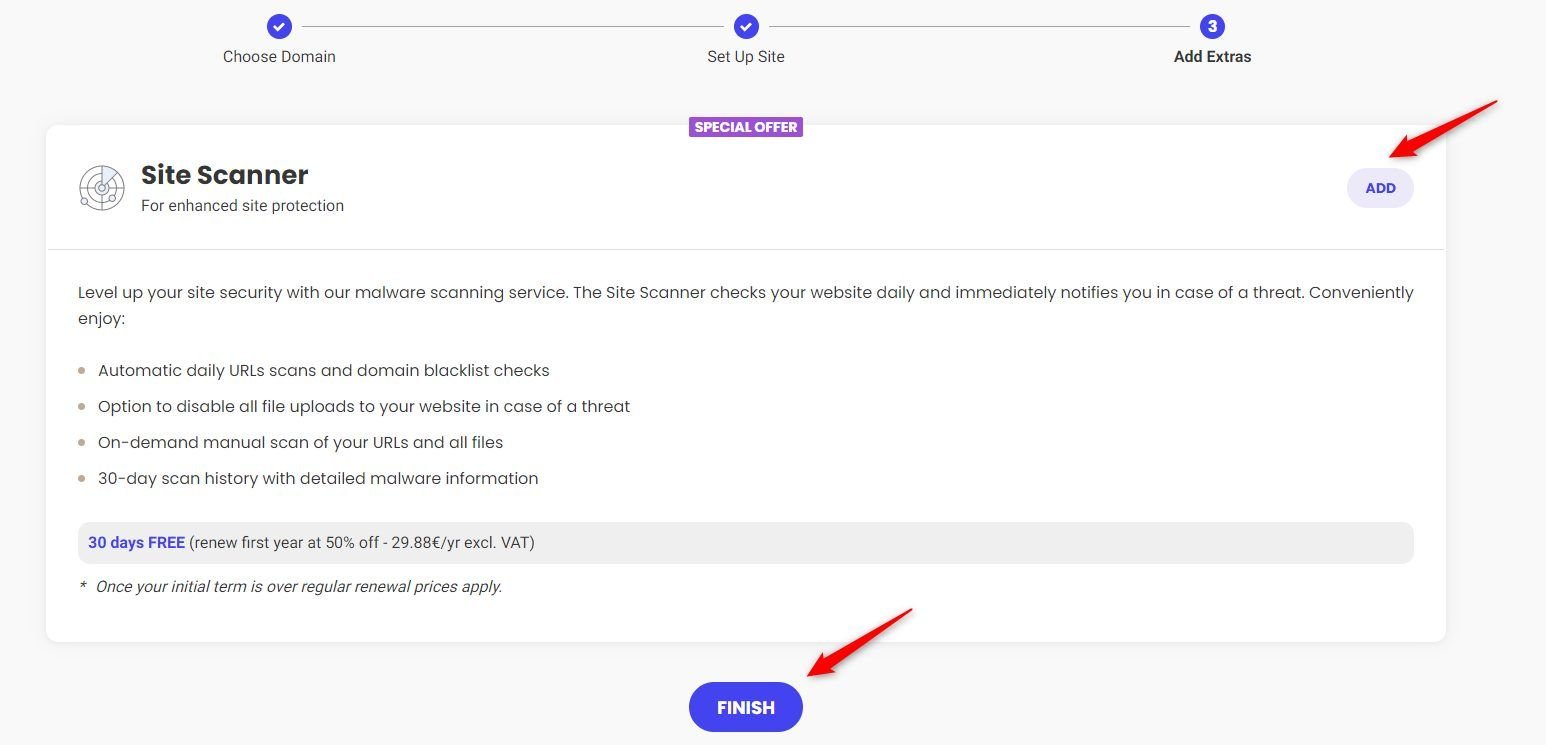
If you need the Site Scanner add-on, click the ADD button and then the FINISH button under the box. Otherwise, click on the FINISH button only.
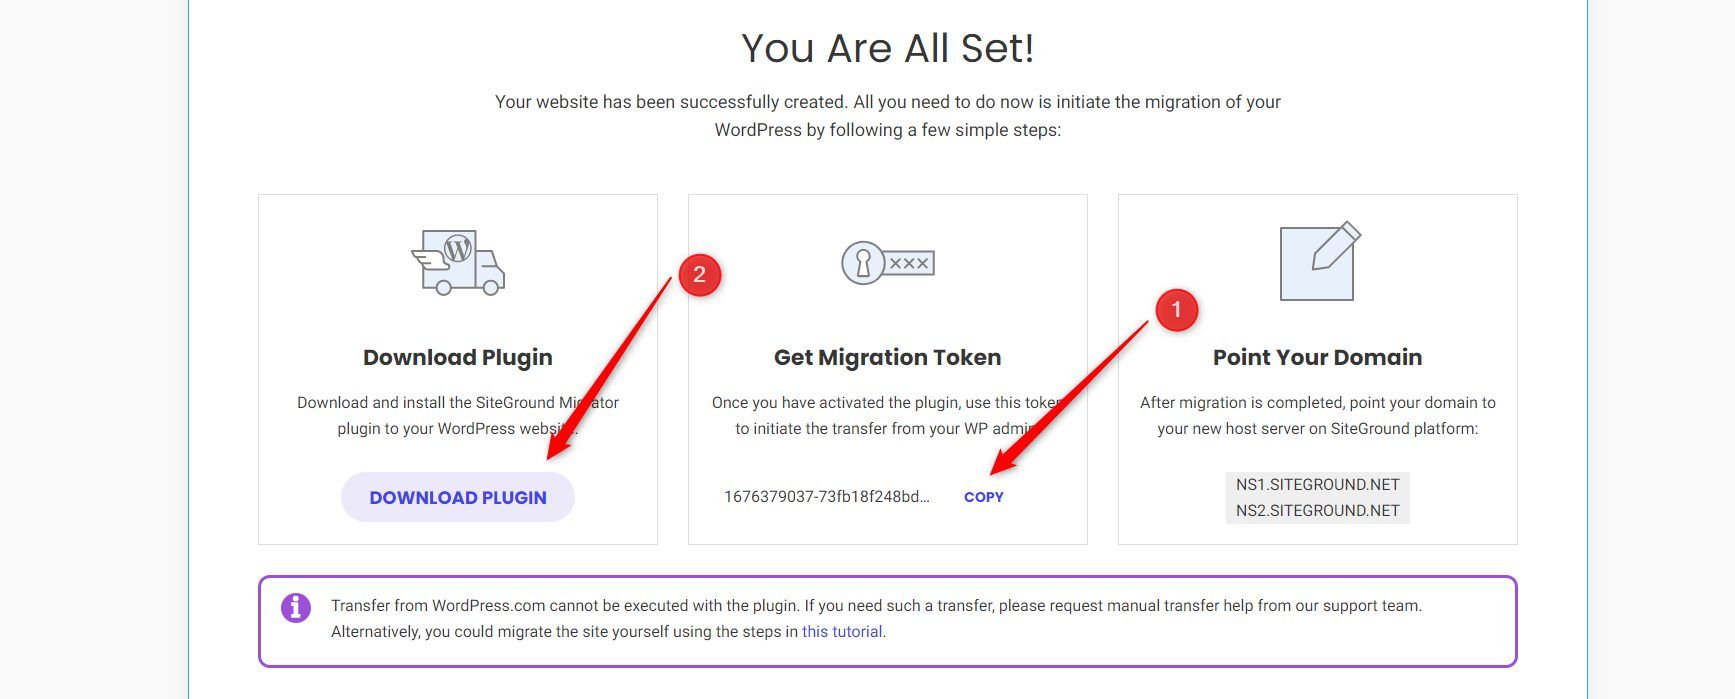
First, click on the COPY link under the Get Migration Token box. Then, click on the DOWNLOAD PLUGIN button.
Now, log in to your present WP admin dashboard. Navigate to Plugins >> Add New.
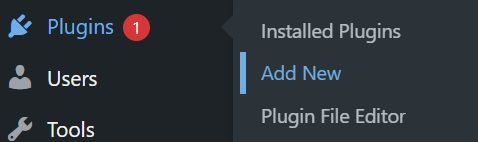
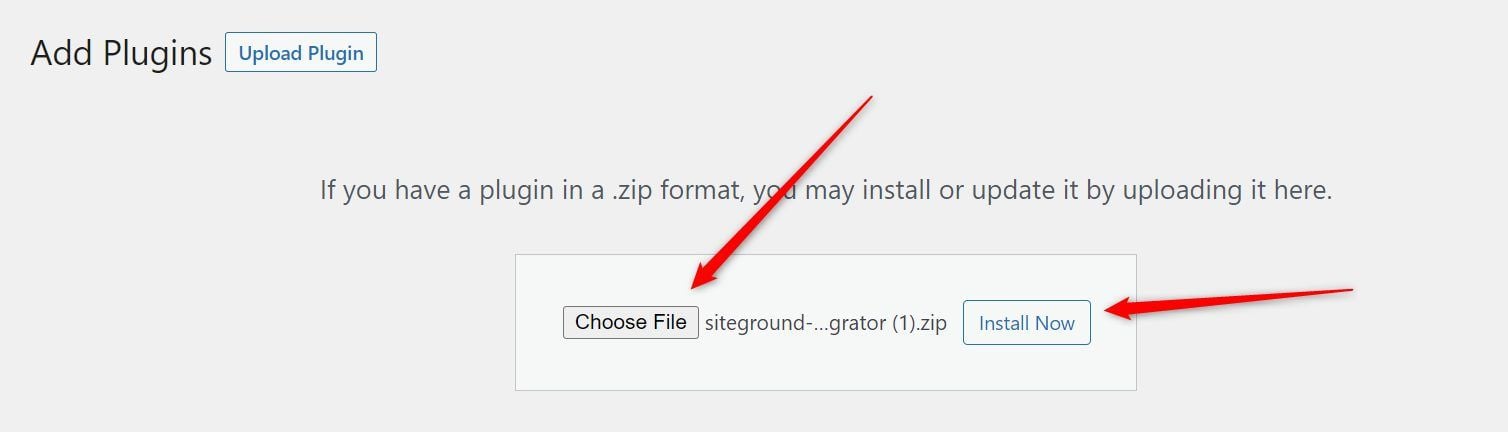
On the next page, click on the Upload Plugin button.

Then click on the Choose File button and select the downloaded plugin from your computer. Afterward, click on the Install Now button.
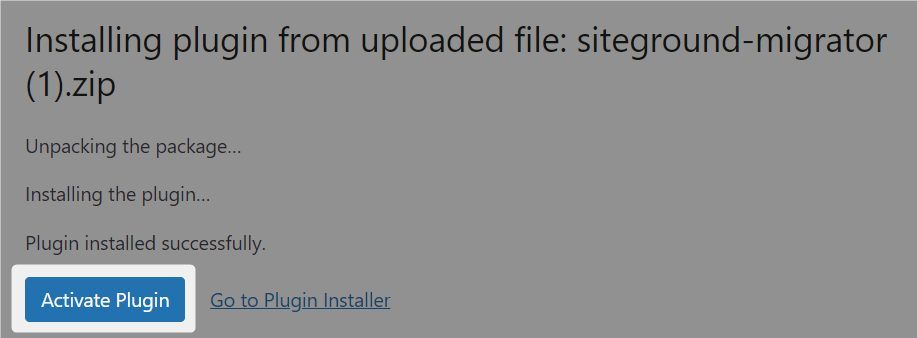
Now, click on the Activate Plugin button.
Afterward, navigate to SG Migrator on the admin menu and click on it.
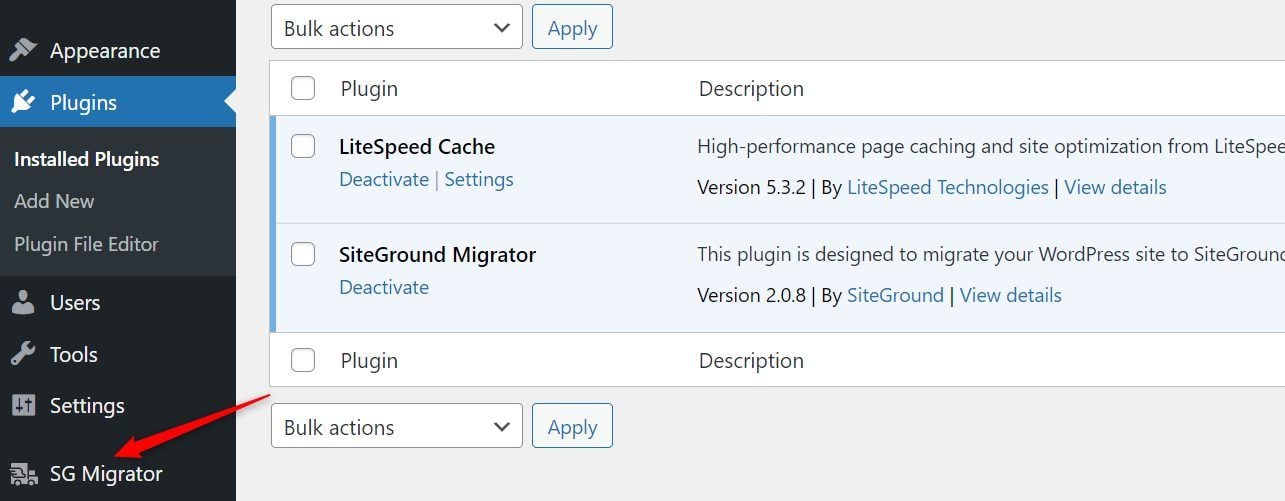
Then, paste the Migration Token you copied earlier into the first box to the left and add an email address to receive the update on your site transfer to SiteGround. Click on the START MIGRATION button afterward.

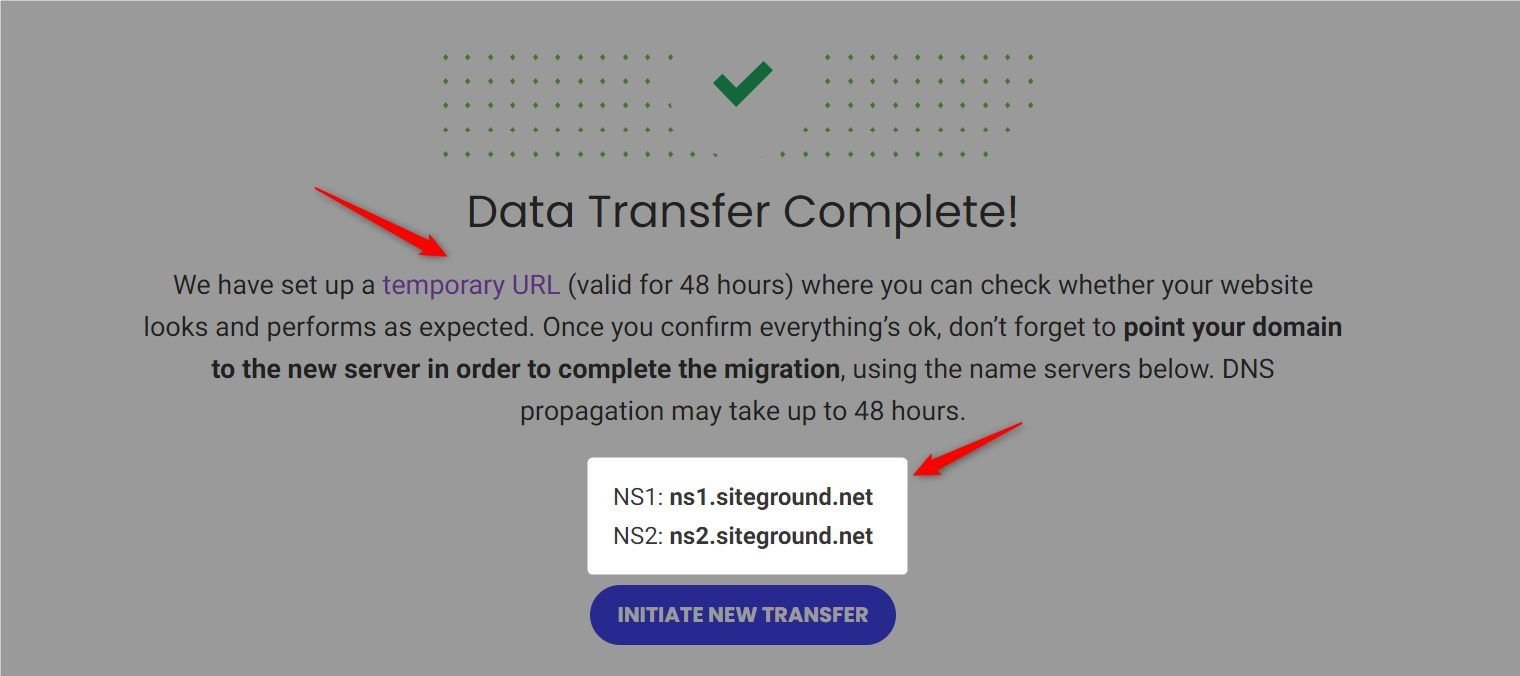
Wait a few moments, depending on the size of your site, for the migration to complete.

Once complete, click on the temporary URL link to ensure it behaves exactly like your present site. Then proceed to change your nameservers to ns1.siteground.net and ns2.siteground.net.
It is done! That is how easy it is to migrate your website to SiteGround.
How to Transfer Your Site with the help of SiteGround Support
After purchasing a hosting plan, as we illustrated earlier, log in through my.siteground.com.
Once on the account dashboard, navigate to the Websites link on the top menu and click on it. Then, click on the FINISH SITE SETUP link or the Add New Site button.
On the next page, click on the SELECT button on the Existing Domain box and type your domain name in the text box below. Click on the CONTINUE button afterward.
Now, click on the SELECT button under the Migrate Website box and then the SELECT button on the Manual Transfer by our Team box. Scroll down afterward.
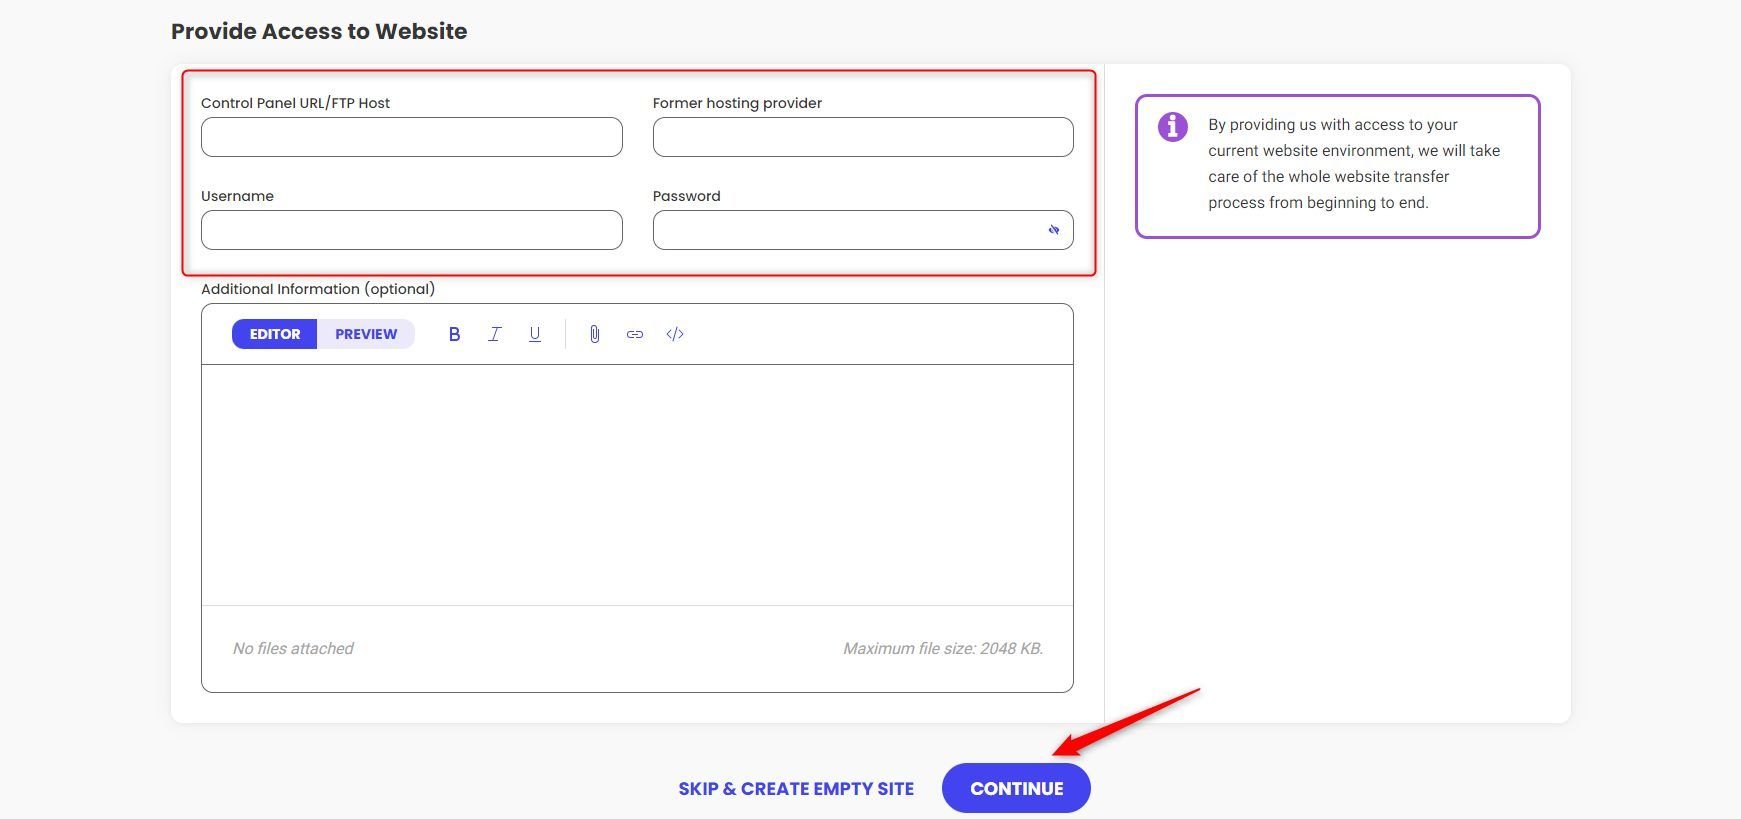
Provide your admin login URL, username, password, and the name of your present host in the appropriate boxes. Then, click on the CONTINUE box.
Now, wait about 5 business days for the SiteGround team to migrate your site. Once you get the email update that the process is complete, you should go to your domain registrar to replace your first and second nameservers with ns1.siteground.net and ns2.siteground.net, respectively.
That is another sweat-free way to migrate your website to SiteGround.
Discover SiteGround Hosting Plans
How to Migrate Your Website to SiteGround Manually
The idea of manual migration should not scare you, because SiteGround has made it easy for beginners.
1. Create a Backup of Your Files from the Previous Host
Assuming your previous host uses the traditional cPanel, log in to your account and navigate to cPanel.
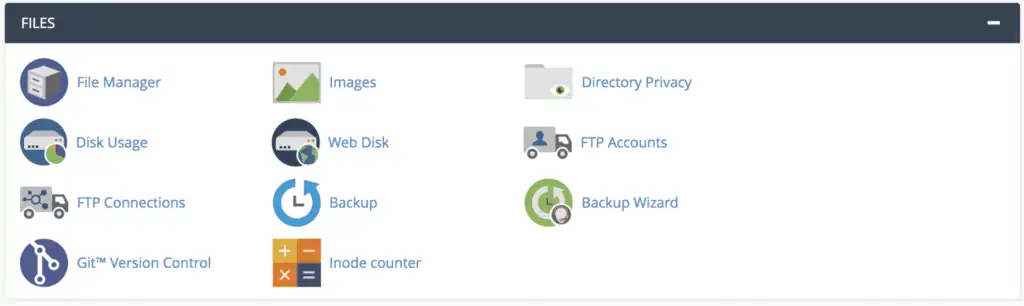
On cPanel, look for the FILES section by scrolling down. Click on the File Manager link.
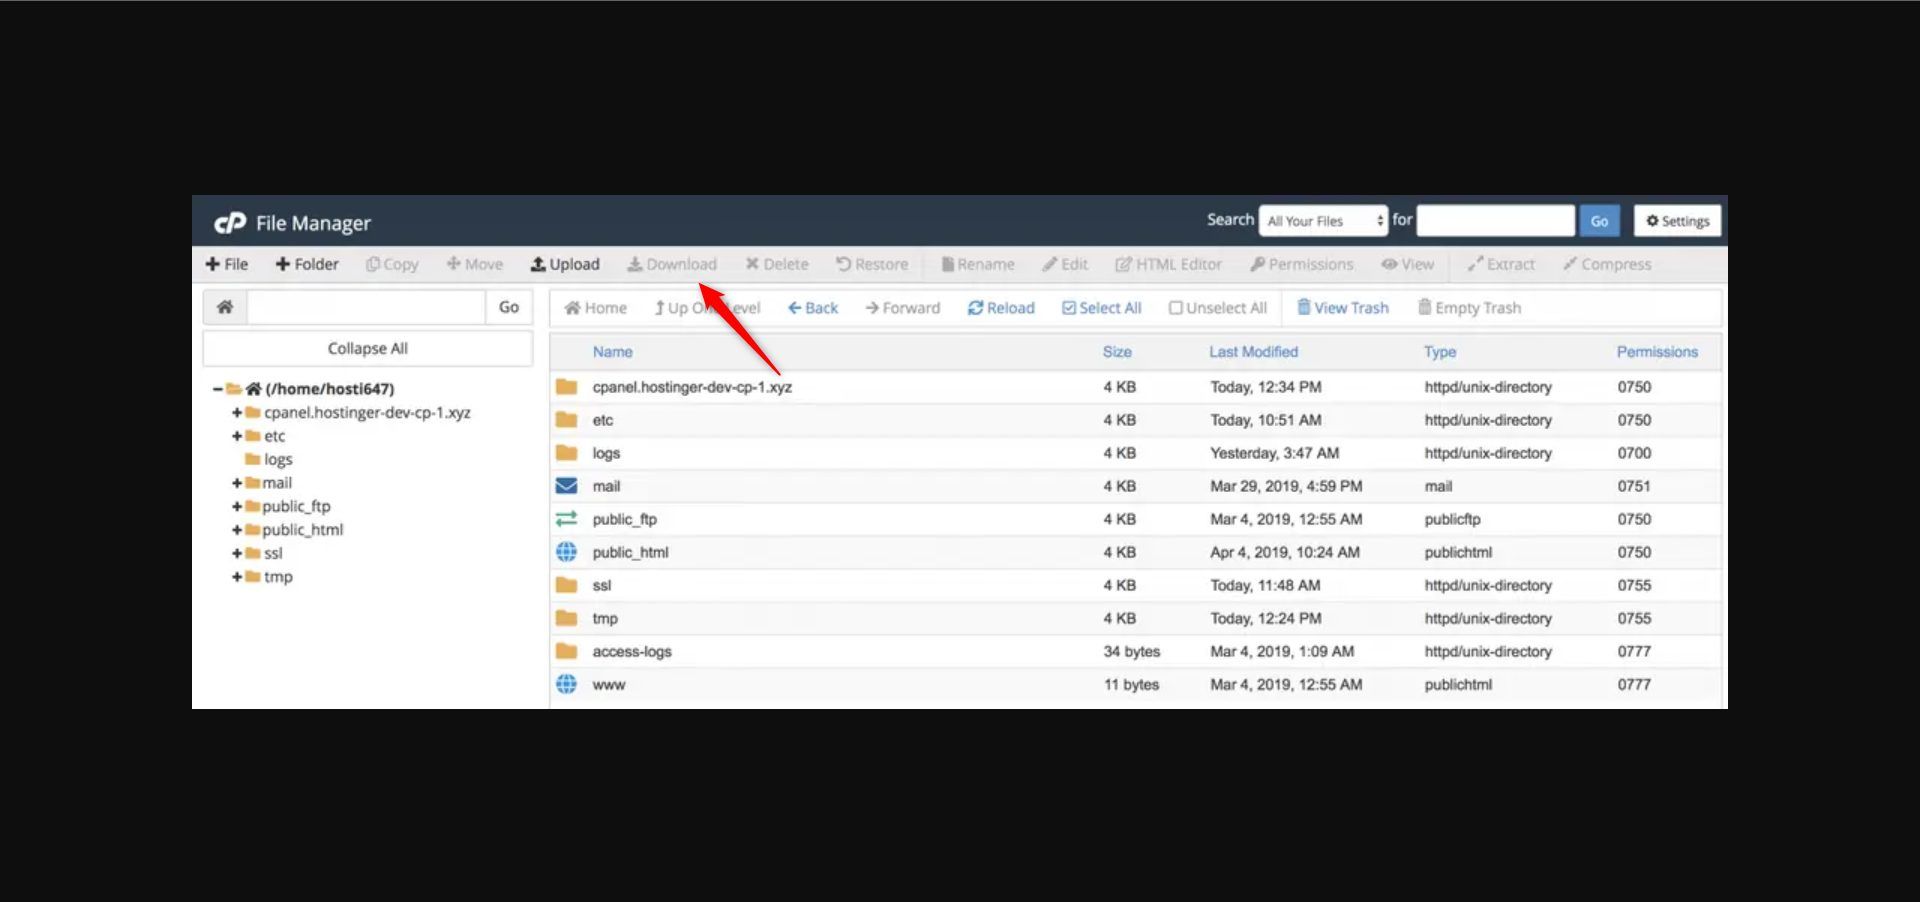
If there are multiple domains on your cPanel, click on the domain you want to move first. Once it opens, click on the public_html folder with a www (web) icon on its left side. Then, navigate to the top toolbar and click on the Compress link.

This creates a compressed file with the name public_html.zip.
Afterward, left-click on the file and navigate to the Download link in the top toolbar. Click on it to download the file to your computer.
Now, extract the public_html zip file.
The downloaded zip file should look like the one below.

And the extracted folder will look like the one below on your computer.

Open the extracted folder (public_html) and ensure that the inner folder which is also named public_html has all the files as it is in your cPanel File Manager. You can use the size of each folder or file for fast comparison.
Select all the files in the inner folder and copy them into another folder named public_html 1.
2. Export Your Databases from phpMyAdmin
The next step to migrate your website to SiteGround is to download your present databases from your phpMyAdmin.
Go back to your cPanel homepage. Then, scroll down to the DATABASES section and click on the phpMyAdmin link.

Now, choose the database that your website is using from the list at the left sidebar. Navigate to the top toolbar and click on the Export link.
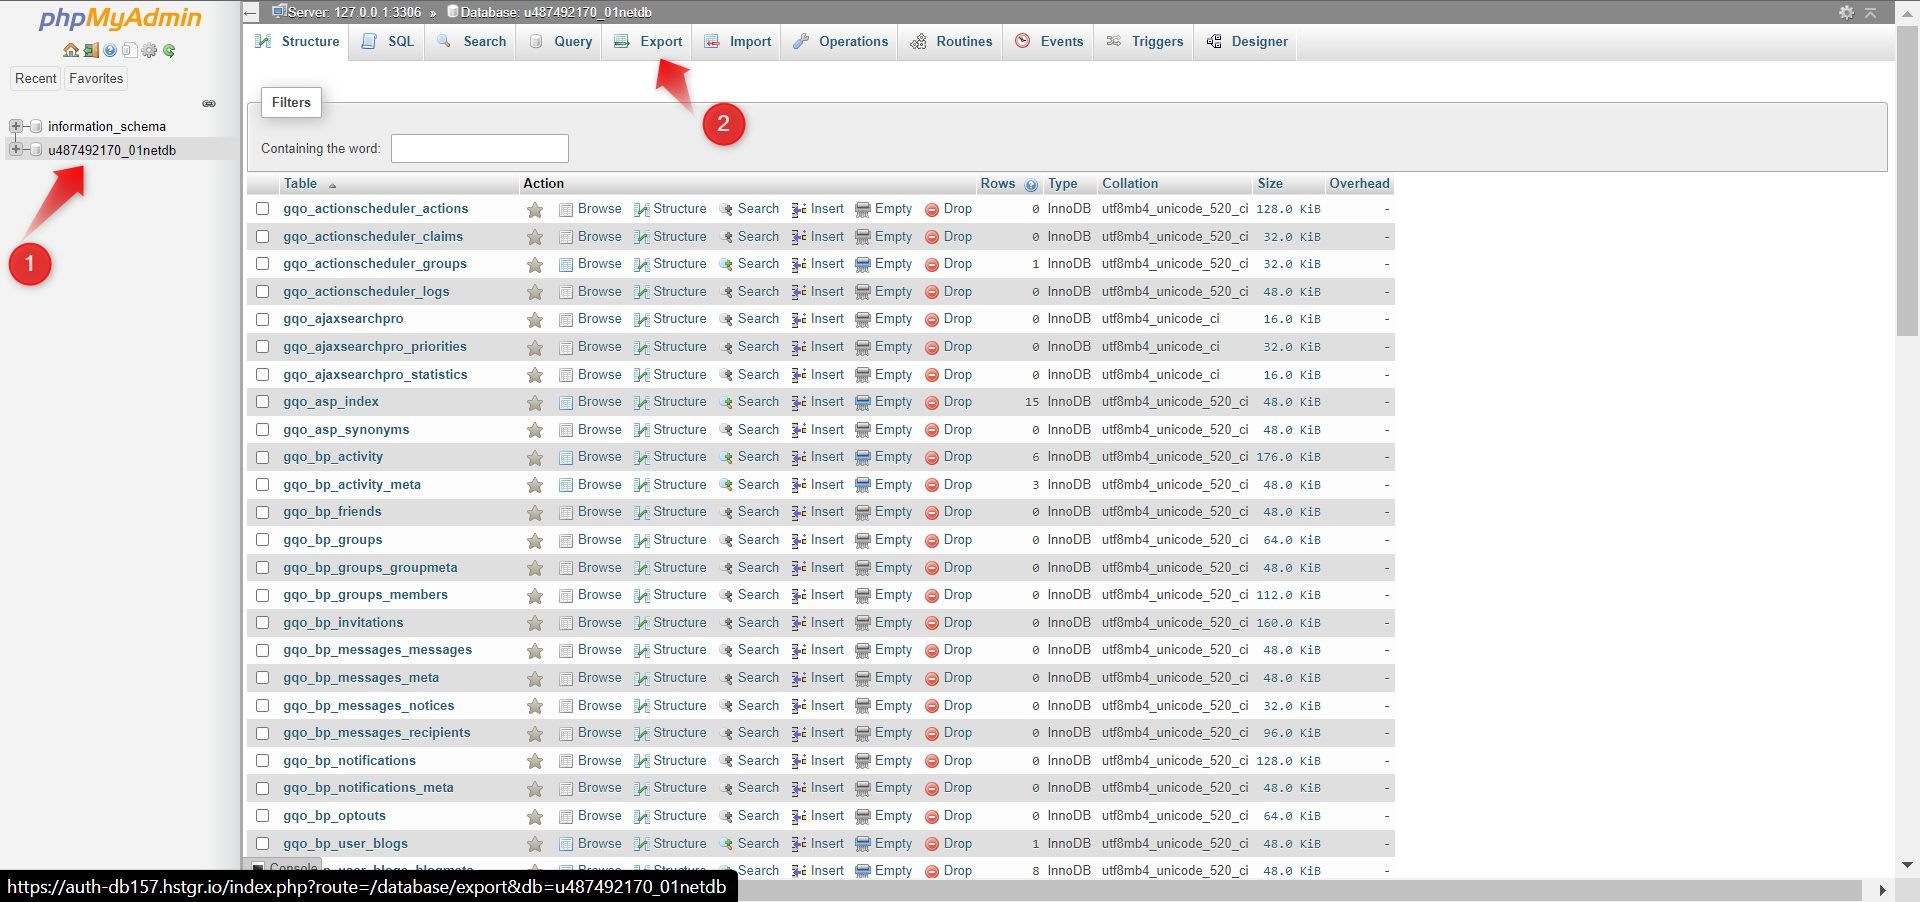
On the next page, choose the Quick option, leave the format at SQL, and click on the Go button.
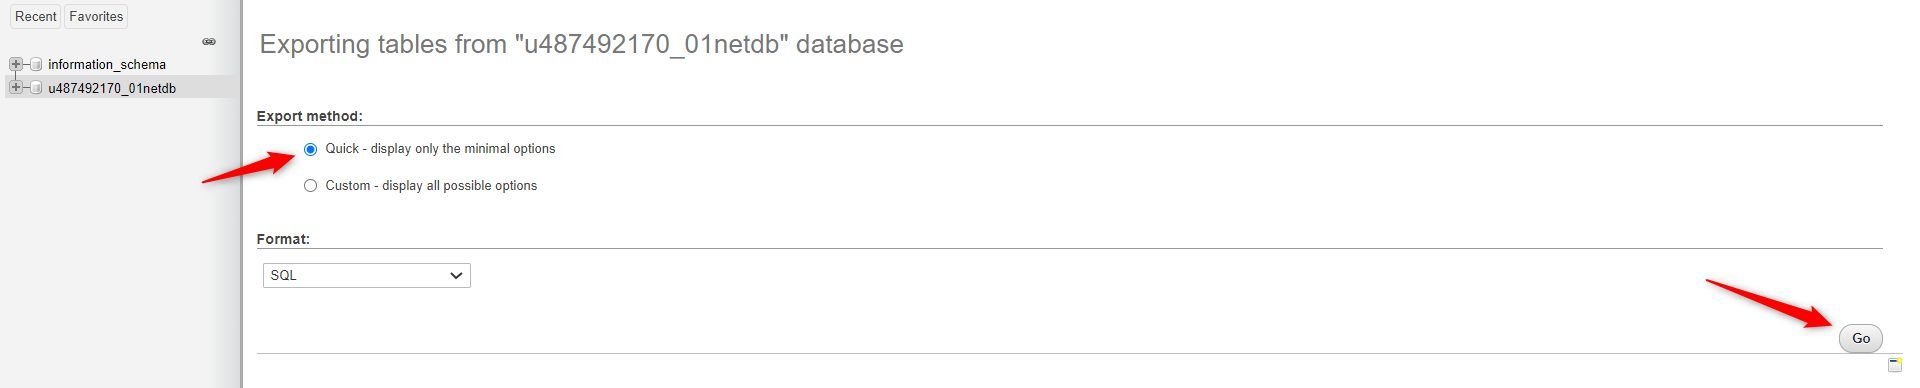
This action downloads the database you just exported to your computer. You can name it as you want for easy access. Yourdomain.sql is a good name example.
3. Check Your Current PHP Version
Knowing your current PHP version is very important because your website may not work with another version after the transfer.
You need to return to your cPanel homepage to get your PHP version.
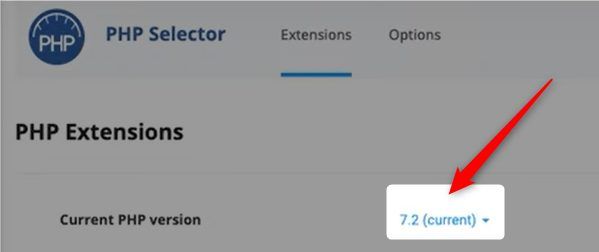
This time, scroll down to the SOFTWARE section and click on the Select PHP Version link.

Look at the digits in front of the Current PHP Version text and write them somewhere.
4. Confirm & Update Your PHP Version
We must ensure that the PHP version at SiteGround is the same as the previous host before we continue our website transfer. Log in to your SiteGround account.
While on the dashboard, click either the FINISH SETUP link or the Add New Site button.
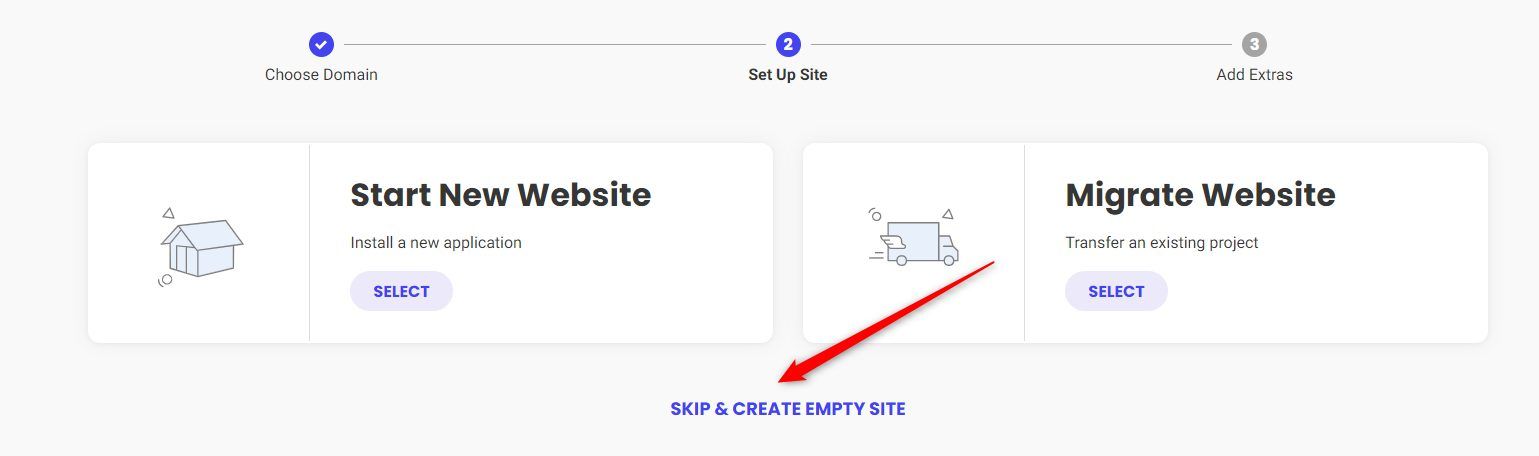
On the next page, click on the SELECT button under Existing Domain. Type your domain name in the space provided and click on the CONTINUE button afterward.
Click on the Skip & Create Empty Website link below the boxes.
If you need the Site Scanner add-on, click on the ADD button first. Otherwise, navigate straight to the FINISH button below the page and click on it.
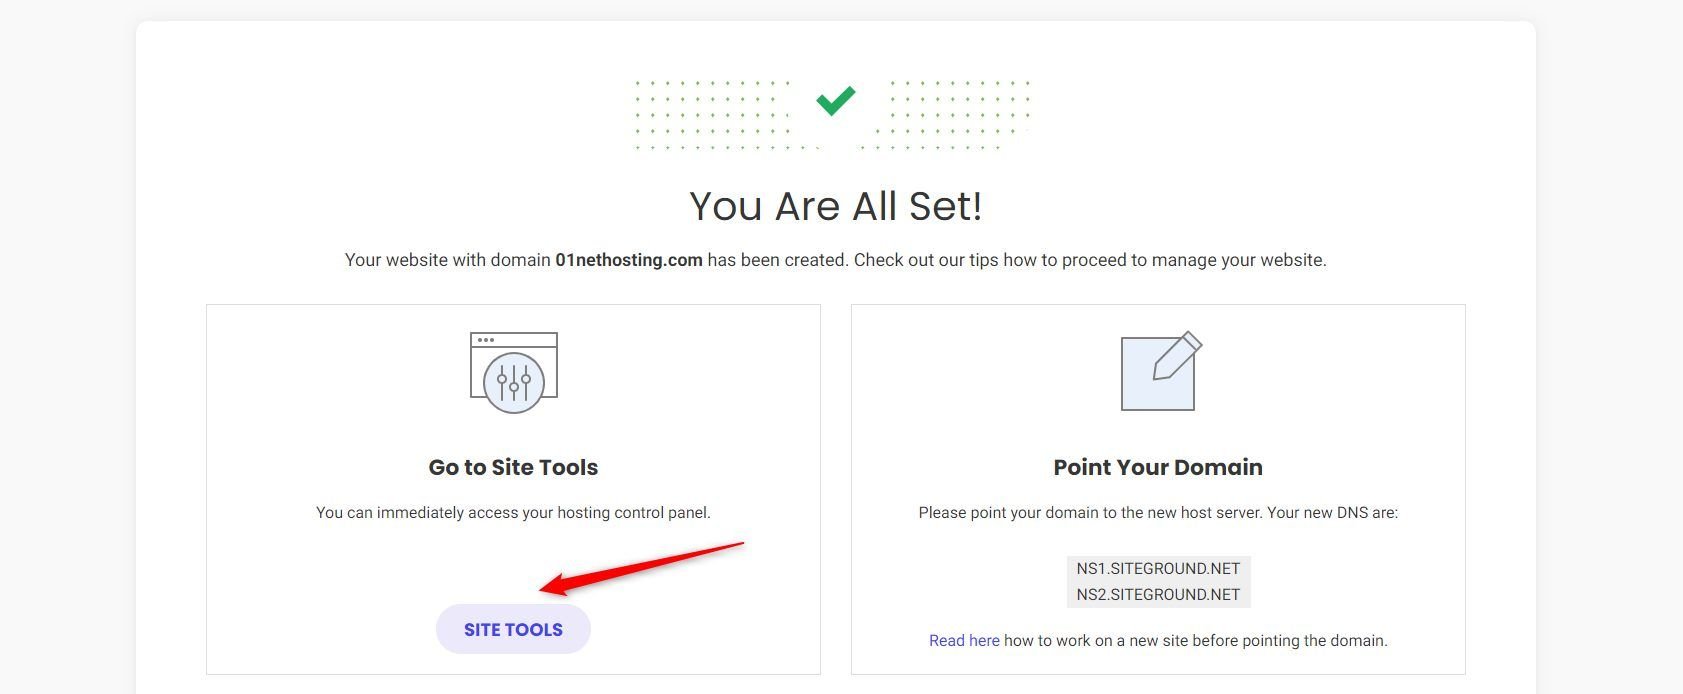
Wait a few seconds while SiteGround creates your website for you.

Now, click on the SITE TOOLS button.
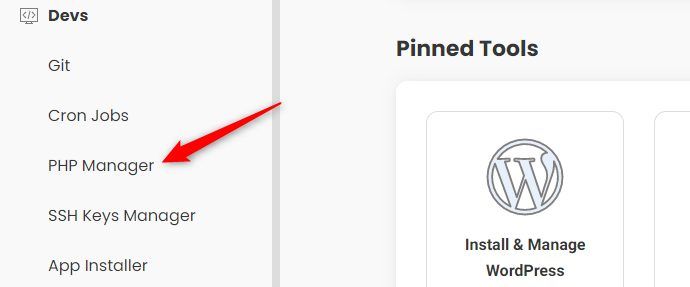
On the Site Tools page, navigate to Dev >> PHP Manager on the sidebar.
Scroll down to the Manage PHP Settings for yourdomain.com section.
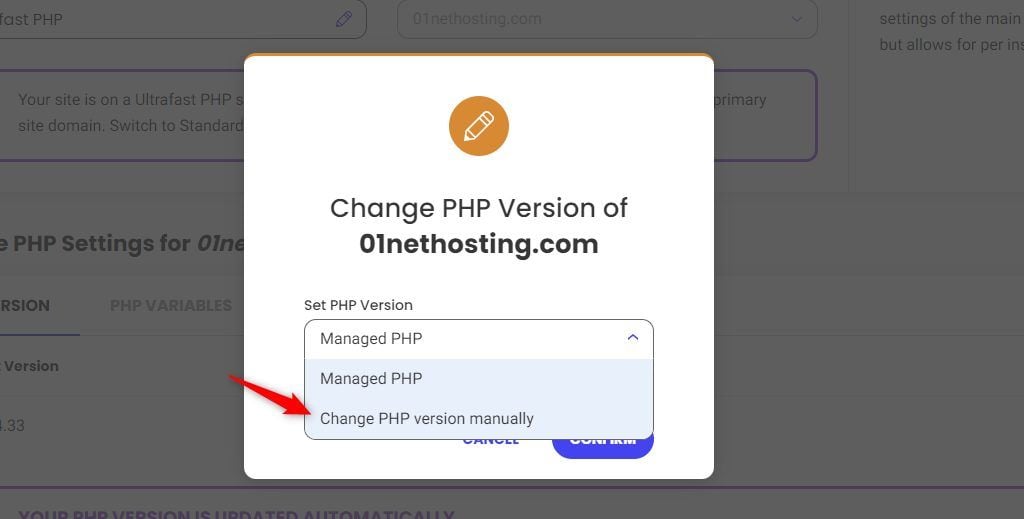
If the first two digits on the PHP version displayed match your current PHP version, leave it and proceed to upload your files. Otherwise, click on the pencil icon.
Then choose the Change PHP version manually option.
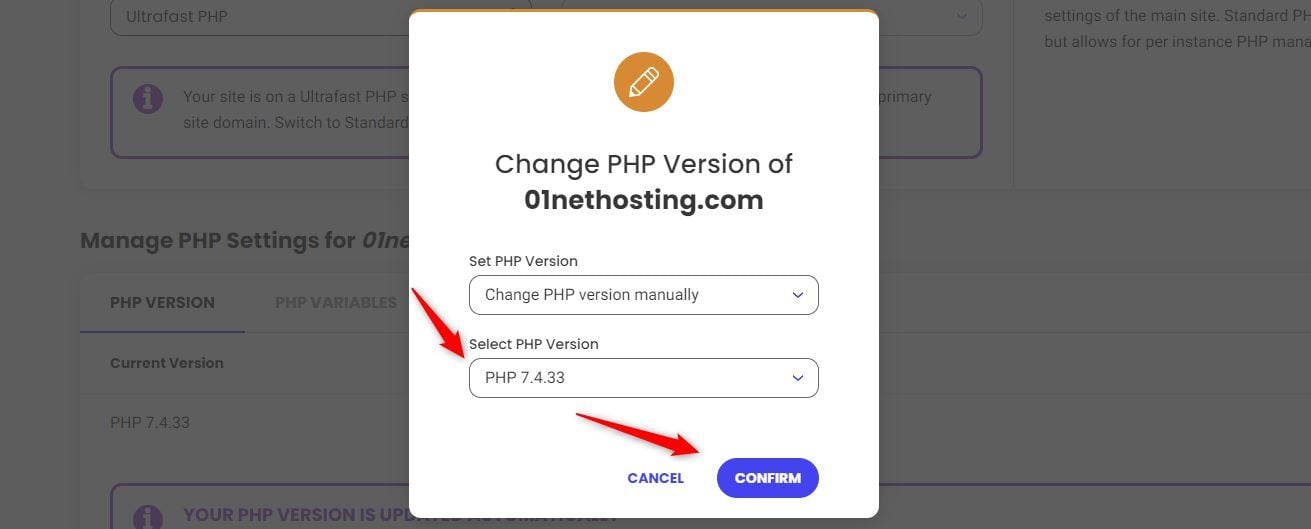
Choose the current one on your cPanel from the drop-down options in the Select PHP version box. Click on the CONFIRM button afterward.
5. Upload Your Backup Files to SiteGround
Now is the time to upload your files to the File Manager.
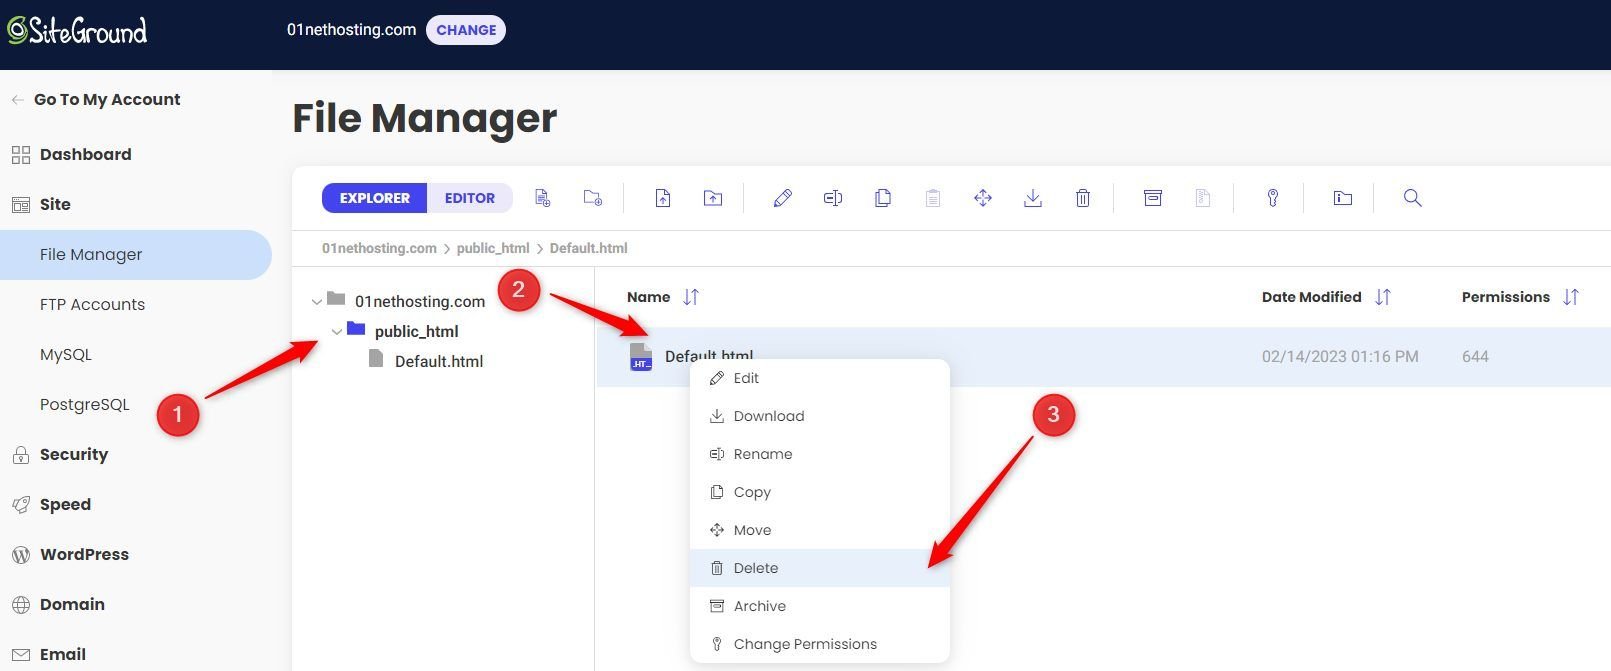
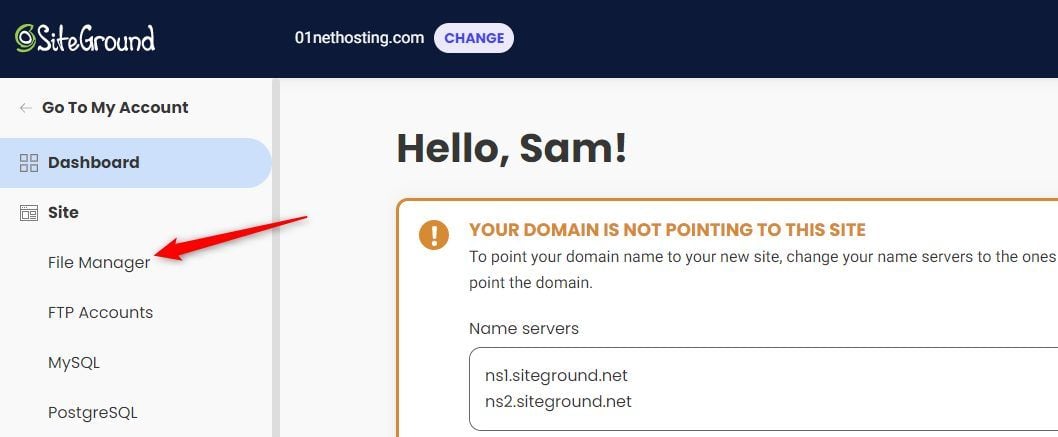
Navigate to Site >> File Manager on the left sidebar.
Now, click on the public_html folder to open it. Then right-click on the Default.html file and choose the delete command.
Click on the Folder Upload button and open the public_html 1 folder. Upload the folders (wp-admin, wp-content, and wp-includes) one after the other.

Afterward, click on the Files Upload button and go to the public_html 1 folder again. Upload all the files in the folder one after the other.

After the uploads, compare the content of your SG public_html folder with those of your cPanel. If all is well, you are good to go.
6. Import and Update Your Databases
The next step on how to migrate your website to SiteGround is to import your database file(s).
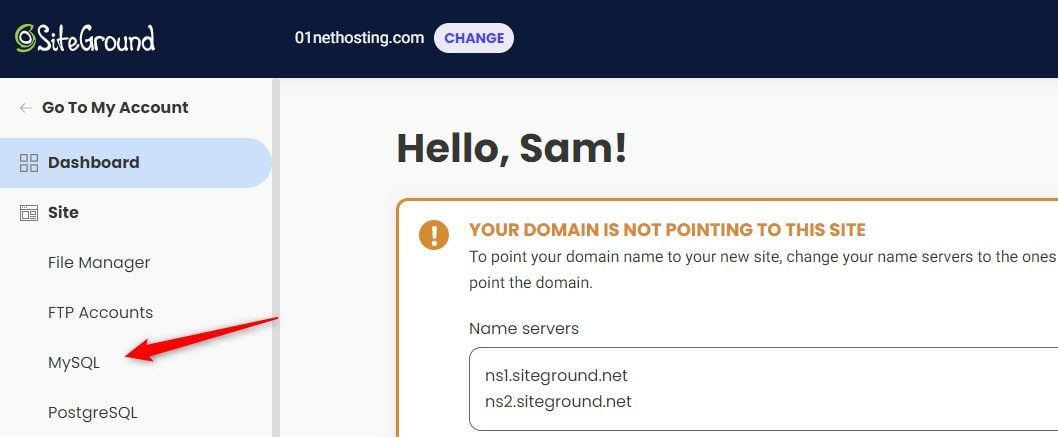
Navigate to Site >> MySQL on your left sidebar in Site Tools.
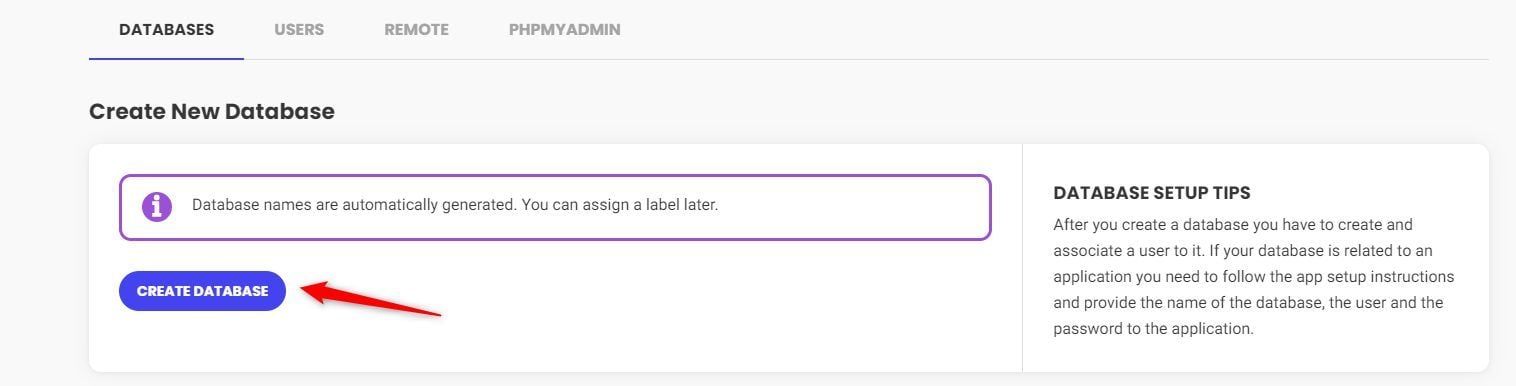
Click on the CREATE DATABASE button.
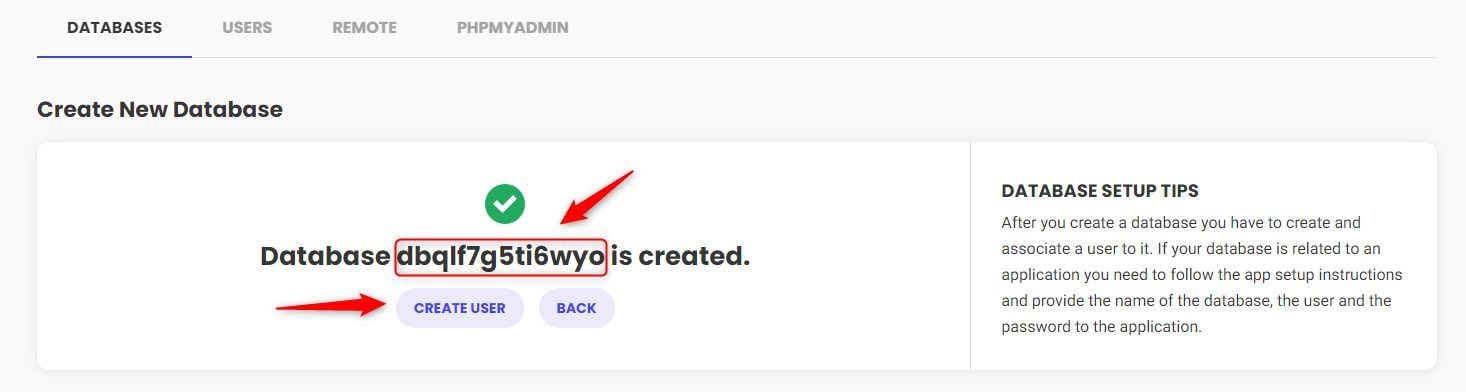
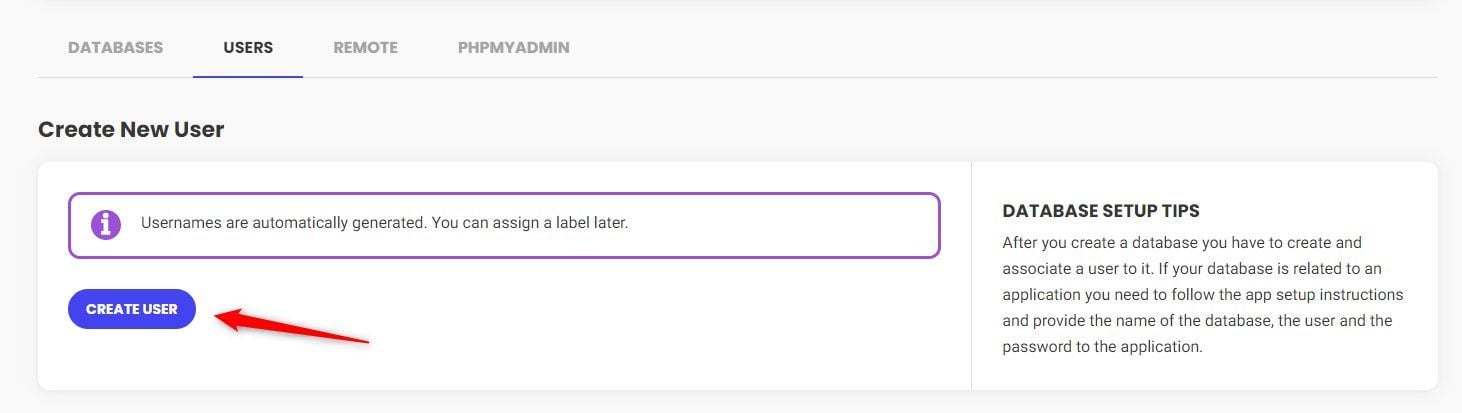
On the next page, copy the database name created. Then, click on the CREATE USER button.
Again, click on the CREATE USER button.
Copy the database user name and the password. Then click on the phpMyAdmin tab.
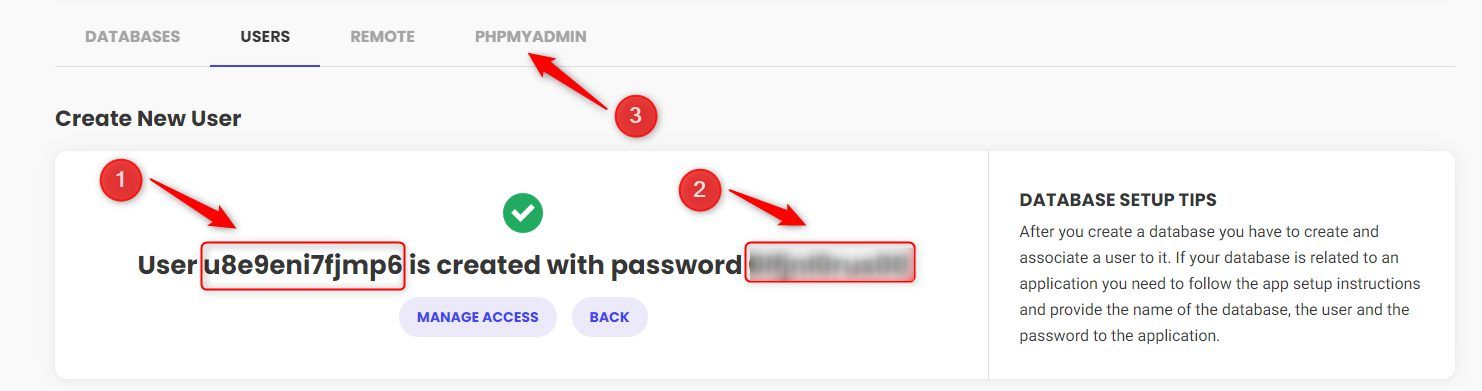
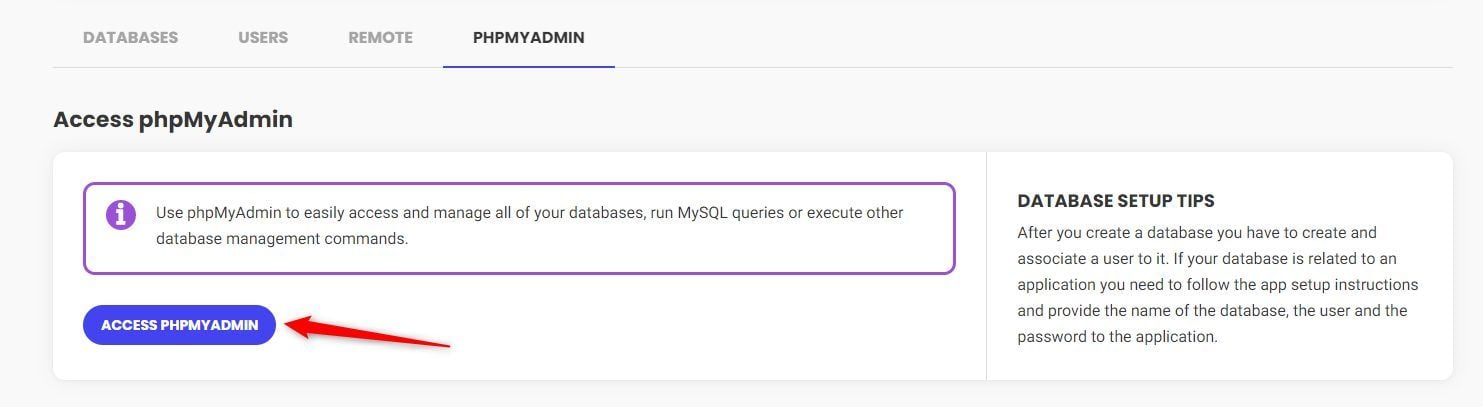
Click on the ACCESS PHPMYADMIN button.
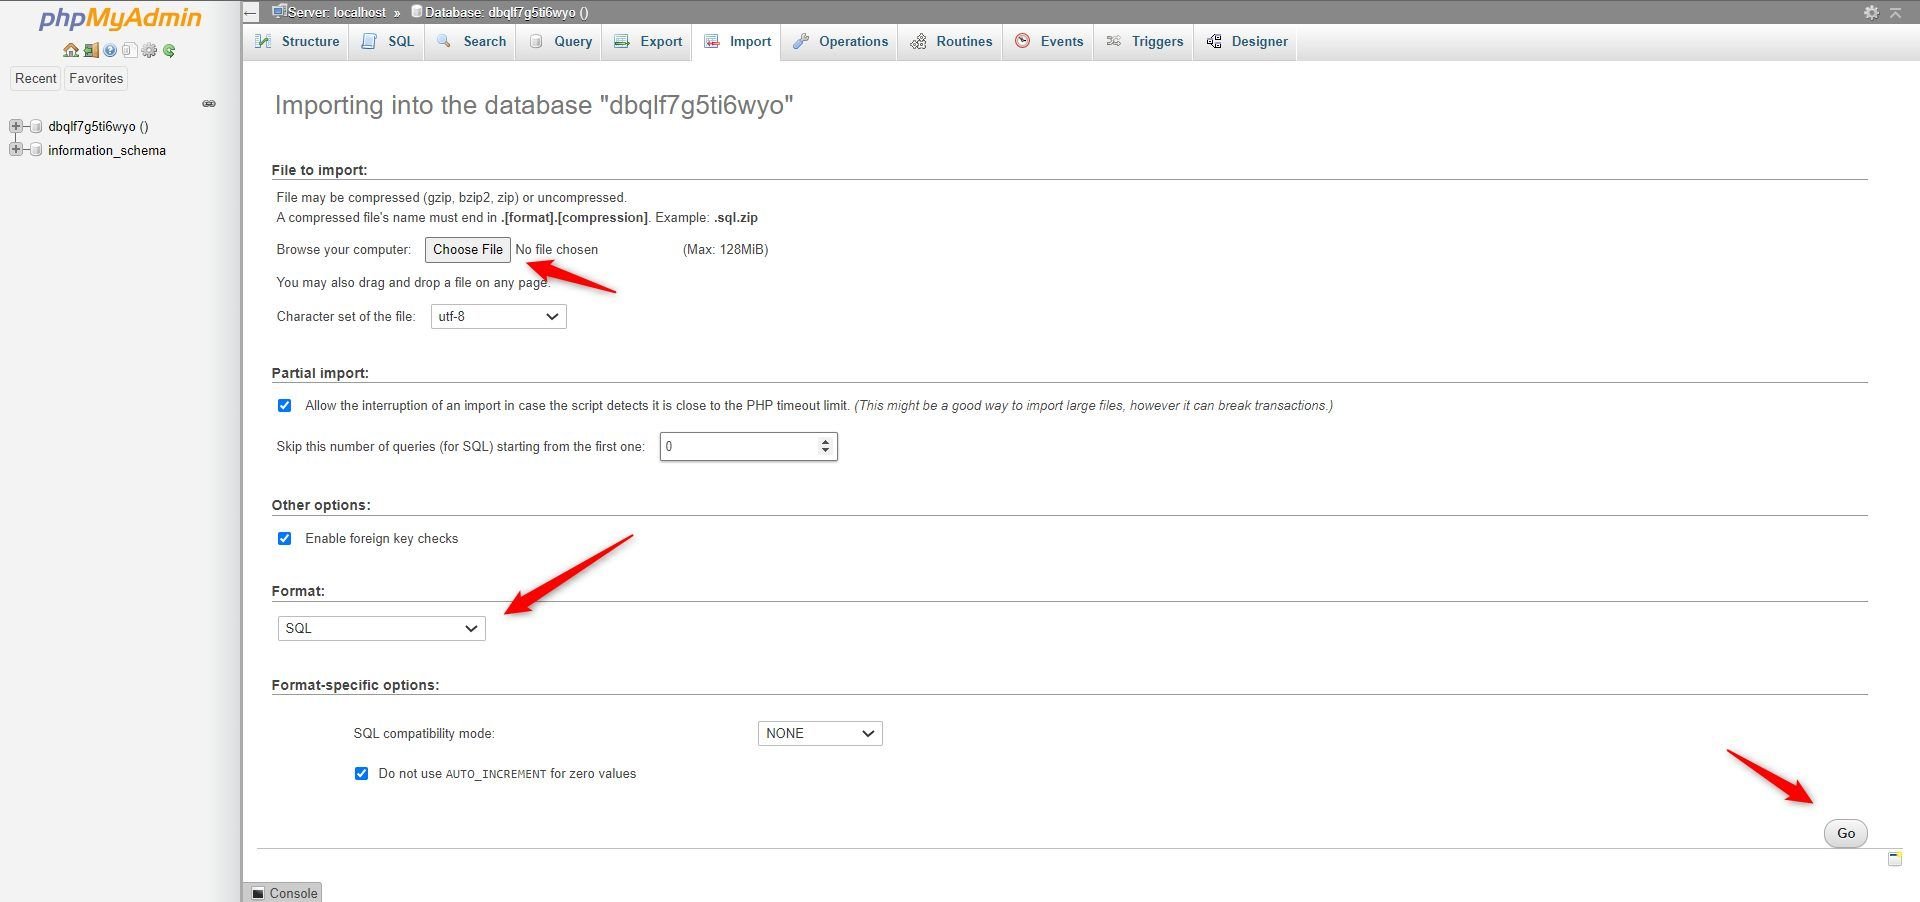
Now click on the database you just created from the left sidebar. Once it opens the table, click on the Import button.
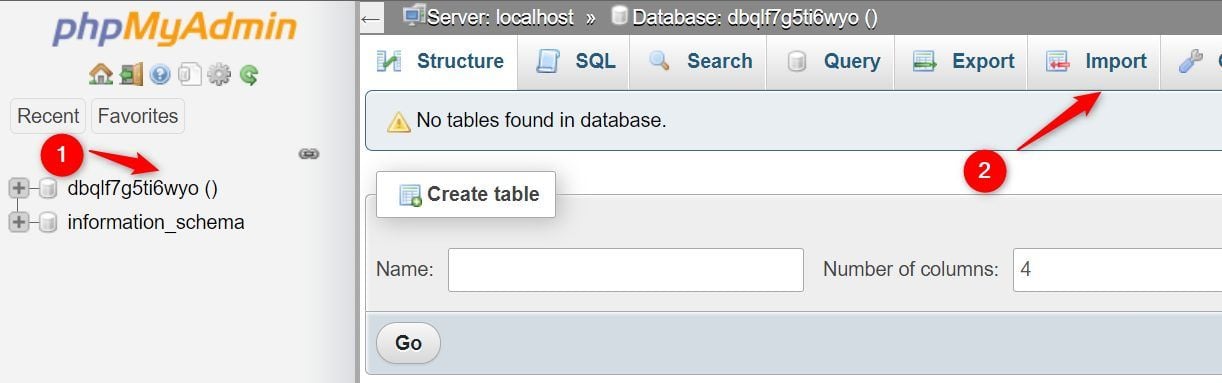
Click on the Choose File button and pick the database file you exported from your previous phpMyAdmin. Leave the format at SQL and click on the Go button afterward.
Now, go back to your Site Tools. Navigate to Site >> File Manager from the left menu.
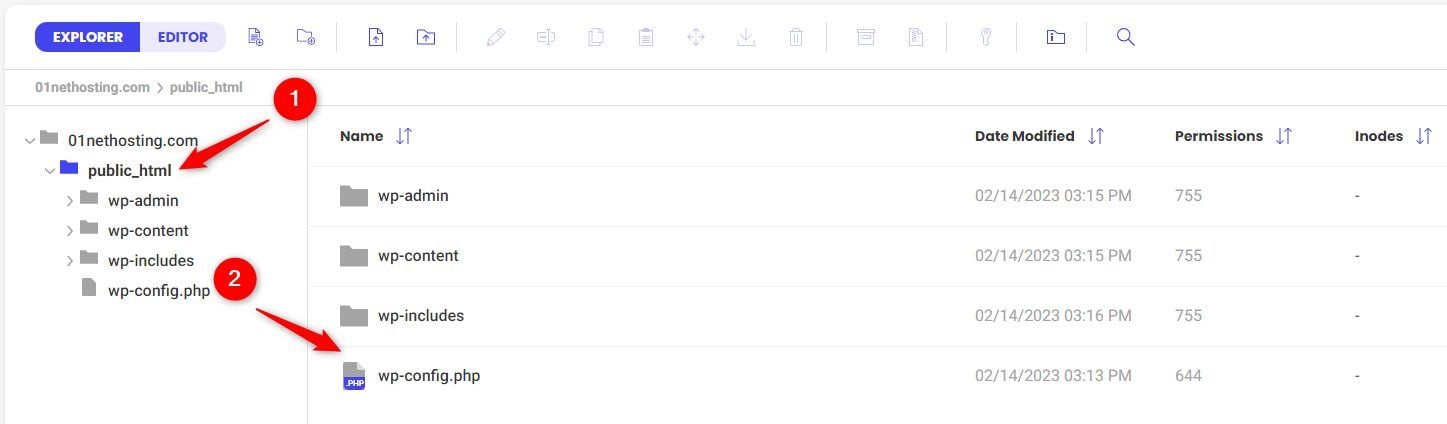
Open your public_html folder and then the wp-config.php file.
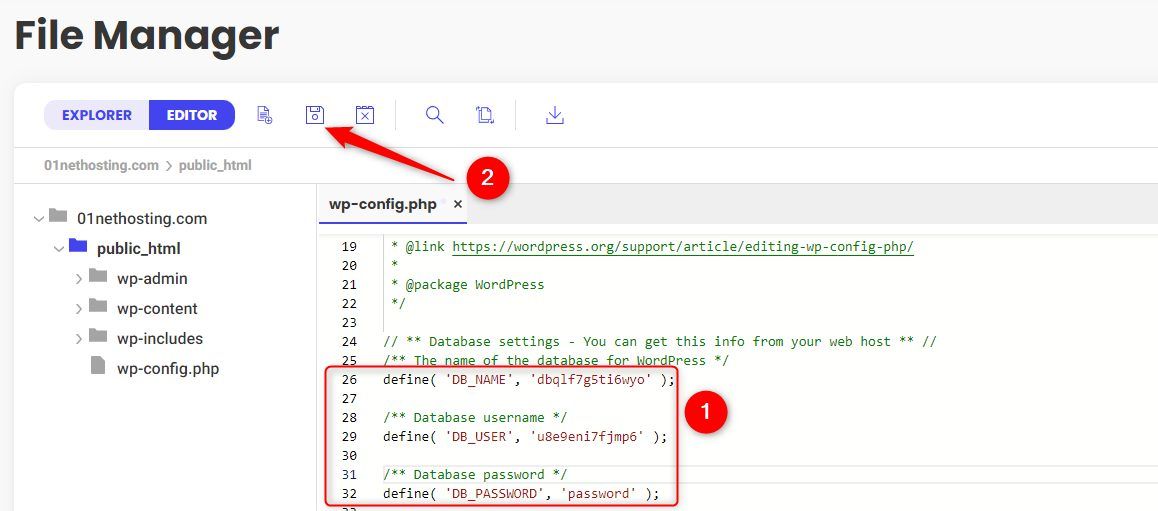
Scroll to the Database Settings line. Replace the database name, username, and password with the ones you copied from MySQL earlier. Then click on the save icon on the toolbar.
The last thing you need to do is to change your nameservers to ns1.siteground.net and ns2.siteground.net for the first and second slots, respectively, on your domain registrar website.
This is how easy transferring your website to SiteGround is.
Reasons to Migrate Your Site to SiteGround
Here are some reasons you should change your host to SiteGround:
- A free and easy migration process
- Great customer service
- Affordable introductory prices
- High-performance technologies and commercial-grade security
- Great value for money
Overall, after testing a large number of web hosting companies, we can assure you that SiteGround is among the very best.
Before transferring your site to this company, don’t hesitate to read our Hostinger vs SiteGround duel to see which of these two excellent web hosting providers is the most suitable for you.