One of the difficulties many business owners without coding knowledge face nowadays is the inability to create a website with WordPress. This is mainly because they think creating a WordPress site is rocket science and only for developers, designers, or geeks.
However, that is not the case. Now, anyone can easily build a website with WordPress in minutes by simply following instructions. It requires no technical skill whatsoever.
Therefore, to help many small business owners get online, we prepared this step-by-step guide on creating a website using WordPress. This article helps you set up a WordPress site for your business or clients in less than 60 minutes. If that sounds interesting to you, stay with me!
There are about eight significant steps to creating a site with WordPress. Here, we will explain all the steps in vivid detail and provide helpful graphical guides.
Step 1: Choose a Suitable Domain Name
The first step in creating a WordPress website is choosing a domain name. A domain name is the most important part of a website. Many webmasters refer to it as a business’s online address.
Your domain name is what users or visitors type into their browser’s address bar to reach your website. It is a unique identifier; no business can share it with you simultaneously. So without this, no site can exist or be created.
It would help to consider certain factors when choosing a domain name for your business. These factors are:
Deciding on a Name
This is the first step regarding the domain name when you want to create a website with WordPress.
When choosing a domain name, it is advisable to consider your business or brand name. As a general rule, it is easier for visitors to link your site’s address to your business name rather than an alias that they do not know.
For instance, if your business name is Example, customers who haven’t heard of your website before will naturally think your domain name is example.com, example.org, example.net, or any Top-Level Domain (TLD).
When this happens, and they are right, it works in your favor since they will visit your site to perform their intended transaction. Consequently, it is advisable to use TLD domain extensions when building a website with WordPress.
Note: A top-level domain (TLD) is the highest level in the DNS hierarchy right after the root domain. Examples of TLDs are .com, .net, .org, and others.
Furthermore, if you are building a niche website on WordPress, choosing a name that hints at what it is about is always advisable. For example, seeing a domain that says hostingtester(dot)com or domaintester(dot)com gives people an idea of what they are about.
Most people can deduce that the first domain tests hosting services, while the other tests domain-related services.
Confirm the Availability of the Domain Name
When you want to build a website with WordPress, the next step is to confirm the availability of the domain name you chose.
Confirming the availability of a domain name comes in two ways. The first has to do with the name’s trademark, while the second has to do with the domain name itself. To confirm the availability of a domain name, you need to try registering it using a registrar. We will show you how to do that in the next part.
When choosing a domain, especially as an infant company that is probably not registered yet, you must do some research. It is critical to make sure that any other registered or established company does not use the name you have chosen.
If the name is already registered, then that company may have the trademark to any top-level domain that uses the exact letters of its name. Thus, you may be in a dirty and unnecessary future lawsuit if the company decides to register that domain name.
In addition, sometimes, the domain name you have picked is already registered, especially the .com TLD extension. When this happens, it is usually advisable to choose another domain name. This is because the .com extension domain is very popular, and people subconsciously add it to a company’s name to find its website.
Thus, your customers may mistakenly land on another company’s homepage.
So, it is more advisable to either change your brand name entirely to match an available domain name or use a popular alias, variation, abbreviation, or acronym of your business name.
Generally, when building a website with WordPress, we recommend getting the .com domain extension as it is better and easier for visitors to remember.
Choosing a Registrar and Registering the Domain Name
Once you have decided on a domain name, the next course of action when creating a WordPress site is to register it. To do that, you need to use a domain registrar. The best domain registrar in the industry is Hostinger, and you can get a domain for as low as $0.99 per year.

You can use the Hostinger domain name search tool to choose a good name or even check the availability of the one you had in mind. To use it, navigate to the domain checker tool page, type your domain name in the search box, and hit the search button.

If your preferred domain is available, click on Make It Yours beside it and then Continue to Cart. This will redirect you to the payment page, where you can choose between one and three years from when you register or subscribe.

Once you have chosen that, input the email address you want to associate with the hosting account or connect using your Facebook or Google account.
Then, choose your preferred payment, type in the details, and click Submit Payment. This will process your payment and create an account for you.

If you used an email address, you will have to set your password and fill in other personal details on the next page to finalize your account creation. Hostinger provides free privacy protection for all its domains, so you do not have to worry about information leakage.
If the domain name is unavailable, the tool will let you know it is taken, and you may choose a similar one with another domain extension.
However, that decision is up for debate, and you may refer to the availability sub-step above to know what to do. But in our expert opinion, building a WordPress website with the .com domain extension is much better than using another extension.
Step 2: Choose a Good Hosting Plan/Company
No website can exist without hosting, which is another important part. So, even if you already registered a domain name, you need a host if you want to create a website with WordPress.
Hosting is more like online housing. It encompasses how and where the files, media, and databases on your site are stored. While your domain name is the address, hosting is the building or warehouse. So, you need to buy a hosting account or plan as well.
The web hosting company that hosts your site has a great impact on the success of your online business. Hence, it is advisable to always go for the best one to avoid regrets later. There are so many out there, but we have prepared an article on the best web hosting providers to choose for your website projects.
Based on the quality of service and our general experience testing these hosting companies, Hostinger is our top pick. Thus, we will use it for this guide on how to build a website with WordPress and recommend it to you, too. Read our Hostinger review to get a glimpse at the quality of their services.
Purchase a Hosting Account/Plan
Hostinger has different hosting types, including shared, managed WordPress, VPS, and cloud. The best one to choose when creating a WordPress site depends on the needs of your business, but we recommend getting a shared plan as a beginner. You can upgrade the plan as your business scales.
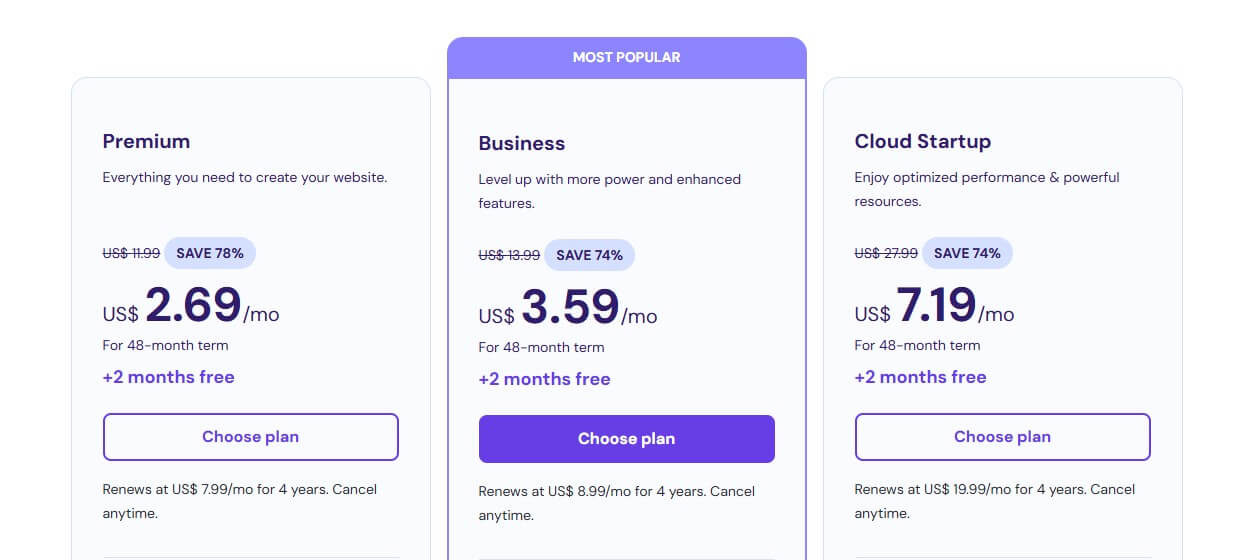
To purchase a hosting account, go to the Hostinger website and choose your preferred shared hosting plan. The Premium web hosting plan is available for as low as $2.99 per month for a 4-year subscription.
This package has many features that will help your site and business grow. It includes SSL certificates, a free custom email address, SSD storage, unlimited bandwidth, and an AI Content Generation tool. Beware that the plan also includes a free domain for a year if you haven’t purchased it yet.
Alternatively, if you have many sites to create and want eCommerce tools, you can purchase the business plan for as low as $3.99 per month. You will enjoy a free domain name registration for the first year, saving you about $10.
After you click on Choose Plan, select your subscription period between 1 and 48 months and provide your email address to open an account. Alternatively, you may use your Facebook or Google account.

Then, you should choose your preferred payment method, type in the details, and click on Submit Secure Payment.

Afterward, you may set your password and log in to the hPanel to continue creating your WordPress website.
Step 3: Install WordPress on Your Domain
Here is where the fun begins. Now that you have a domain and a hosting account for your site, the next step when creating a WordPress website is installing WordPress on that domain. Do not fret; Hostinger makes building a WordPress website pretty easy.
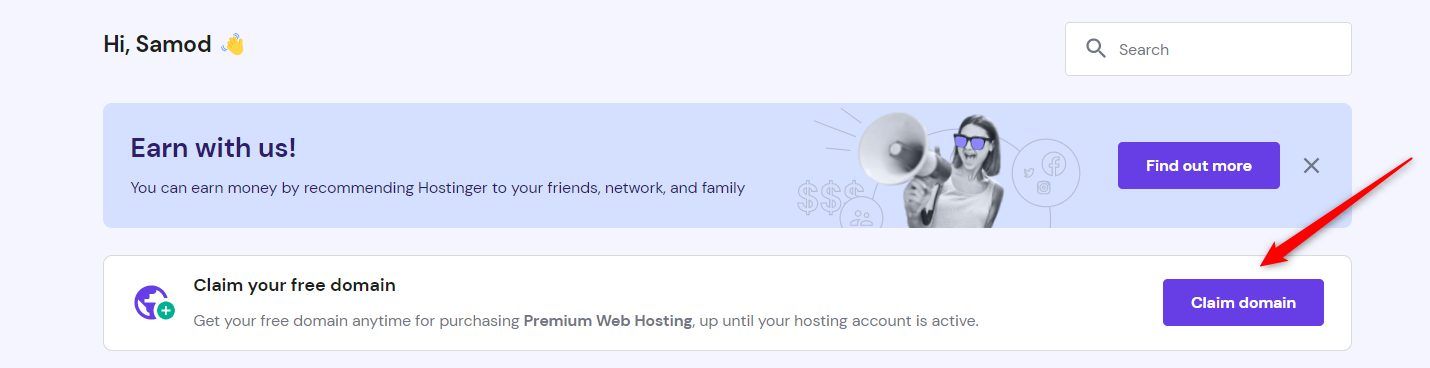
To do that, log in to your control panel (hPanel). If you are on the Premium shared plan upwards, you can claim a free domain.
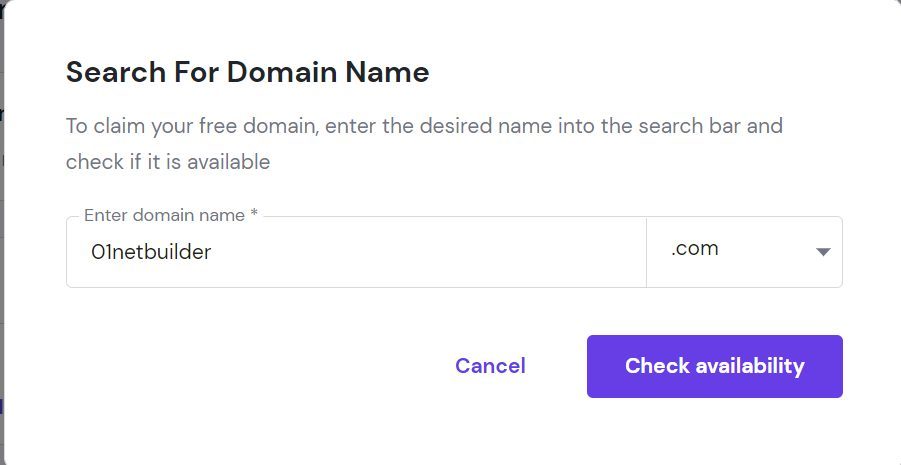
Thus, click on the Claim domain. On the pop-up window, enter your preferred domain name and choose an extension from the list.
Afterward, click on Check Availability. The tool will let you know if the domain is available. If it is not, it will suggest that you search for another domain name.
If it is available, click Claim domain. You may then proceed to install WordPress on that domain.
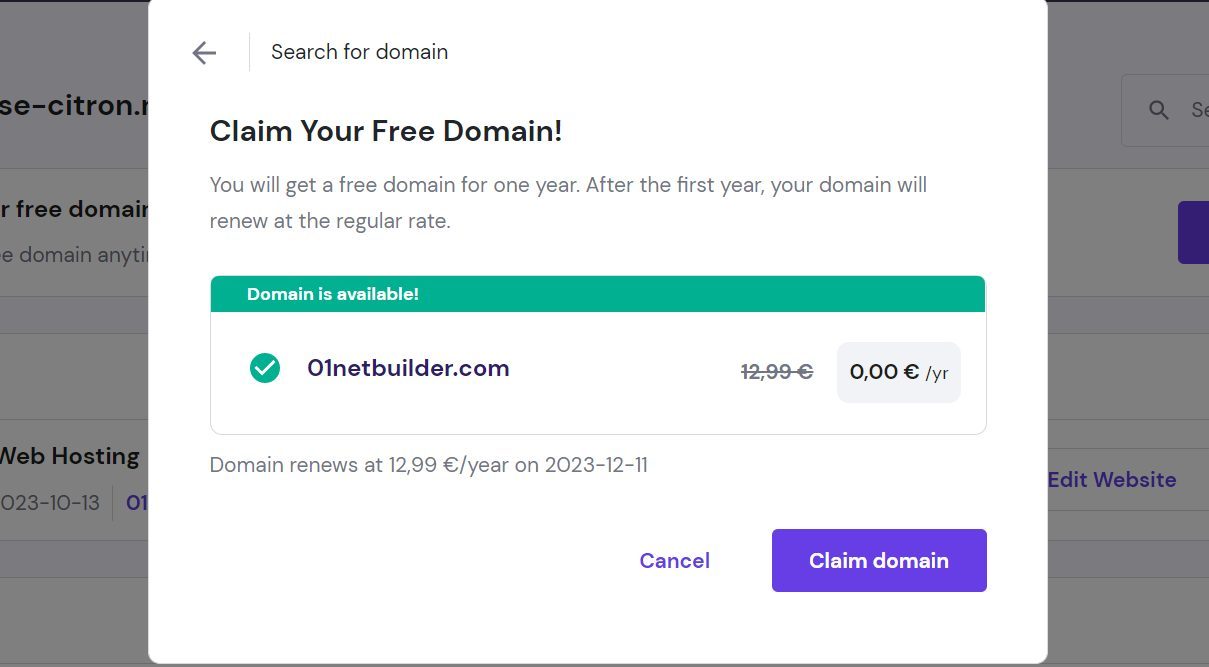
Note that no matter when you claim the free domain, it will expire after the first year of your subscription, and you will have to renew to keep it.
Once on the Hostinger hPanel, click on Website from the top menu. Then click on the big box that says Create or migrate a website.
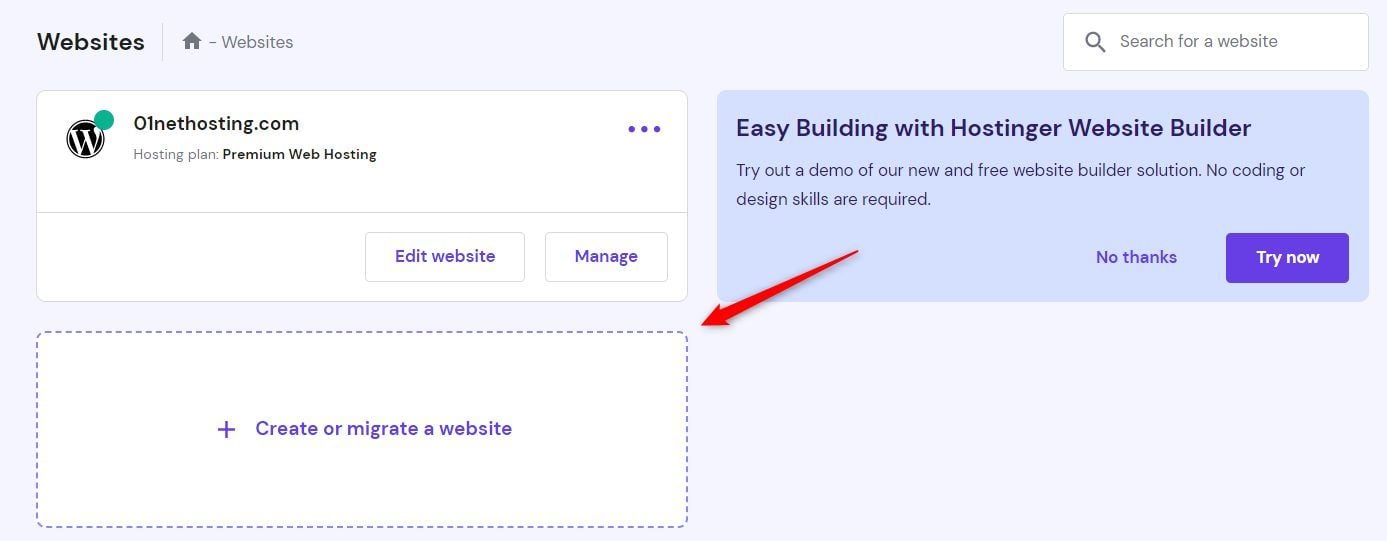
Select the Create a New Website option since we are not migrating a site.

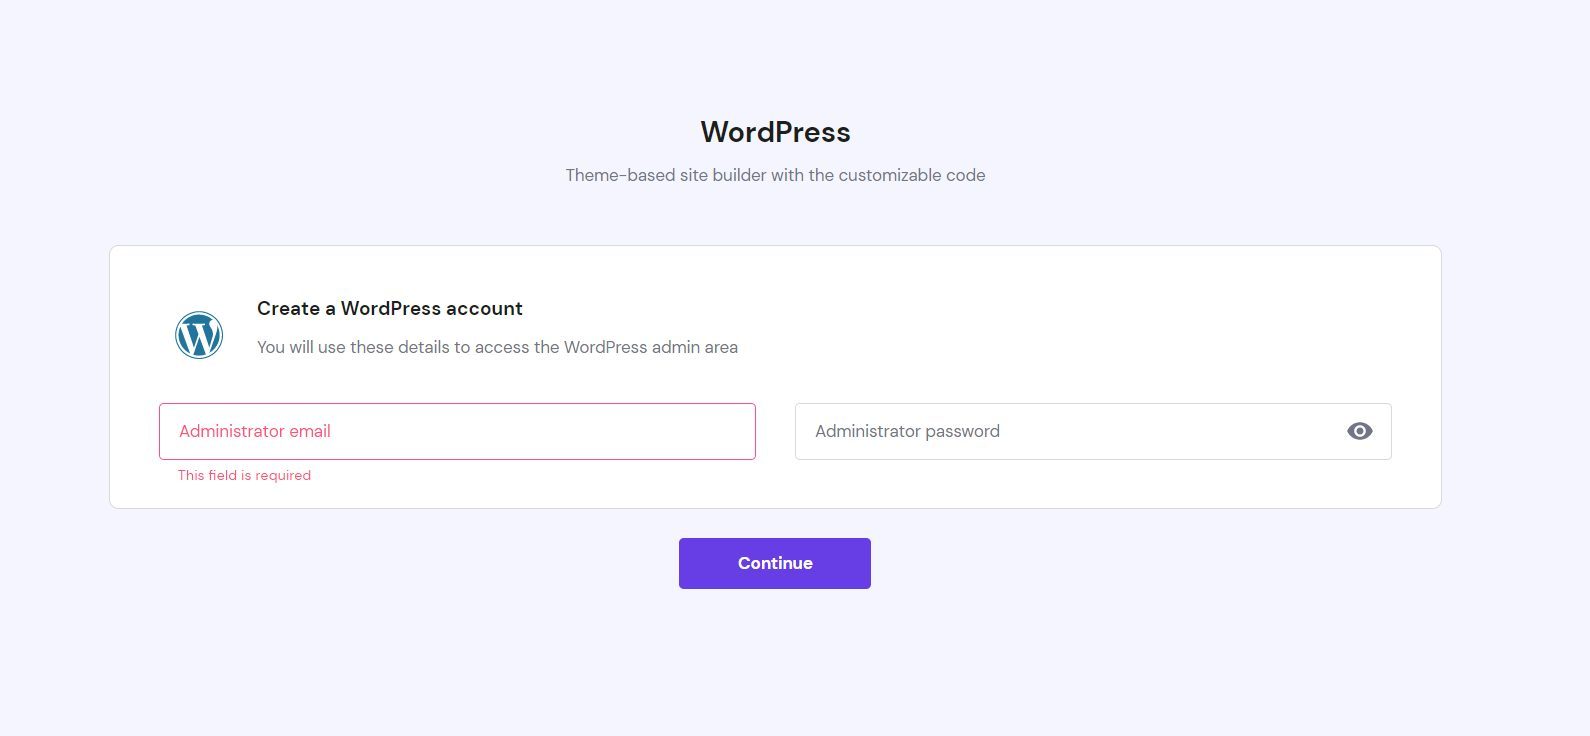
On the next page, select the WordPress option since we are trying to create a website with WP. The Hostinger Builder option does not work with WordPress, so do not make the mistake of selecting it.
Afterward, specify the email address you want to use for your administrator account and your preferred password. Then, click on Continue.
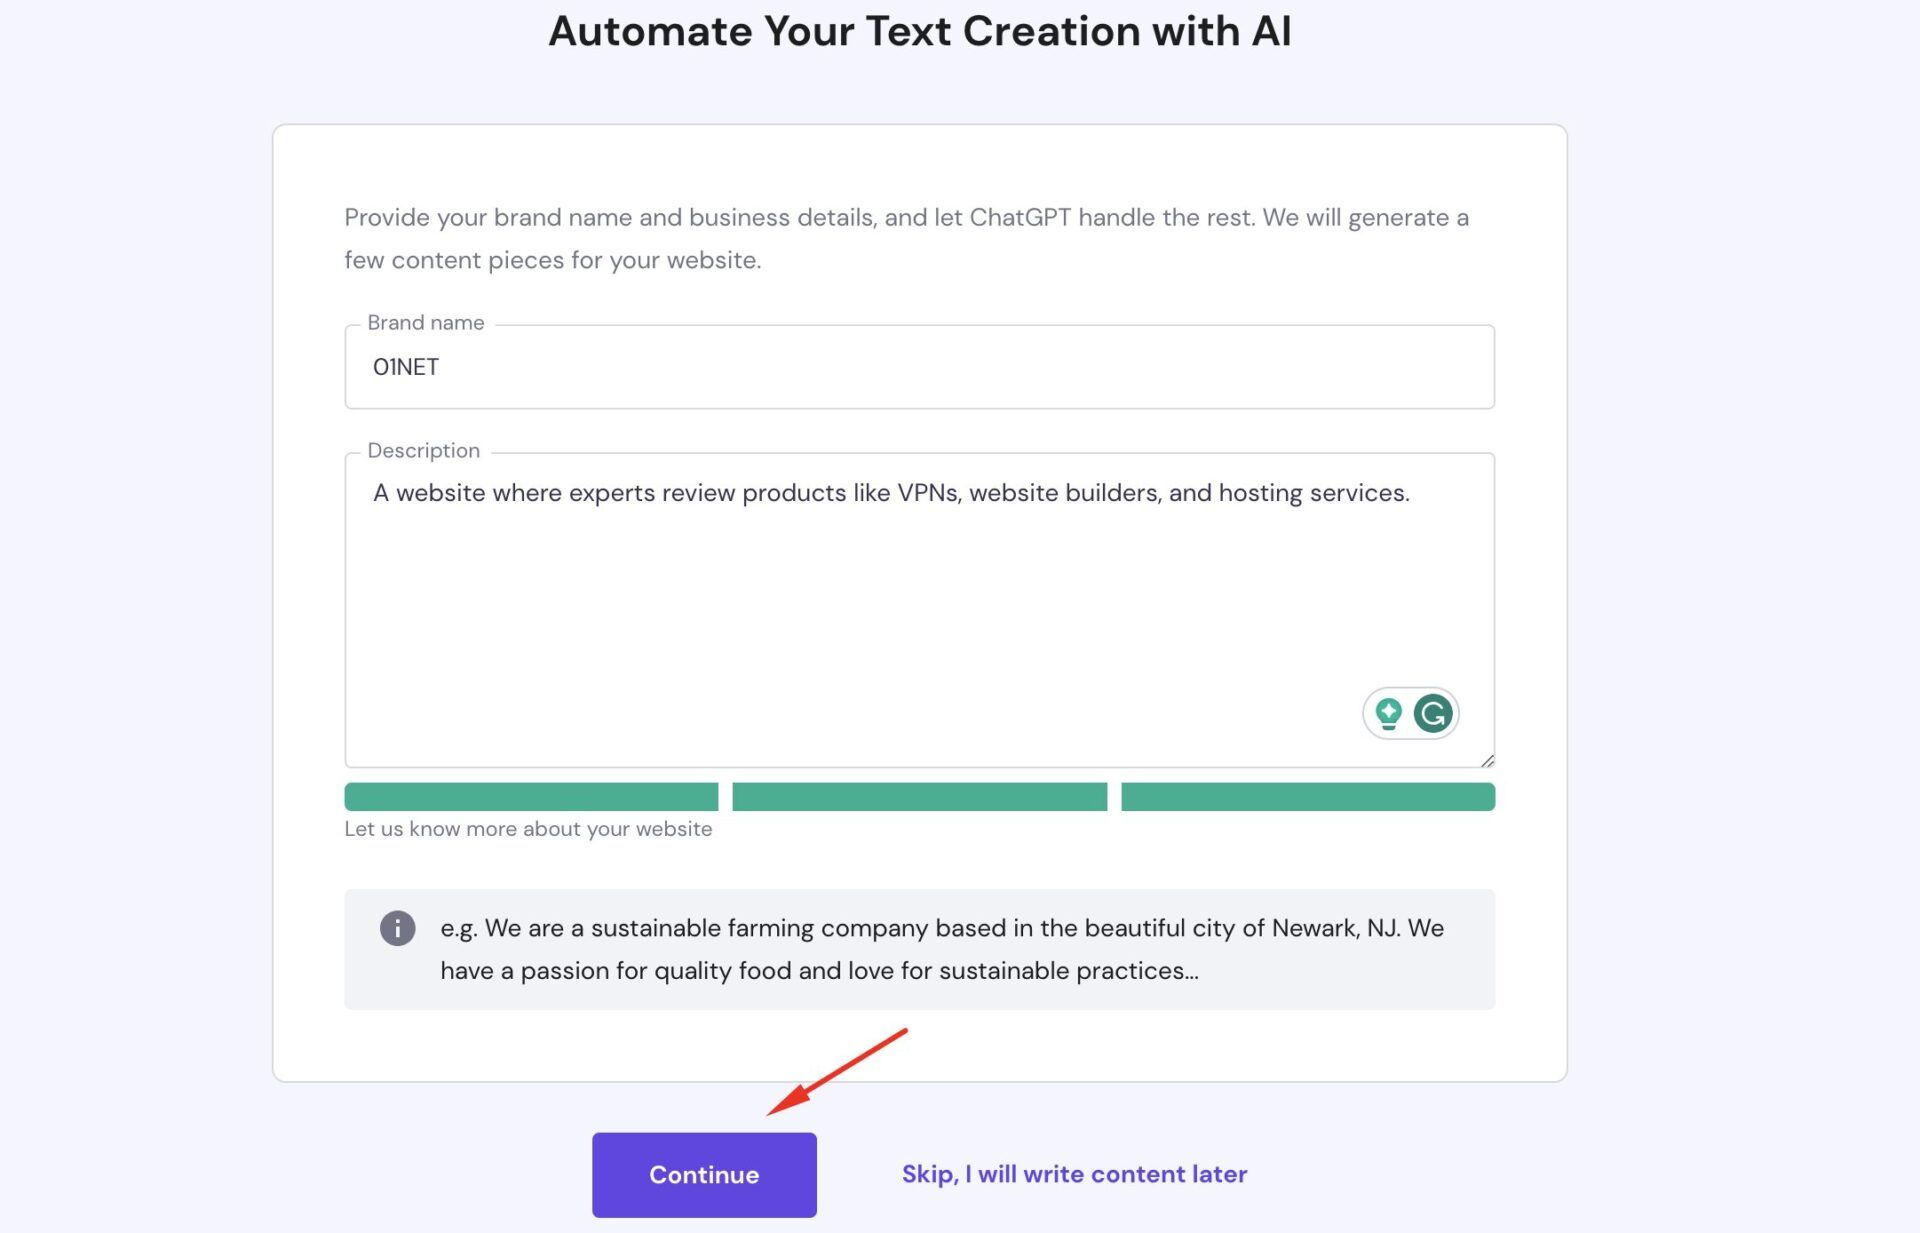
Afterward, you can choose to make ChatGPT create some content for you. All you need to do is provide your brand name and a description of your business. Then, hit the Continue button. The content will be automatically generated on your site. If you don’t want AI content, click the Skip, I Will Write Content Later link.
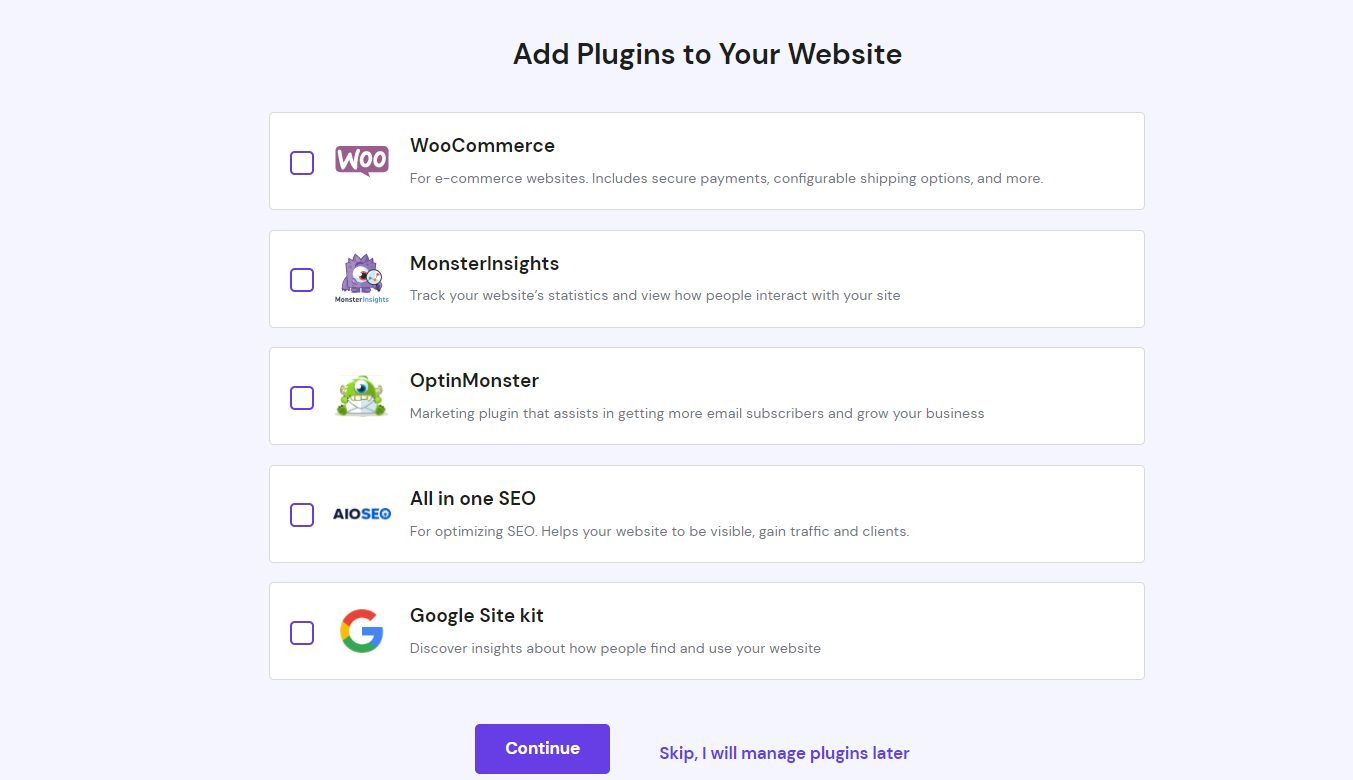
On the next page, you can choose a list of plugins you would like to include in your WordPress installation. These plugins are for SEO and Analytics. Afterward, click on Continue.
If you do not wish to include them, click on Skip, I Will Manage Plugins Later.
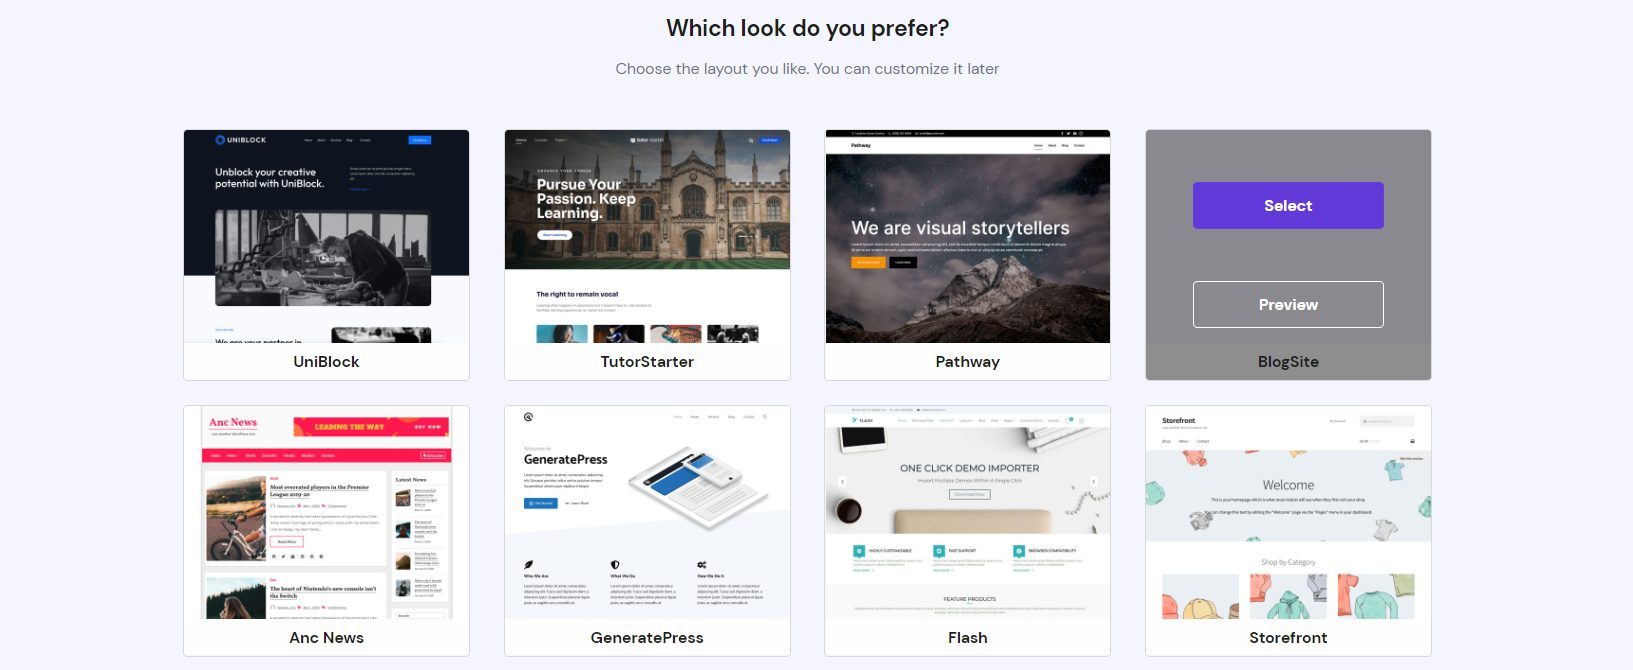
Afterward, you may choose a starter theme from the list of templates available. You may preview them to see if you like them. Click on Select on the template you want.
If you choose no template, click on Skip, I Don’t Need a Template, and the Twenty-Three theme will be pre-installed for you.
Now, you can choose the domain you want to install WordPress on. If you already have one registered, select Use an Existing Domain. Then, type the domain name in the box provided and click on Continue.
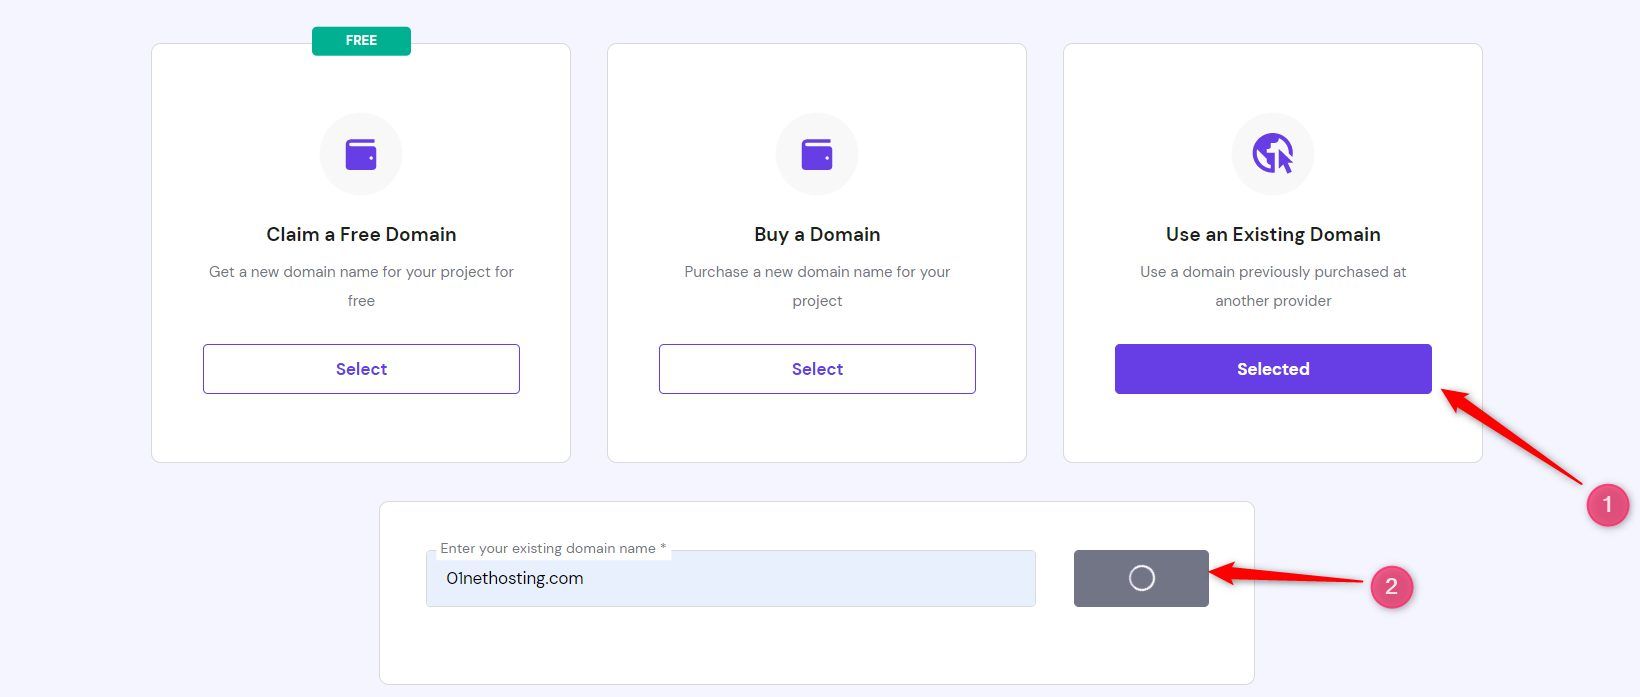
If the domain is registered on Hostinger, the installation process will provide a drop-down where you can choose it as an alternative method.
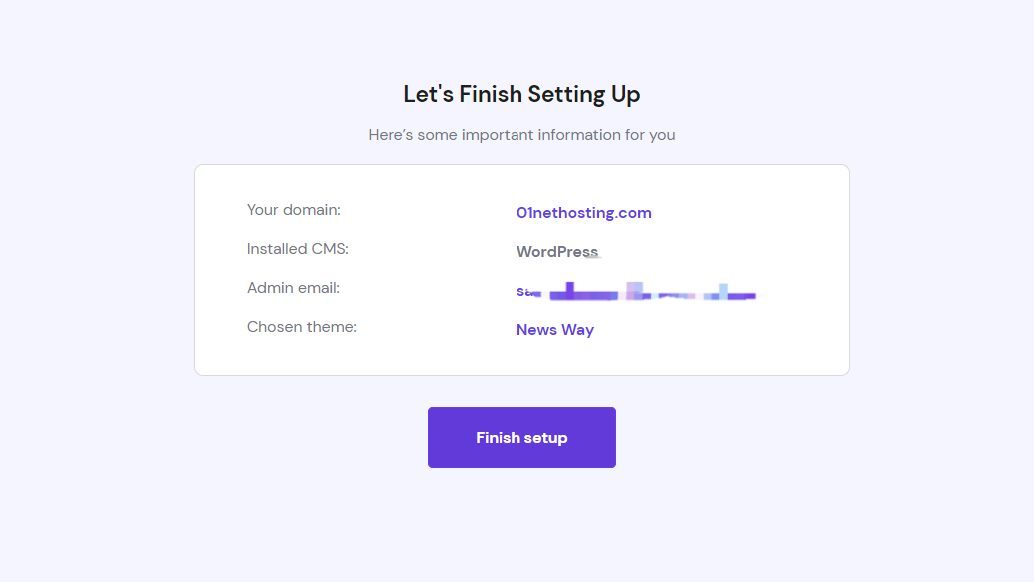
On the next page, click on Finish setup. This concludes your installation, and you have been successful in building a WordPress website to a point. You can now log in to your WP-Admin area using the username and password you set during the installation.
Step 4: Choose Your Preferred Theme
Themes are the skins of your WordPress site. They determine how the WordPress website you create will look, and they come in various designs with different features. If your preferred theme was not part of the available templates during your WordPress installation, you could change it now.
There are a lot of themes that you can use to build your WordPress website. Some are free, while others are only available as paid themes. At the same time, some themes have both free and paid versions.
The right theme to use when building a WordPress website depends on your business’s purpose, personal preferences, and the features you need. You should also consider the theme’s general performance regarding speed and SEO.
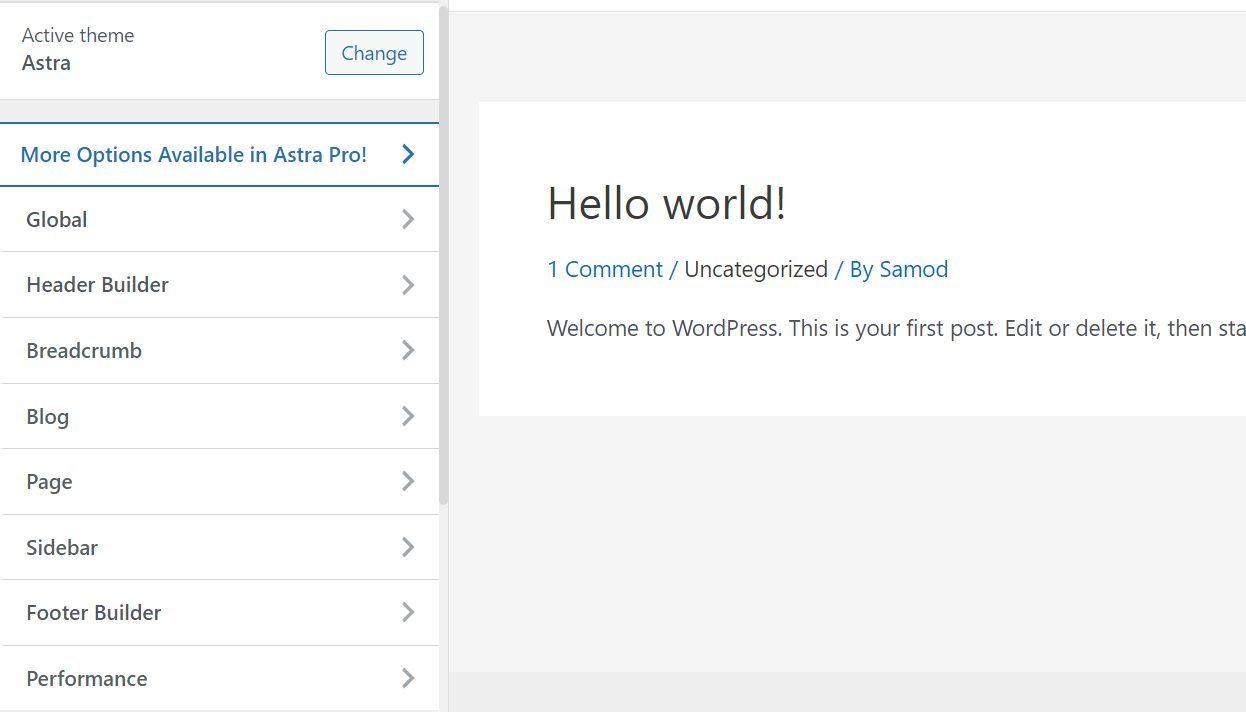
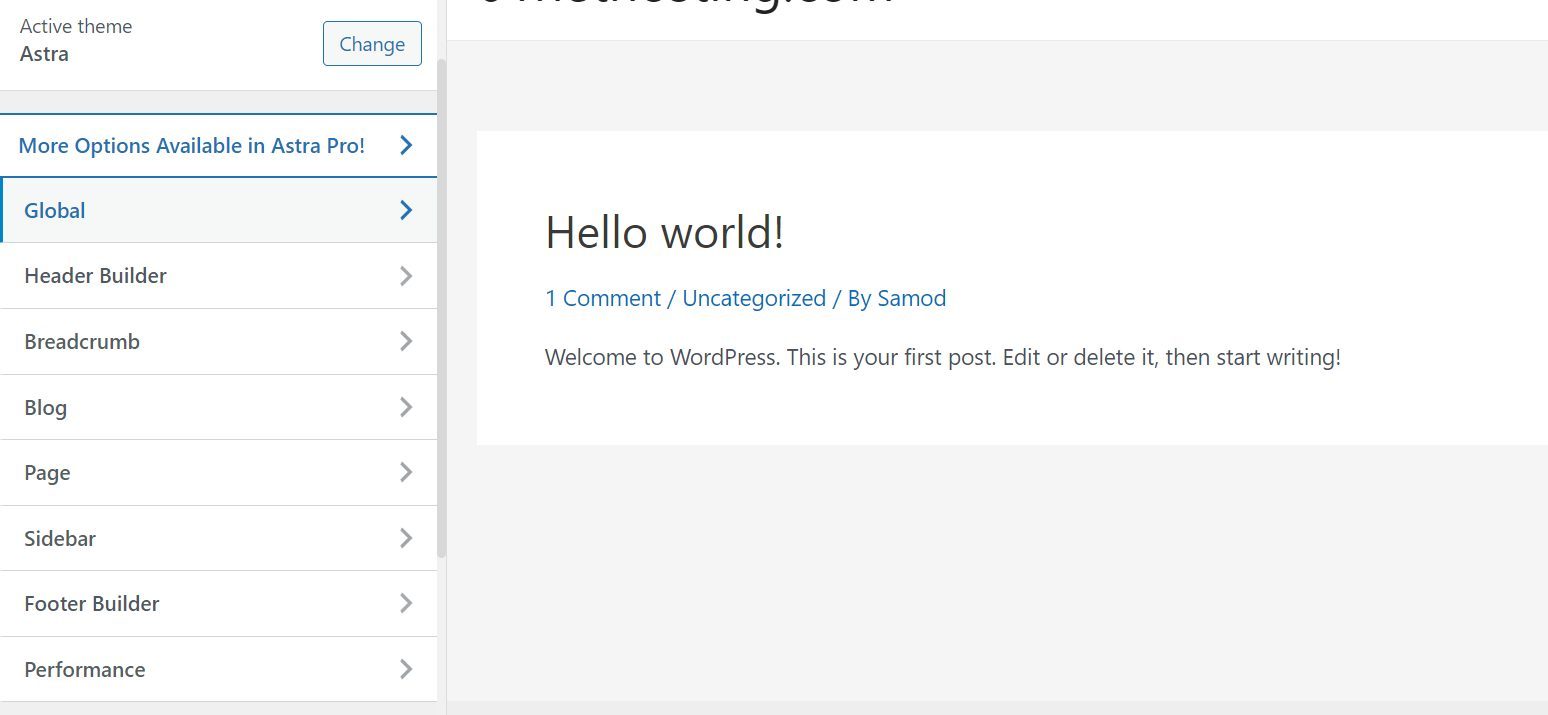
Based on our tests and review of WP themes, we can recommend Astra as a great theme to use when you want to create a website with WordPress. Astra is a noteworthy theme that comes in both free and paid versions. It is fast, lightweight, and optimized for SEO.
It has many layouts suitable for different types of sites or blogs.
Furthermore, the Astra WordPress theme is very eCommerce-friendly, as it supports many features that can help you make money with your content. This includes out-of-the-box support for WooCommerce and its plugins and LearnDash. LearnDash is very useful if you want to create a website with WordPress to sell online courses.
Even with the free version of the Astra theme, you can fully customize most parts of your website. You can set the menus and design the layouts how you want, customize your widgets, and change the style of your site.
If the free version’s customization isn’t enough, the Astra theme is compatible with many page builders, like Elementor, so you can customize it further. With the Astra Pro theme, things even get better. Your designs and customizations are limitless.
You will get many professional website templates to choose from and edit with your content. The pre-designed menu layouts also increase, and more eCommerce functions are unlocked.
Astra is a powerful theme recommended for beginners who want to build a WordPress website easily. The free version is great, and the Pro version is even better. The Astra Pro theme costs as low as $59 yearly.
Install the WordPress Theme
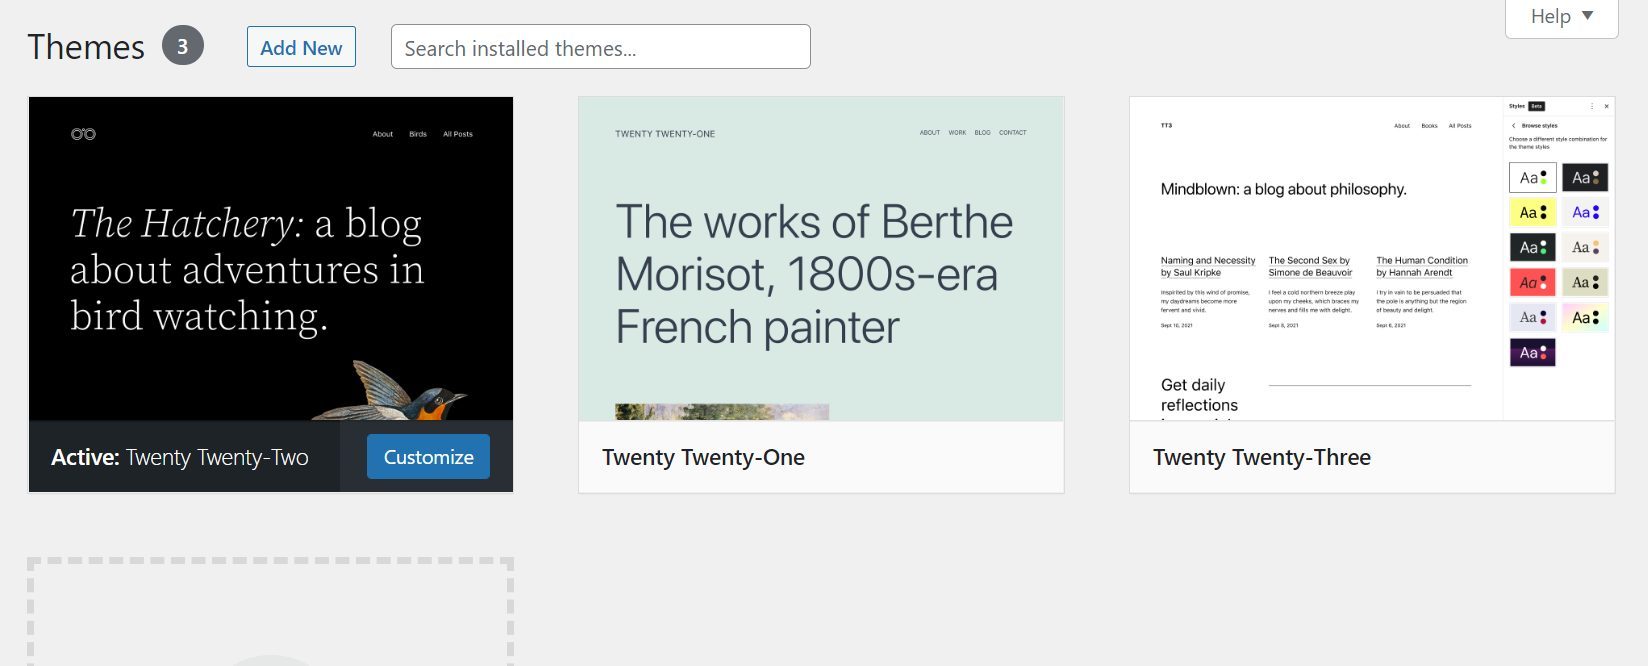
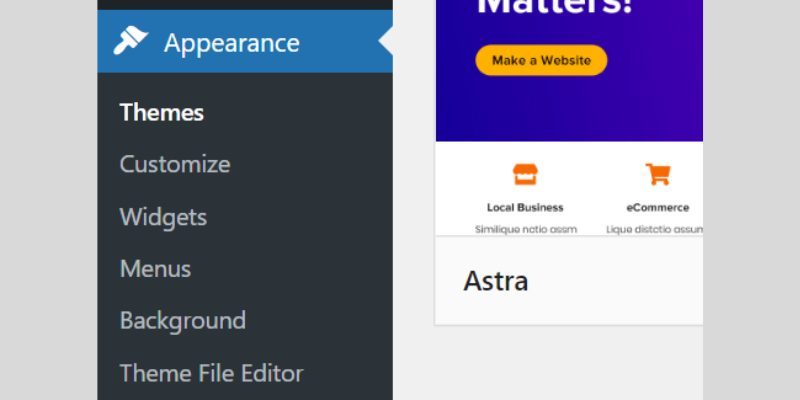
Once you have decided on the theme you want to use to create a website with WordPress, the next step is installing it. To do that, navigate to the wp-admin menu and click on Appearance.
This will take you to a page to see all the installed themes. Look at the top left of the page and click on Add New. This will take you to the page where you will see more than 5000 WordPress themes that you can use.
On this page, type the name of your preferred theme or a related term in the search box. It will display all relevant themes below. We are installing the Astra theme since it is one of the best WordPress themes to use right now.
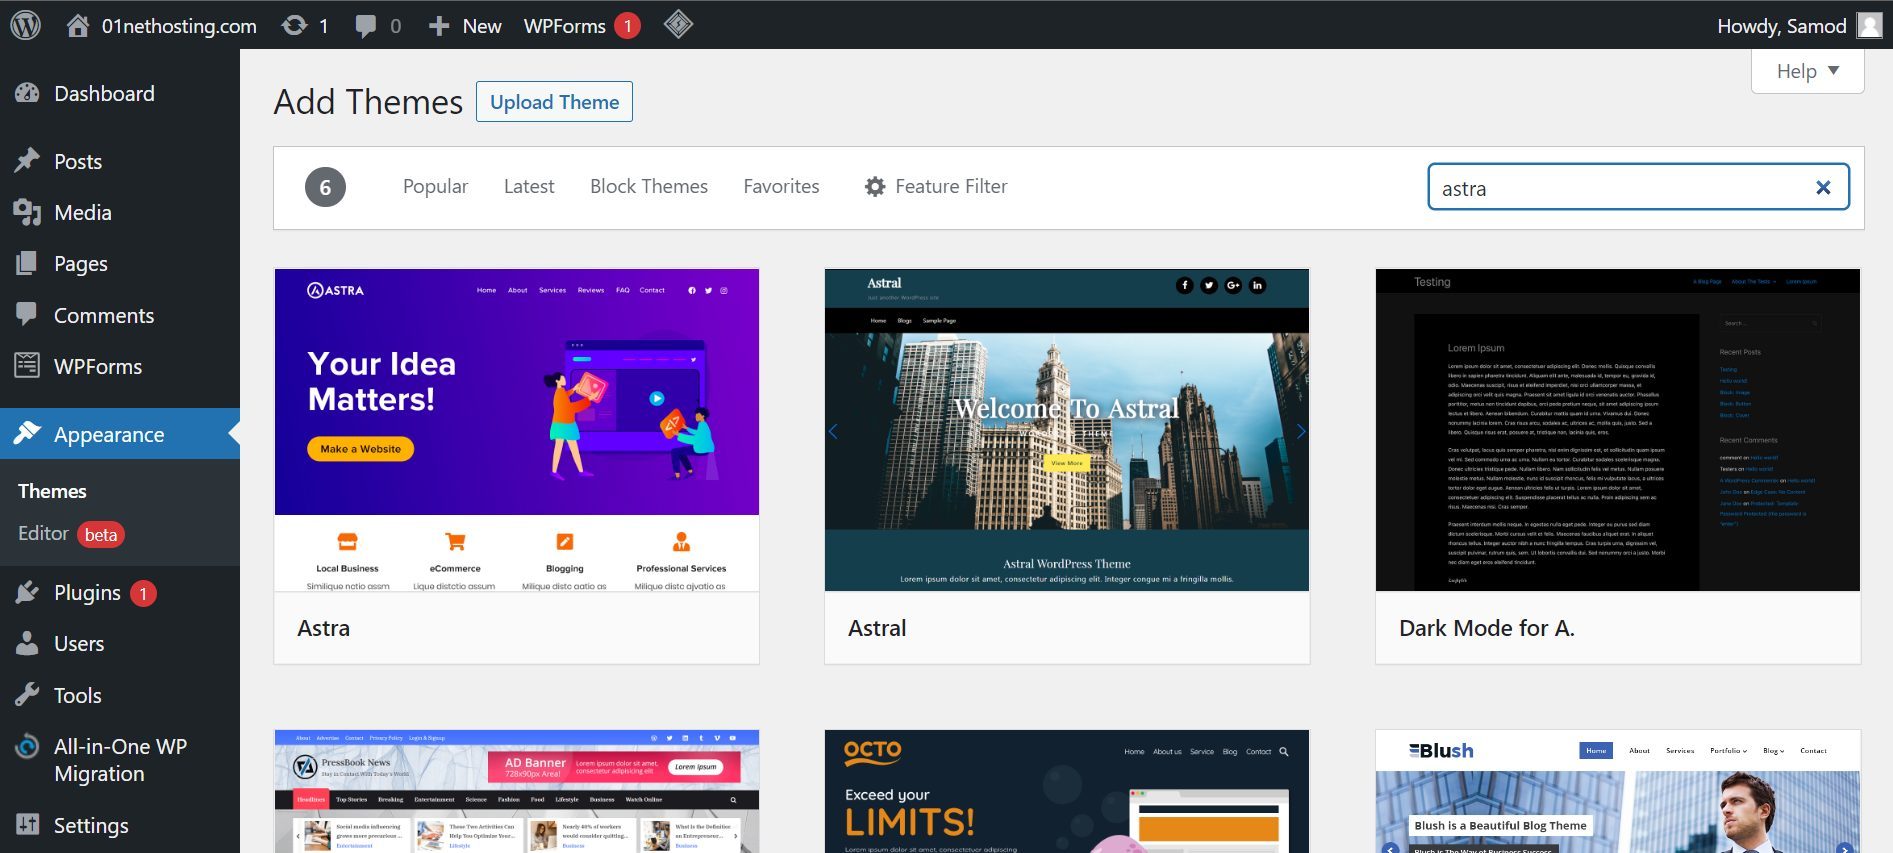
If you do not already have a theme, click the Feature Filter. This allows you to filter the themes using Subject, Features, and Layout parameters. This way, you may find the relevant theme you have pictured for your website faster.
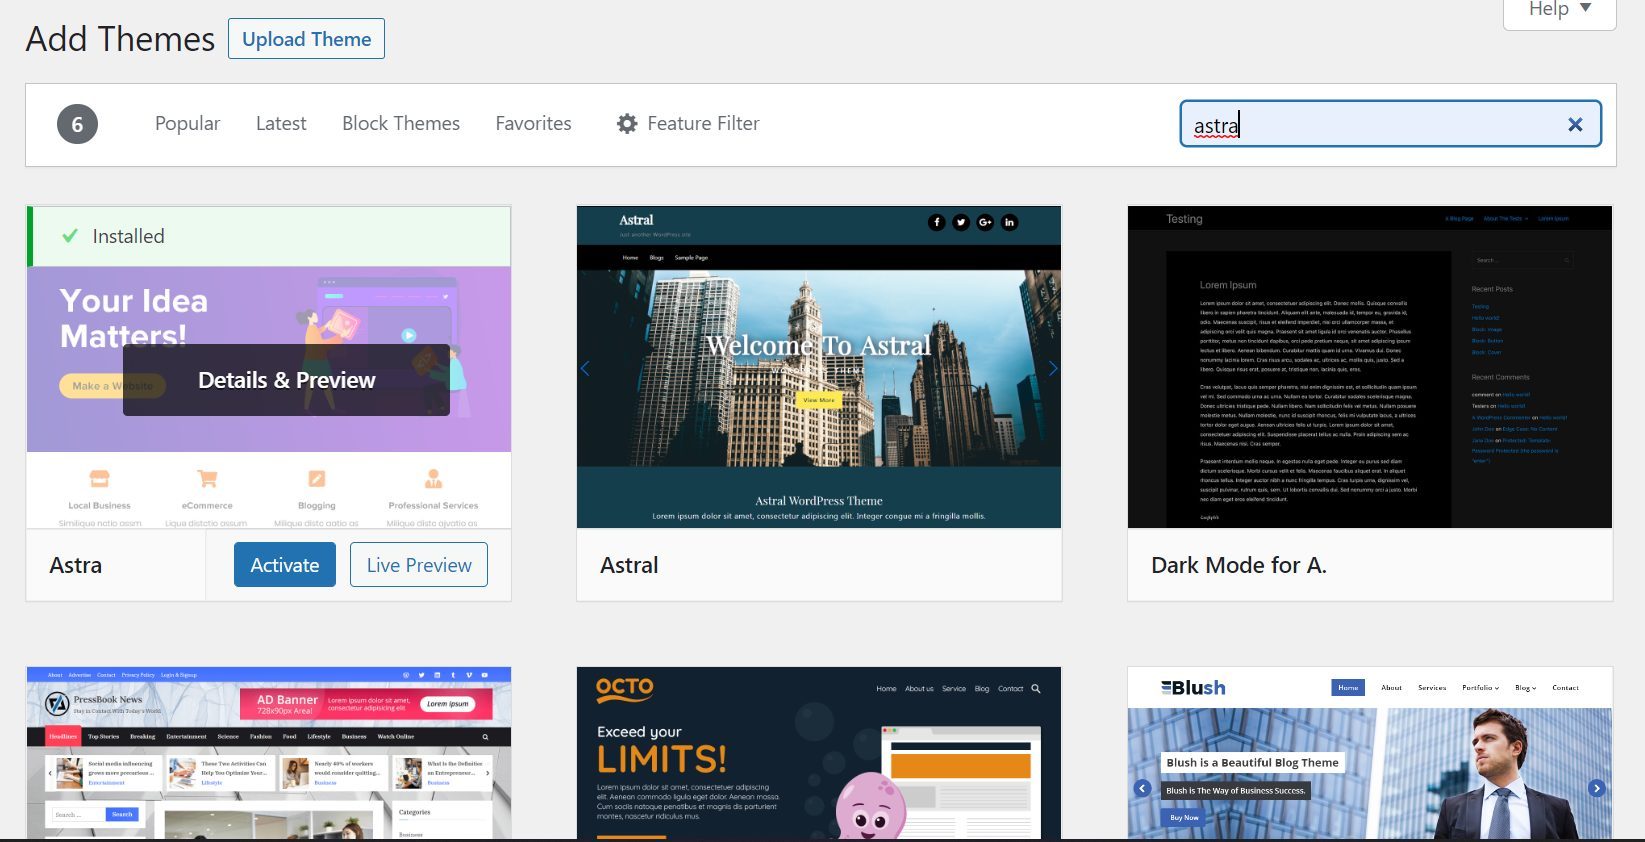
You may also preview your website’s appearance when you use the theme. To do this, hover over the theme’s name and click on Preview.
Once you have found the right theme, move your cursor to the top of the theme and click on Install. Wait a few seconds for the installation to be complete, then click Activate to make it your theme.
Customize the Theme (Site)
Once you have activated your theme, the next step when creating a WordPress website is to customize it and make it yours. This includes, but is not limited to, setting your logo, site name, and tagline, and customizing your header and footer layouts.
Set Your Header and Footer Layouts
Sometimes, the header and footer layouts that come with the theme we use to create our WordPress website are not very good. Hence, we may change them into what we like or what works for our business.
To change your header and footer layouts, click Appearance on the wp-admin menu, then Customize.
Once on the Customizer page, navigate to Header Builder and click on it.
In some themes, it might just be the Header. Clicking this opens the header’s built-in builder, where you can rearrange the elements or blocks.

You can change the position of the elements, delete existing ones, and add new ones. To do this, move your mouse to the editor and hover over it to check where you can add elements or blocks.
Once you see a “+” symbol indicates that you can add or move an element or header item to that position. If you click on the “+” symbol, you will see the possible elements or blocks you can add, so click on the one you want in that position.
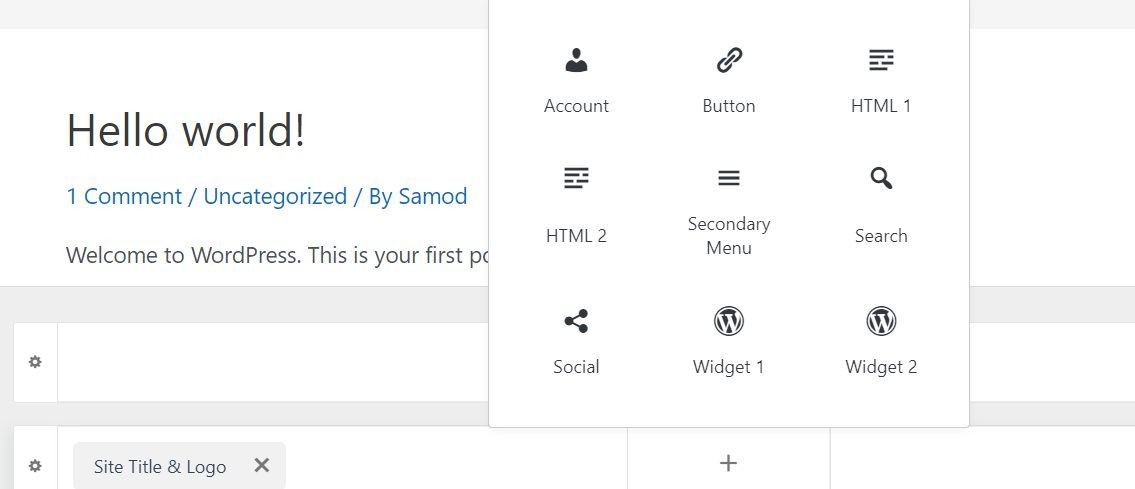
After adding an element to the header, you may customize it by clicking on it. You will see all the possible customizations available in the left Controls sidebar. The one shown in the screenshot below is for the Primary menu.
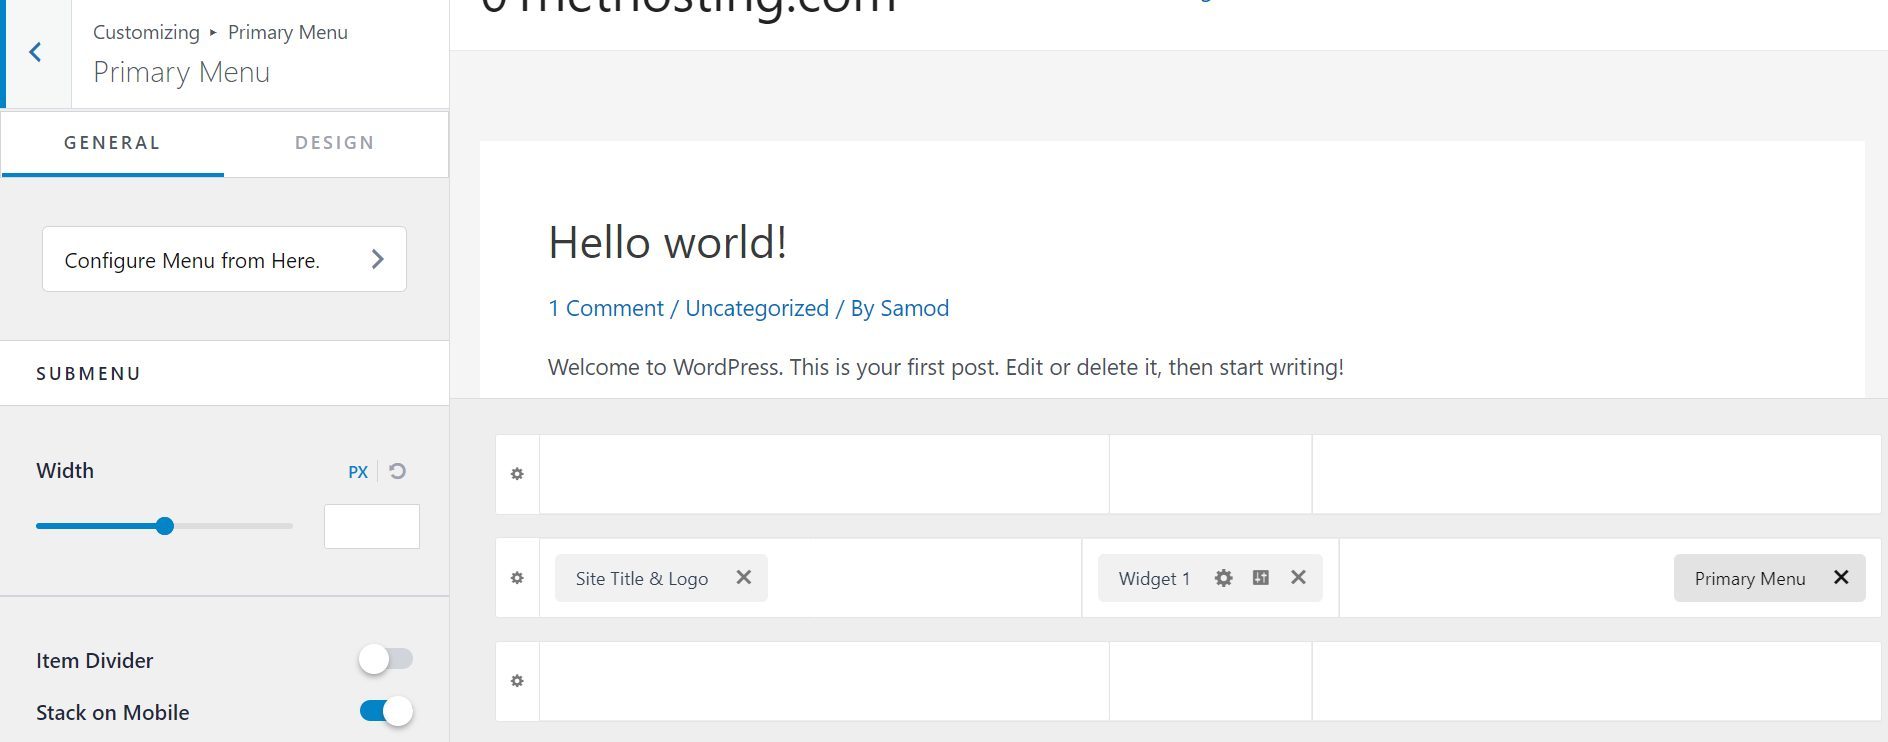
You can also customize the design of the entire header by clicking on the “gear” icon beside it.
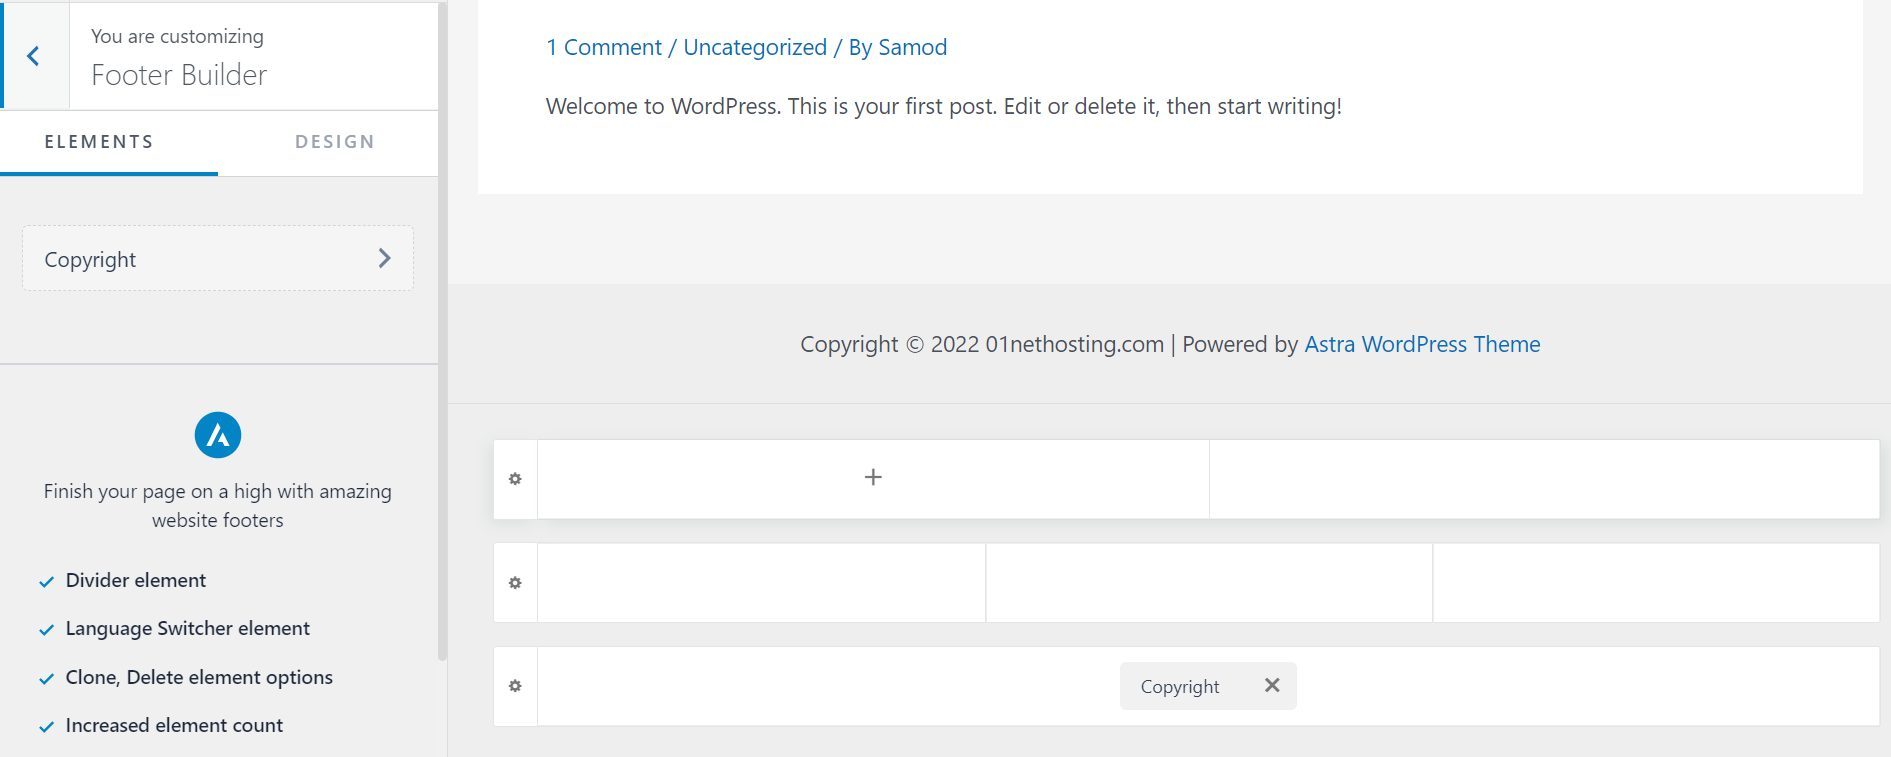
The same process applies to customizing your footer layout. However, the controls are at Appearance >> Customize >> Footer Builder. Once you are done customizing your changes, save or publish them.
Choose a Site Icon and Logo
To set an icon for your site, navigate to Appearance and click Customize.
Click on Site Identity and select a site icon from the left sidebar.
Afterward, upload it from your computer and publish the changes in the Customizer to your live site.
The site icon is the little image browsers display alongside your URL or page title in the tabs. The recommended size is a 1:1 aspect ratio, and the least dimension is 512 by 512 pixels.
After you have set an icon, the next one is your logo. However, there is no rule about the one you must set up first.
The method of changing logos for your website solely depends on your theme. However, you can usually change your logo using the Customizer.
To change the logo in the Astra theme, go to Customizer and navigate to Site Identity.
On the next screen, click on Site title & Logo Settings.
Then Select Logo.
Choose the logo file from your media library or computer and upload it. Afterward, publish the changes to your live site.
Set Typography and Colors
Your site’s typography and color are part of your branding. Hence, it would help if you changed them. If you do not have brand colors or fonts in mind, test many variations and ensure they are visible well enough.
Go to Global >> Typography in WordPress Customizer to change the typography.
Then navigate to BASE FONT.
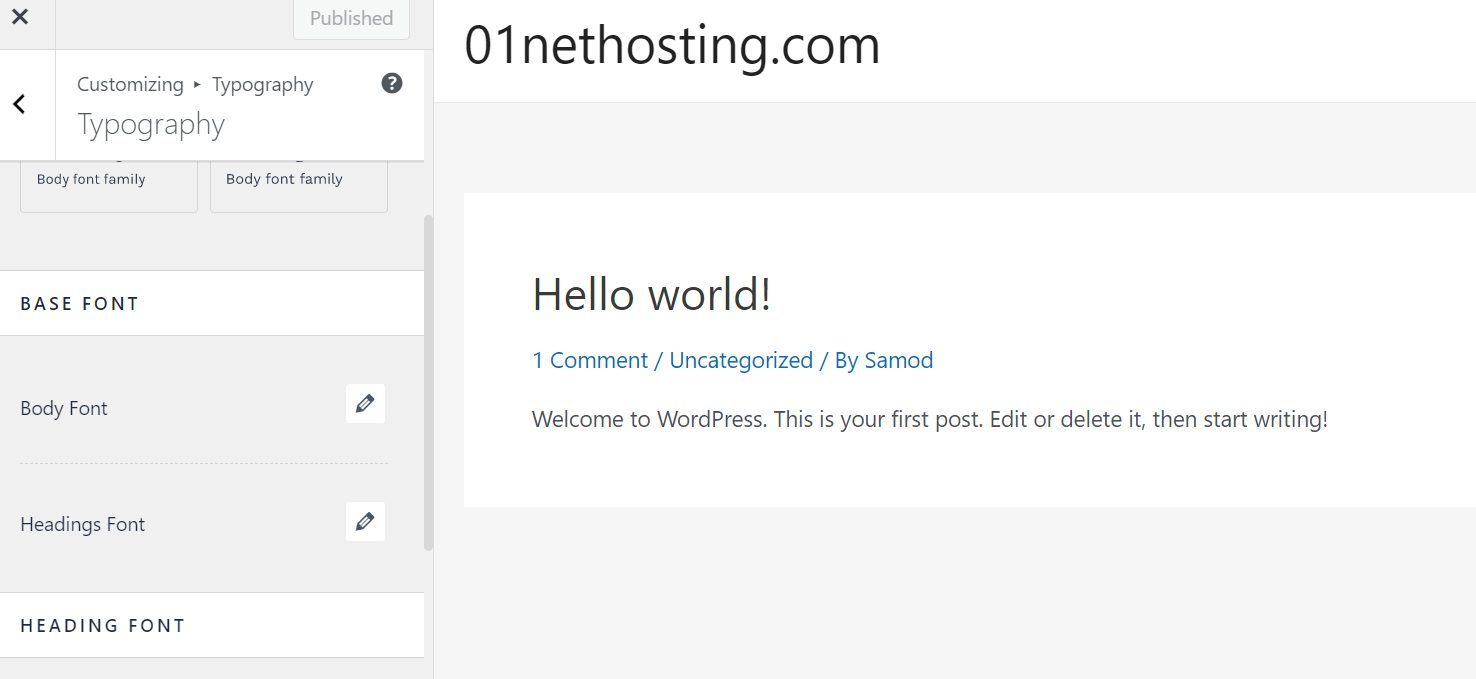
With the Body Font control, you can set the typography for all HTML tags, excluding the headings. You can choose your preferred font family, weight, height, and transformation (letter case).

Moreover, you can use the Headings Font control to set the typography for all the heading tags. Furthermore, you may customize the h1 to h6 tags separately using different typography. However, this is not advisable since using too many fonts slows down your site’s loading speed.
Go to Global >> Colors in your Customizer to change your colors.
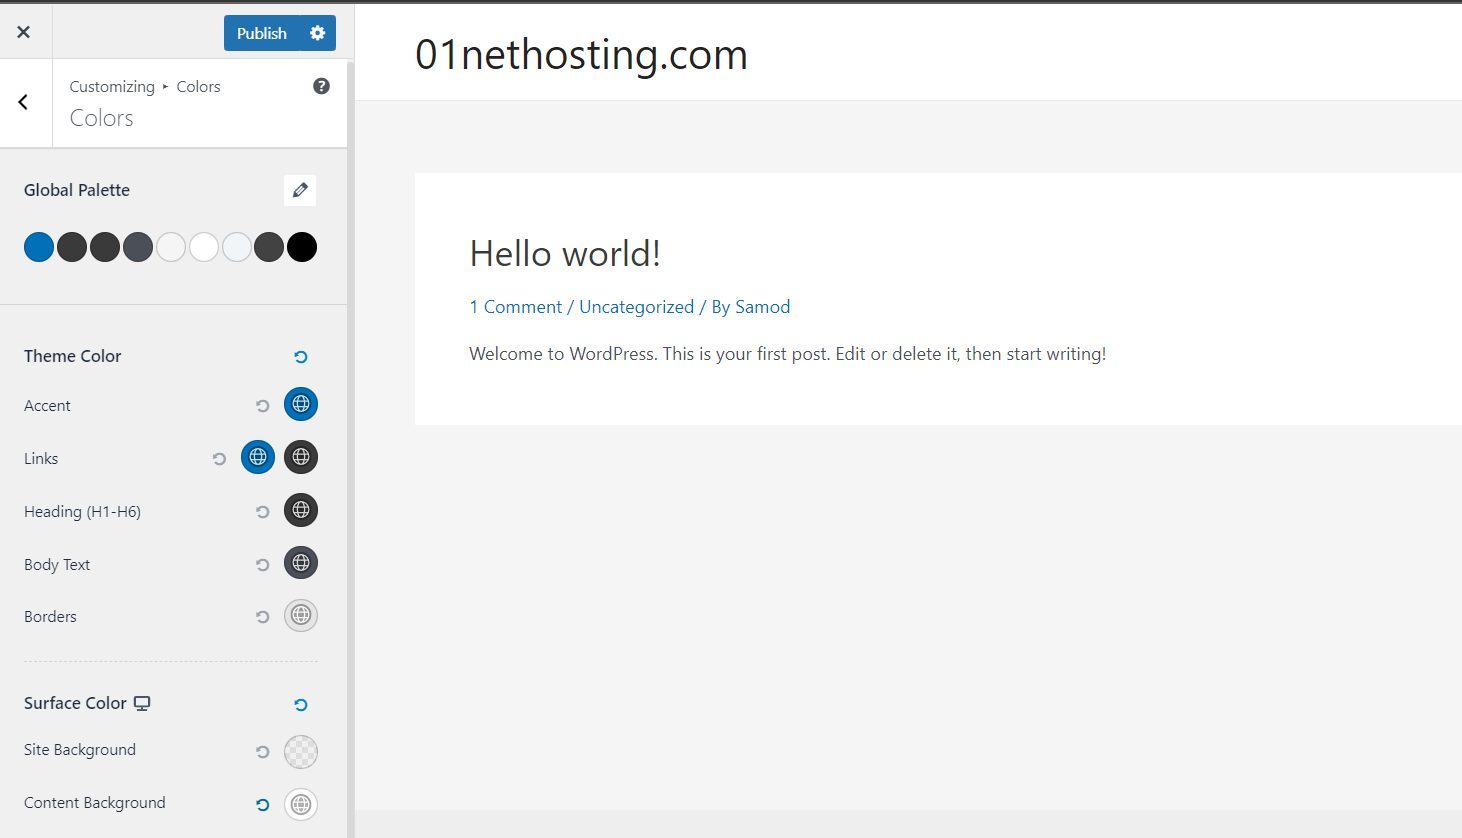
You can change the color of your site’s background, body text, headings, buttons, links, etc. If you mess up the colors while trying to customize, you may reset to the default colors using the reset icon beside the controls.
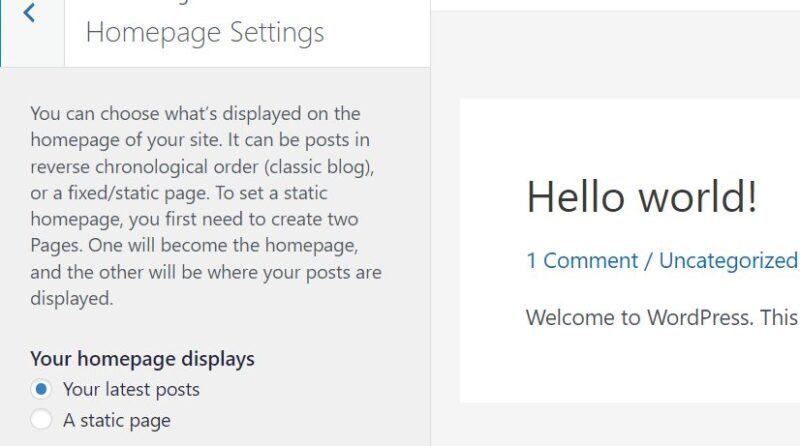
Choose Your Preferred Homepage or Frontpage Setting
When you build a WordPress website, you have two options for your front page.
The “Your latest posts” option is recommended for blogs or magazines that publish daily posts. This makes the recent blog content available and easily accessible to visitors from the homepage.
On the other hand, if your site is not primarily about blogging, the general rule is to make its most important page your homepage. Hence, choosing the “A static page” option is recommended. You may now link to the page containing recent blog posts from your header or footer menu.
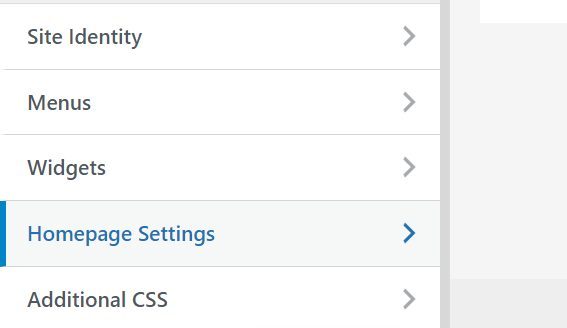
No matter what the former URL of the static page was, once it is made your homepage, you can access it only through the site’s URL. To set your front page, navigate to Appearance >> Customize >> Homepage Settings.
The default for most themes is Your latest posts, so if you prefer A static page, choose it. Upon clicking on it, you will be asked to choose the homepage and the posts page.
Choose the page you have designed specifically for the front page as the homepage from the drop-down menu. The Posts page is just like the page for your latest blog posts, but it is not compulsory.
But if you want your blog posts to be on the front page, just below your main content, choose a page you created specifically from the drop-down menu. Publish or save your changes afterward.
Step 5: Add Plugins to Improve Your Site’s Features
When you create a website with WordPress, like every other builder or Content Management System (CMS), some features will be unavailable. As a result, we have to use plugins to add some functions.
There are thousands of WordPress plugins available for use by any site, and they offer different features. Like WordPress themes, some plugins are free, and others are paid. At the same time, some have both free and premium versions.
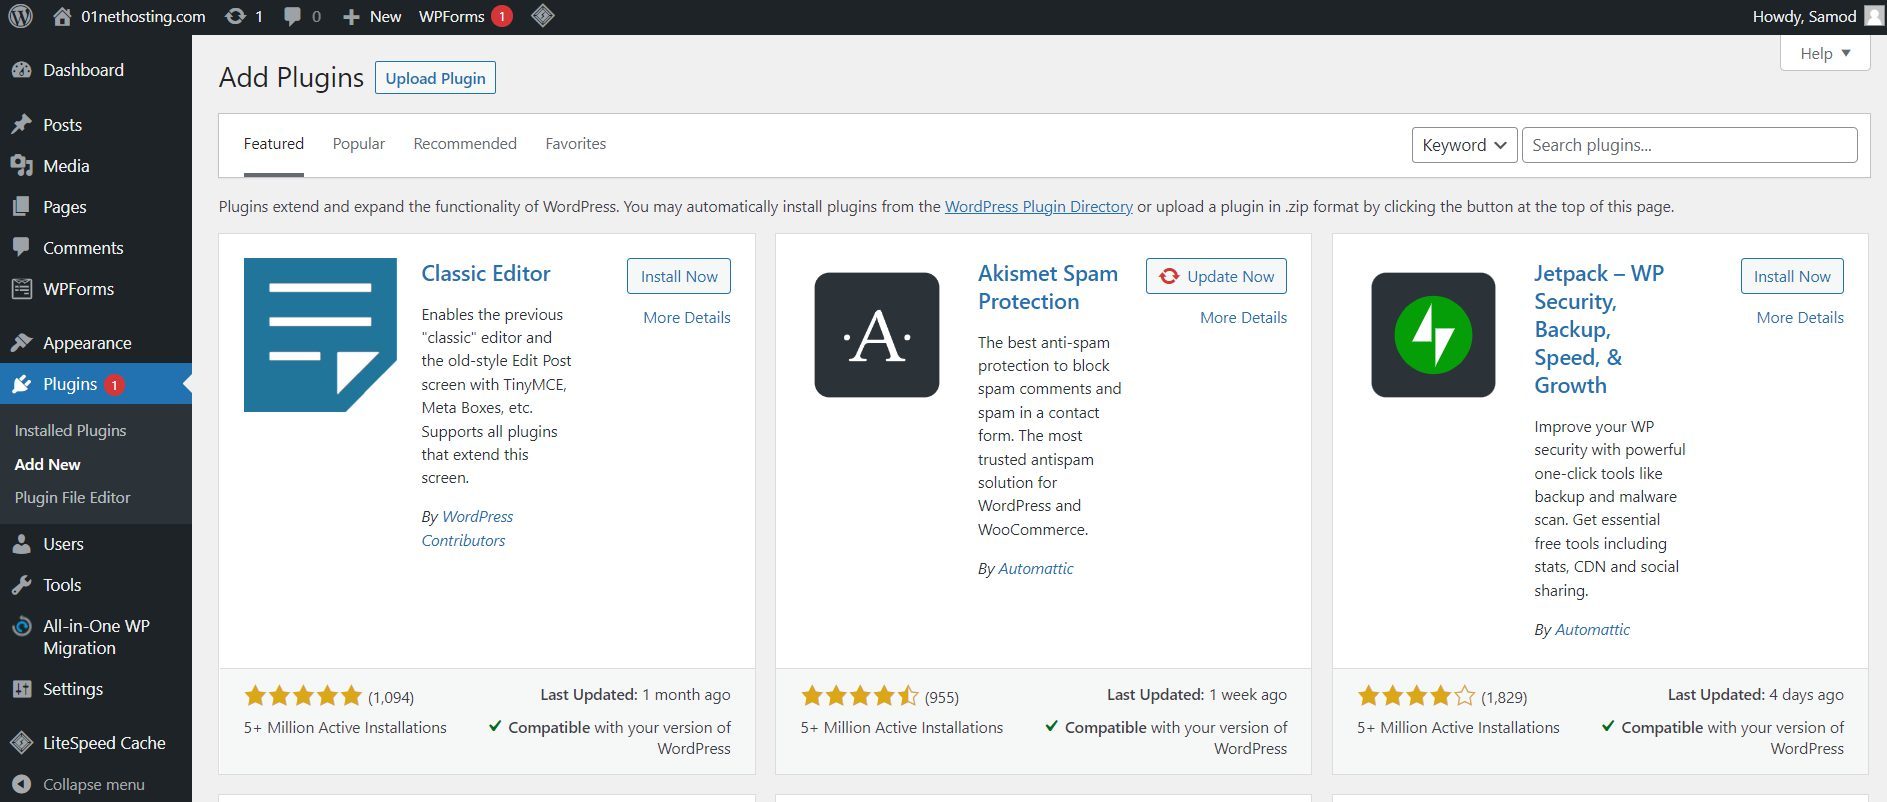
To add plugins to your WordPress site, navigate to Plugins >> Add New.

Afterward, type the name or keyword of the plugin you wish to install. After the results have been automatically loaded, hover your mouse on the plugin card and click on Install Now. Wait a few seconds for the plugin to be installed completely, and then click Activate.
You may now start using the plugin for its intended purpose.
Recommended Plugins for a WordPress Website
Here are some of the plugins you need to build your WordPress website to function effectively:
- SEO plugin: Search Engine Optimization (SEO) plugins are essential for a website interested in organic traffic. That is, getting traffic from Google and other search engines. They will help to optimize your web pages, content, images, etc. Examples of WordPress’s popular and very effective SEO plugins are Yoast SEO, Rank Math, All-in-SEO, etc.
- Analytics plugin: An analytics plugin is a tool that helps simplify your traffic reports. It records your site’s traffic and breaks it down into many metrics you can understand better and use for marketing purposes in the future. Examples of this are Monster Insights, Site Kit by Google, etc.
- Security Plugin: A security plugin is a tool that secures your site against cyberattacks like malware injections and brute force attacks. It provides 24-hour monitoring, malware scans and removal, firewalls, backups, login security, etc. Examples of popular and effective ones are Wordfence and Sucuri.
- Page builder plugin: A page builder plugin is essential, especially when you have reached the limits of the built-in customizations of your theme. Most WordPress page builders are equipped with drag-and-drop editors. Hence, they are sometimes tagged with the WYSIWYG – What You See Is What You Get term. Whatever you customize using the page builder will show the same on your live site. An example of an exemplary page builder for WordPress websites is Elementor.
- Contact Form Builder: Contact forms are a way of collecting users’ information on your site. This will help you gain a high volume of email lists and prospective customers. You need a contact form builder plugin to build the forms, which will collect this information and save it for you without coding knowledge. An example of a contact form builder is WPForms.
Step 6: Finalize Some Basic WordPress Settings
Just before you start writing content or commence the concluding parts of your website creation, there are some WordPress settings you need to do. I will explain them below.
Set Your Permalink or URL Structure
Permalink refers to the general structure of your site’s URL that every new post and page will inherit. For instance, if our permalink structure is domain + date + name, then our blog post titled “Sample Post” will have the URL “https://01nethosting.com/2023/07/13/sample-post/.” This is the URL structure all our future posts will take.
Generally, blogs like news websites should have the URL structure “https://01nethosting.com/2023/07/13/sample-post/.” At the same time, sites for niche topics or other types of non-timely content should use the URL structure “https://01nethosting.com/sample-post/.”
It is important to ensure that you change your permalink structure before publishing your first post or page.
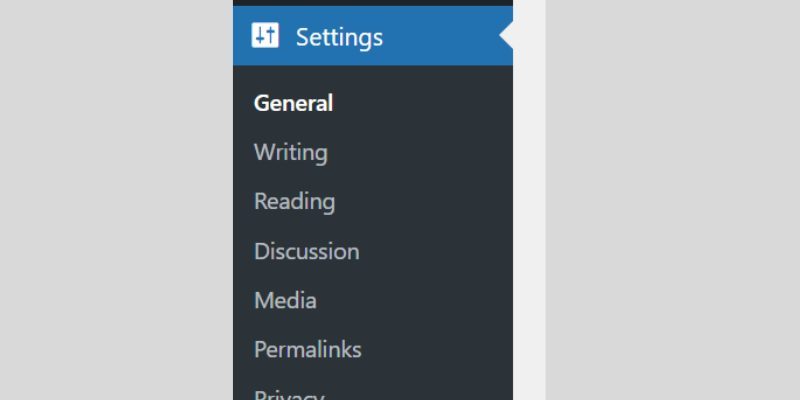
To change your URL structure, go to Settings >> Permalinks.
We strongly recommend choosing the Post name structure since it’s more practical and popular. However, you may create a custom URL structure if you have something else in mind that is unavailable on the list.
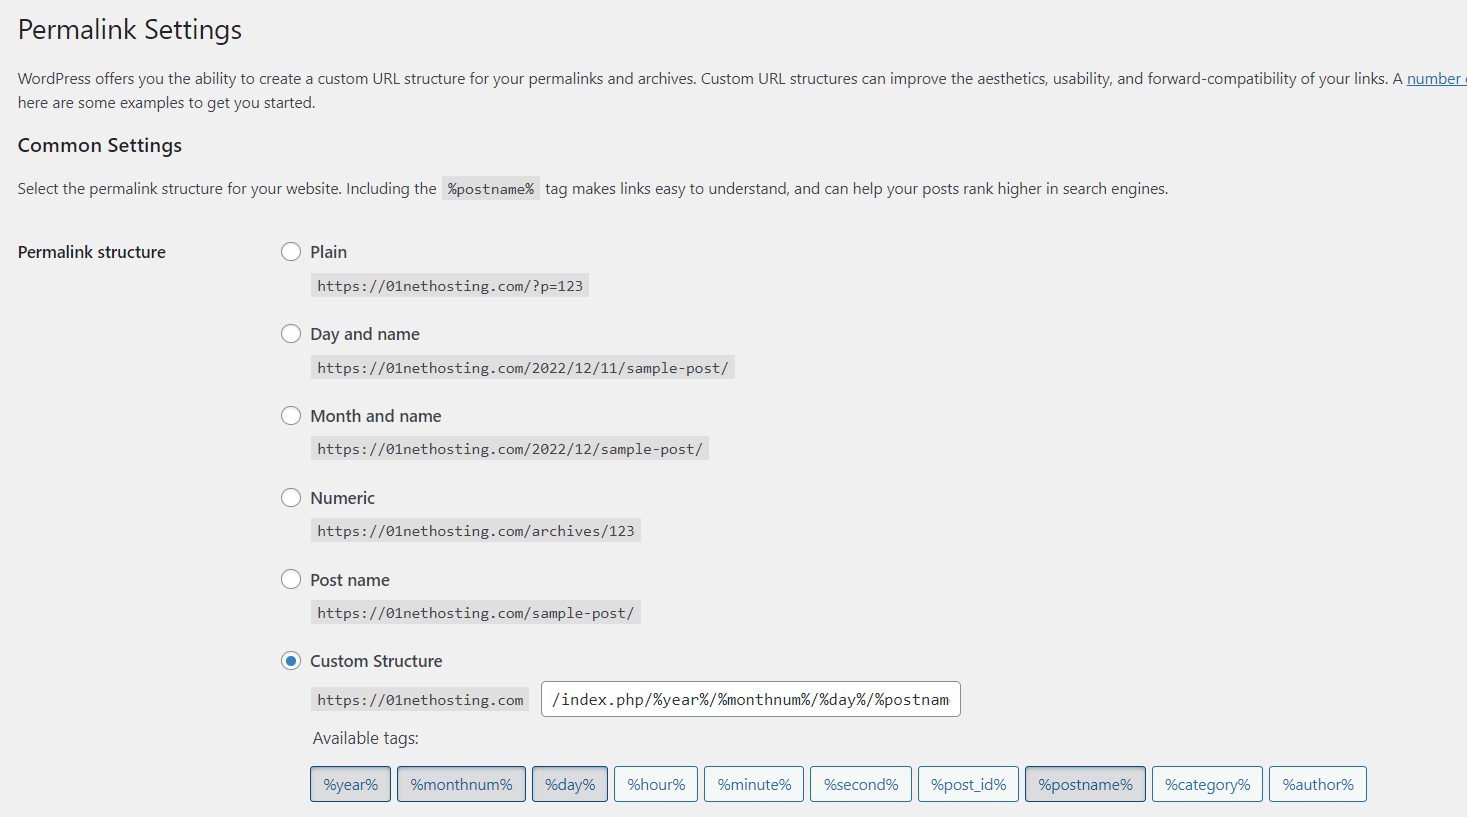
You can also change your category and tag bases if you would like. This will change the URL structure of your category and tag pages.
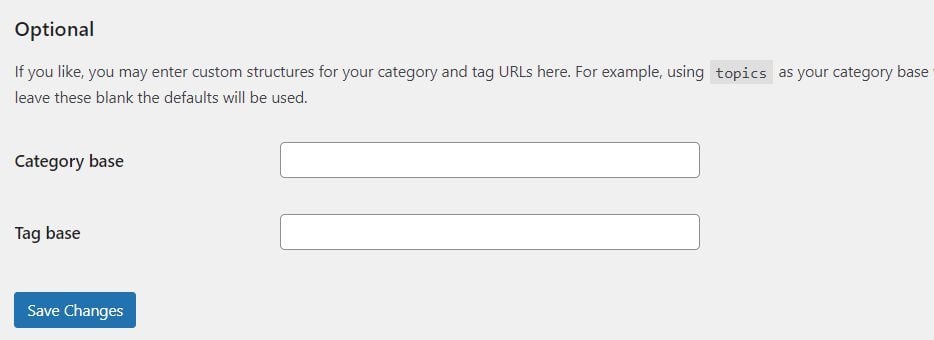
Once you are done setting your permalink structure, click on Save Changes.
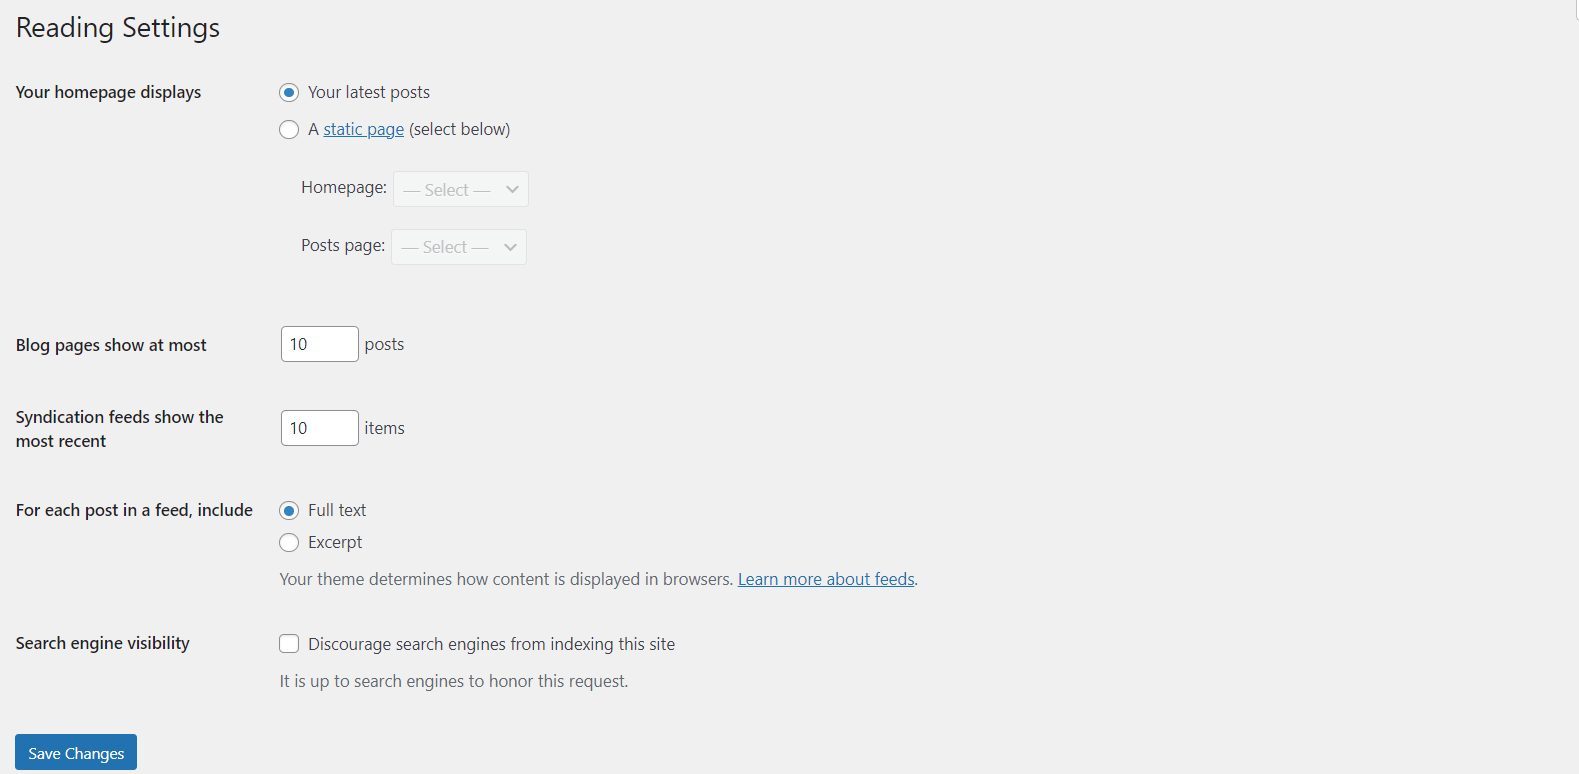
Check Your Blog Posts Settings
This is under Reading Settings in your WordPress admin dashboard. Here, you can set your front page to either a static or the latest post page. So it is an alternative method to using the WordPress Customizer.
The important settings we need are the number of posts per page before pagination and your search engine visibility.
The search engine visibility setting directly alters your robots.txt file. Depending on your choice, you can instruct search engine bots on whether to crawl your site for indexing. You cannot work on SEO if you choose to discourage search engines from indexing your site.
To change these settings, go to Settings >> Reading.
You may now alter your settings and click on Save Changes.
Set Your Comment Preferences
Another basic setting to attend to when you create a website with WordPress is commenting or discussion. Commenting is great, but your need for it depends on your website’s purpose.
A brand or company website without a blog option does not need comments. However, if you run a blog, you need to allow commenting on your posts. This helps to create engagement and may improve your SEO.
You can also change other comment settings, such as moderation, avatars, etc., to your preference.
To change your comment preferences, go to Settings >> Discussion.
You will see all the options and settings you can alter on the page.
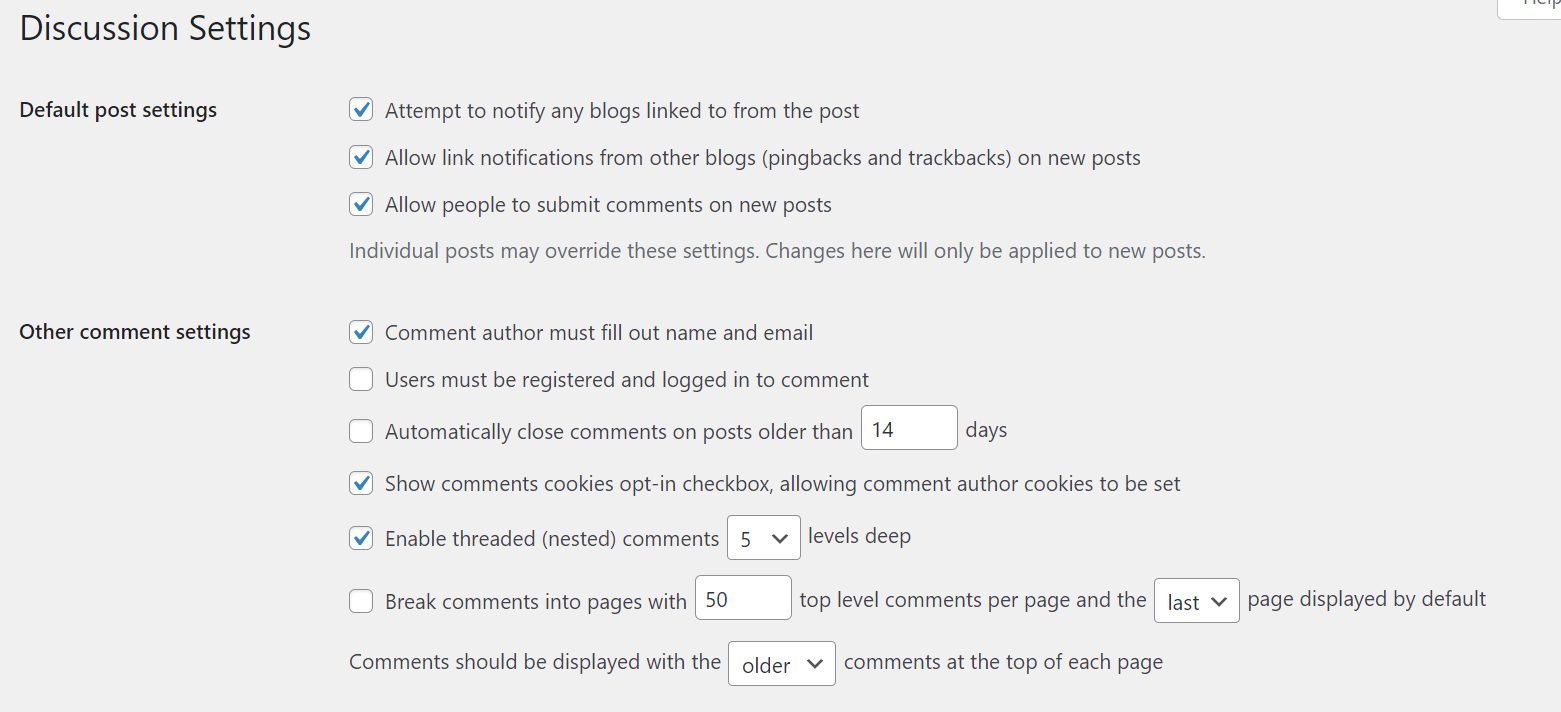
To prevent spam, we recommend defining the keywords or words you disallow commenting on. At the same time, ensure every new comment passes through moderation for approval before reaching your pages.
Step 7: Create Relevant Pages
When you build a website with WordPress, you must create some pages depending on its purpose. Generally, every website should have essential pages such as About, Contact, and Privacy Policy. If you are running an eCommerce store, you may need to create pages for Terms and Conditions, Refund Policy, Disclosure, etc.
Furthermore, the method of creating pages on WordPress depends on the features you wish to include or the designs you prefer. For simple pages with text and images, using only the Block Editor will suffice.
However, if you wish to create pages with more sophisticated designs on your WordPress website, you may need to use a page builder like Elementor. You can install the free version of the plugin and start designing your pages.
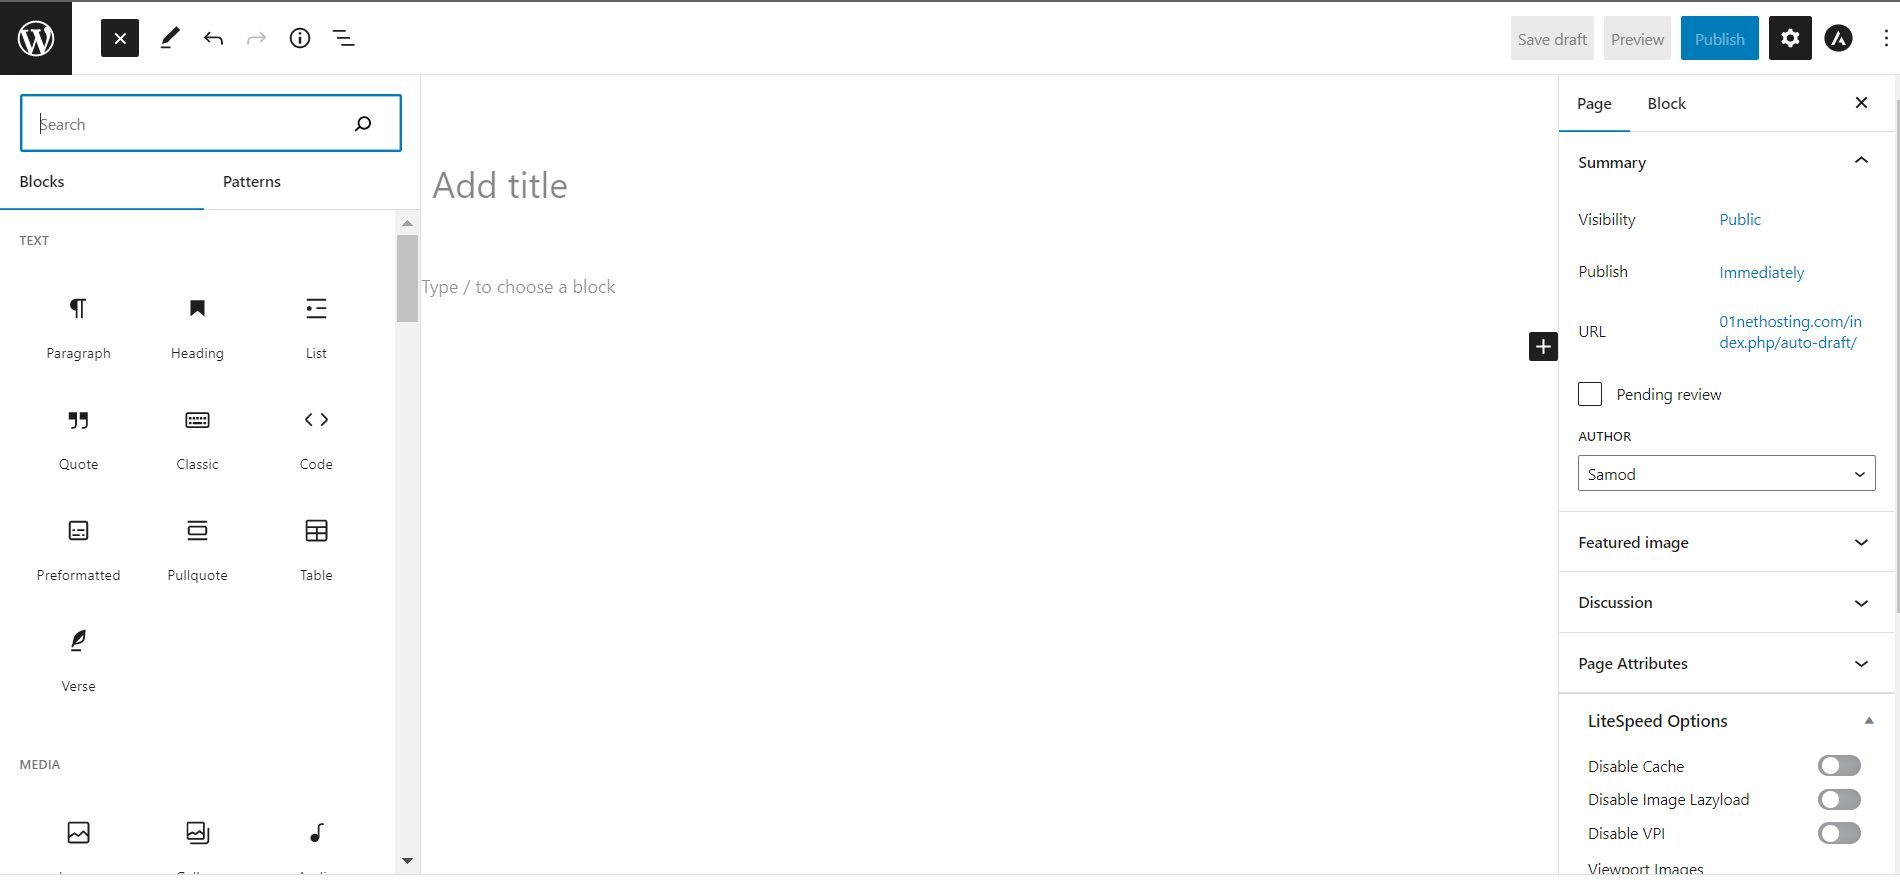
To create a new page using the more straightforward method (Block Editor), navigate to Pages >> Add New.
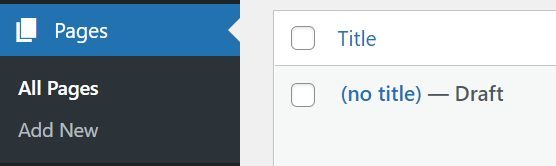
Once on the editor screen, give your new page a title.
If you are using the Block Editor (WordPress default editor), look for the boxed “+” sign and click on it. A window of elements or blocks you can add to your page will pop up. You can click on the Browse All button to see all the blocks.
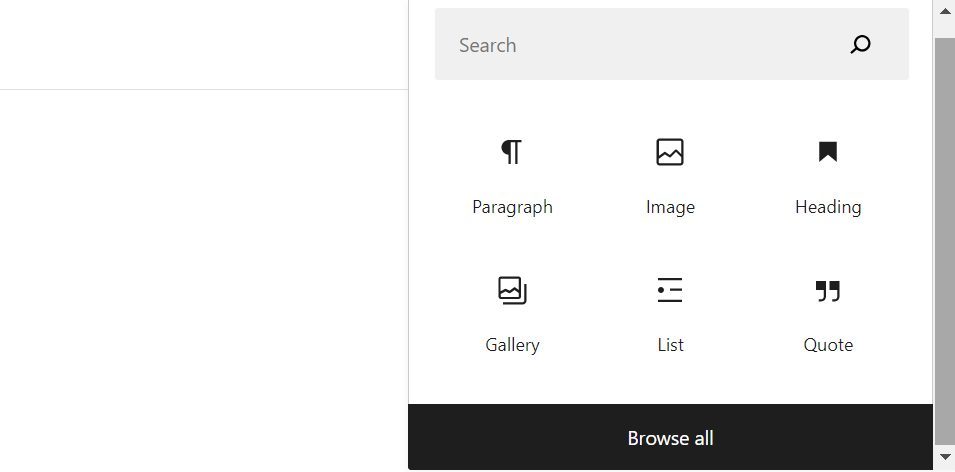
For texts, you can add a Paragraph, Heading, List, Code, etc. You can also add media blocks like an image, gallery, video, file, etc. There are so many blocks on the list.
After choosing which element to include, click on it, and it will be added to your page. You can then repeat that process for every element you wish to add. For paragraph blocks, clicking the return key on your computer in the editor will create one for you each time.
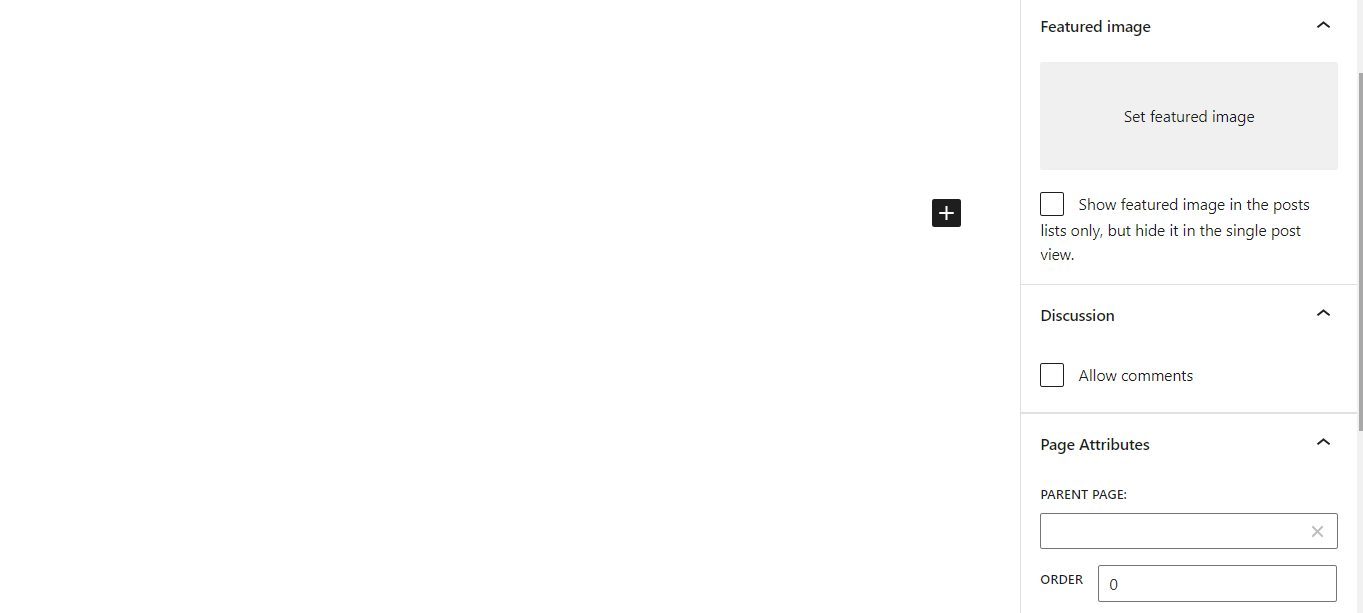
When you are done writing the page’s content, you can add a featured image using the control on the right toolbar. From there, you can also choose to disallow or allow comments on the page.
Lastly, from that toolbar, you can choose whether this page is a parent page. A parent page is a page that treats a broader topic related to other specific articles. If your new page has one, choose it from the drop-down; otherwise, leave it and publish your page.
Like that, your first page on your site has been published!
Step 8: Improve Your Site’s Navigation
Navigation is very important when you want to create a website with WordPress, no matter what kind you build. It helps users find important parts of your website faster, thus boosting a great user experience.
The two types of navigation you need to worry about at this stage are menus and widgets.
Create Your Menus
Menus are essential and must-haves for any WordPress website you create. They make navigation very easy since they contain links to important pages of your website. Sometimes, they may link to sources outside your site or domain.
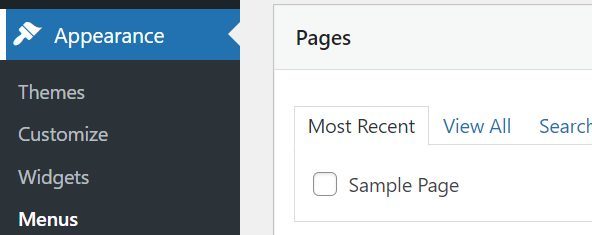
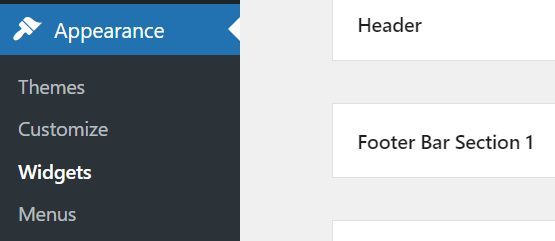
To add new menus, go to your WP-Admin dashboard and navigate to Appearance, then Menus.
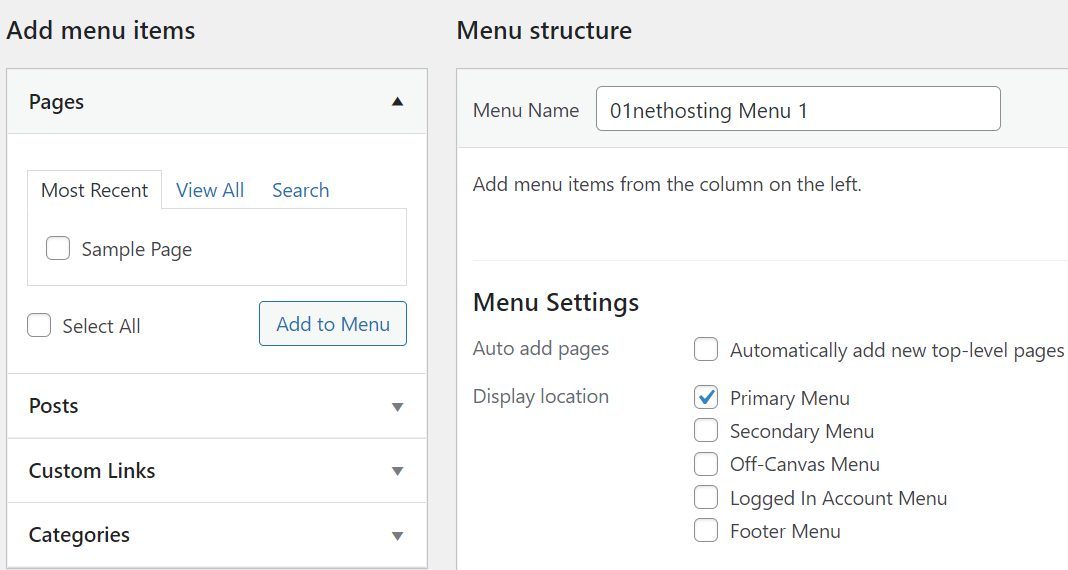
On the menu page, you will see two screen elements. The first is “Add menu items.” This is where you can add all the items, like links, pages, etc., to your menu. The second one is “Menu structure.” You can use it to create menus and assign them to different locations in your theme.
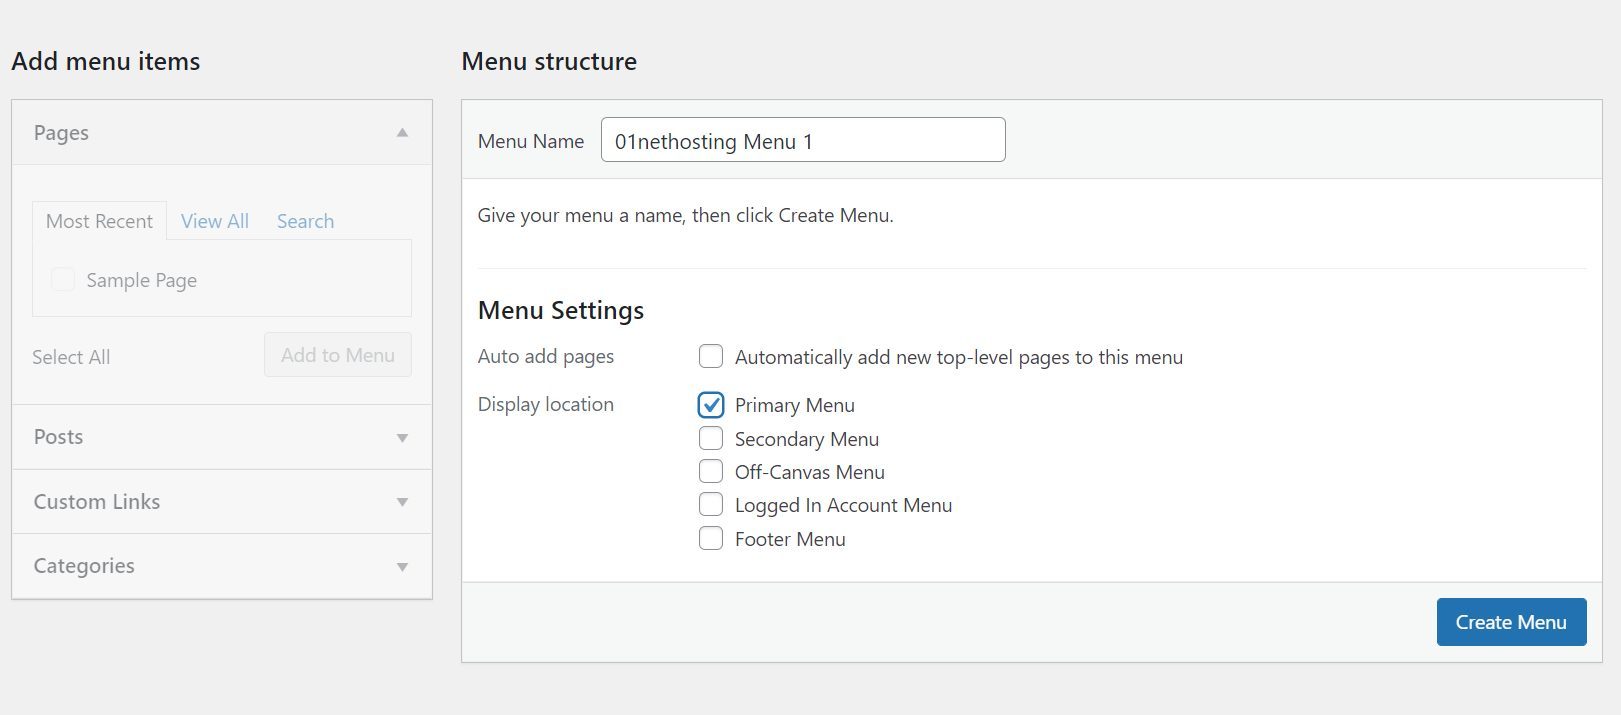
To create a new menu, type the menu’s name in the box under the Menu structure text. Choose the display locations under the Menu Settings, then navigate to click on Create Menu.
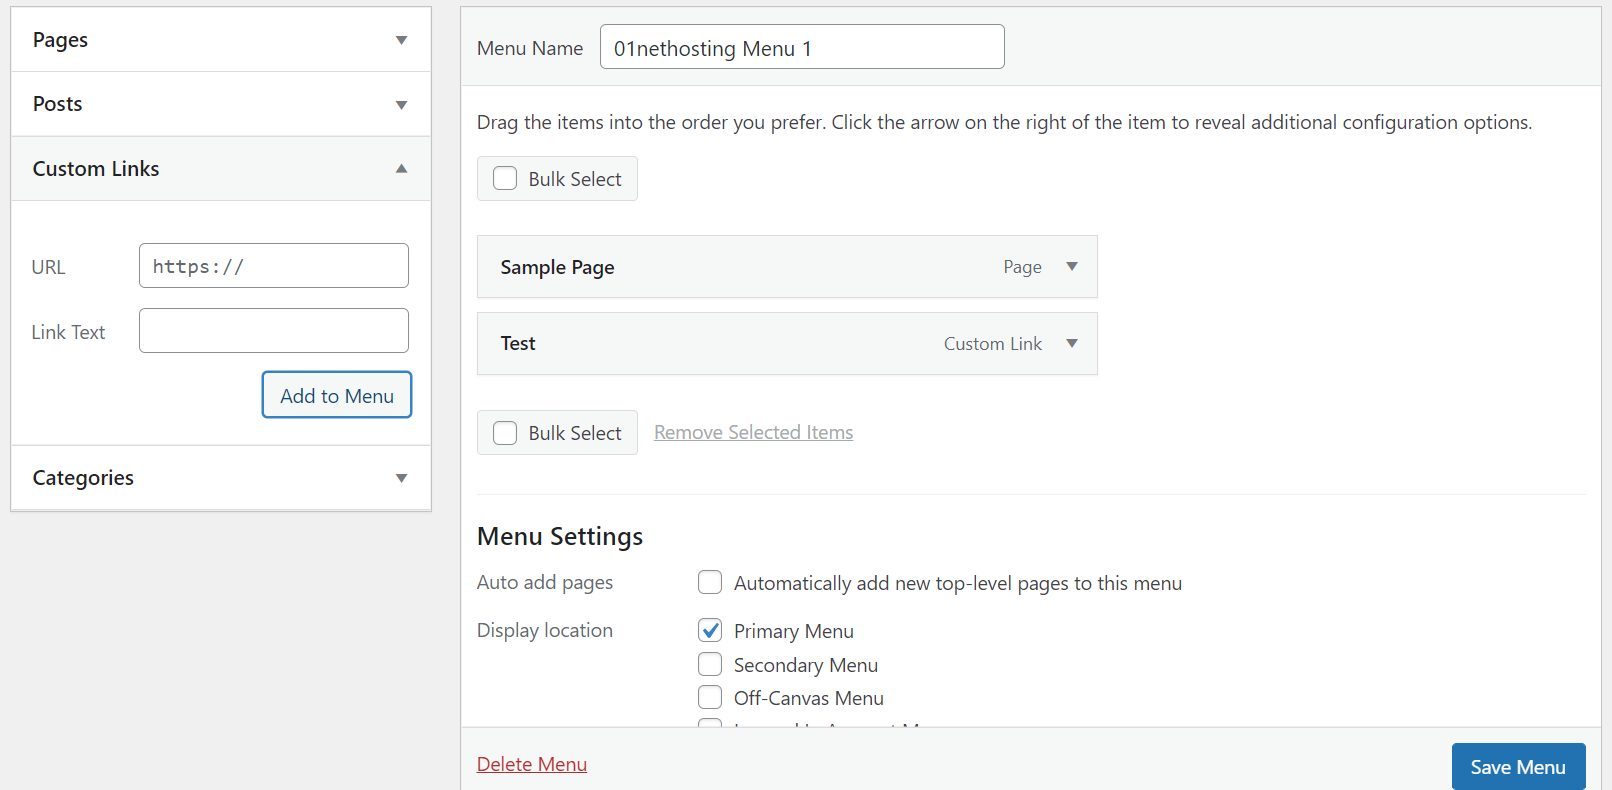
Once the menu has been created, the elements under Add menu items will be available. You can add pages, posts, categories, and custom links to your menu.
For every category you choose items from, click on Add to Menu under it. You may then rearrange the items by changing their order and turning some into sub-menus if necessary. Once you are done, click on Save Menu.
Add Widgets to Your Site
Widgets are another way of offering visitors more straightforward navigation on your site.
Unlike menus that allow you to add only links to pages, posts, sites, buttons, etc., you can add any block as a widget. You can add images, videos, texts, codes, galleries, etc., to your widget areas.
Therefore, they serve not only as navigational parts of your site but also as design elements. The only issue with them is that your theme fixed and defined their positions. Thus, if you ever wish to change their positions or add more widgets, you must do that at the code level.
To add blocks to your widgets, navigate to Customize >> Widgets.
Afterward, click on the position you would like to edit. This will open the location and display a big button with a “+” symbol. Click this button to add the block you wish to put in that widget area. You can also customize the blocks or edit them from this screen.
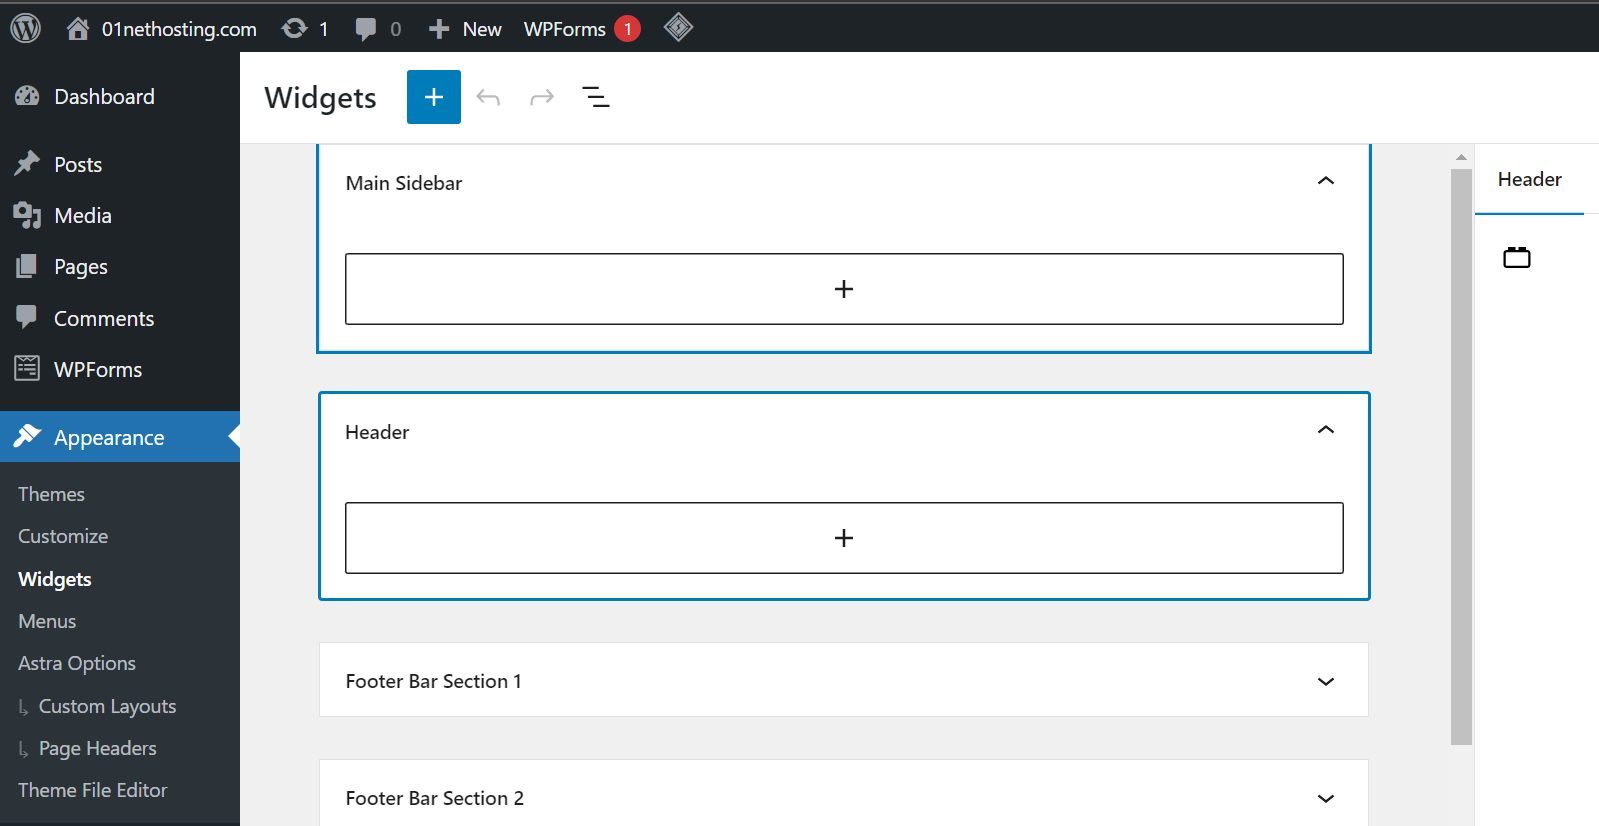
Repeat this process for each block you add for every location. When you are done, click on Update to publish the change.
Bottom Line: Can a Beginner Build a Website With WordPress?
A beginner can build a working website with WordPress, as shown in this guide.
WordPress is a straightforward CMS and website builder, even for those who know nothing about coding. It offers many opportunities, like free themes and plugins, to help you achieve your desired site even without technical skills.
Therefore, a beginner or anyone following this guide meticulously can create a website with WordPress within 1 hour.
FAQs About How to Create a WordPress Site
How Much Does it Cost to Create a Website with WordPress?
Creating a WordPress site has varying costs, depending on many factors. For instance, you need a domain name, a hosting plan, a theme, and plugins. While paying for a hosting plan and a domain is compulsory, paid plugins or themes are optional.
The cost of creating a WordPress site includes a domain name ($10+ yearly) and a hosting plan ($2+ monthly). Learn more about website costs here.
Does WordPress Have a Monthly Fee?
WordPress is open-source software that does not require a monthly fee. However, WordPress must be installed on a server before you can use it. This is where a hosting company that provides a server comes in. A hosting company has a monthly or yearly fee for its server resources, but WordPress charges nothing!
Do I Need to Know HTML/CSS to Create and Customize My WordPress Website?
WordPress has become so easy that you don’t need to know HTML/CSS or any code to customize your site. You can use a drag-and-drop builder or purchase a premium theme with pre-made starter sites.
What is the Difference Between WordPress.com and WordPress.org?
WordPress.com is a hosting company that hosts only WP sites. It can host virtually any site and costs a pretty penny compared with other hosting providers.
WordPress.org, on the other hand, is popularly referred to as WordPress. This open-source software is used to create powerful WordPress sites on the Internet.
Can I Make an eCommerce Website Using WordPress?
Yes! You can make any website, including one for eCommerce, using WordPress. There are many free themes and plugins, like WooCommerce, that you can use to achieve this goal.
Can I Build a WordPress Website for Free?
Of course! You can build a WordPress website for free through WordPress.com. One downside is that you can’t use a custom domain, so your site won’t look professional. Your site will have the URL “yoursite.wordpress.com.”
How Much Money Can I Earn from WordPress?
If you think WordPress pays website owners, you are wrong! However, there are several ways to make money using a WP site. You could place ads on your site, go into affiliate marketing by promoting products, etc. How much money you can earn depends on how you monetize your website.
How Long Does it Take to Build a WordPress Website?
The time spent building a WordPress site depends on the features you want to add and the level of competency of the person in charge. Typically, it could take several hours to several days, weeks, or months.